Scenarios & Tutorials
This section provides practical, step-by-step scenarios for solving common business problems using the 8x8 WhatsApp solution. These guides combine portal tools like the Campaigns and Automation Builder with concrete API concepts, including full JSON payloads for templates, message sending, and interactive replies.
Appointment Reminders via WhatsApp
This scenario shows how to proactively send a reminder and automatically handle the customer's confirmation or reschedule request.
Tools Used: Campaigns (or API) + 8x8 Automation Builder
Goal: Reduce no-shows by confirming appointments automatically.
The Flow
-
Step 1: Create the Template (Business-Initiated) You first create a
UTILITYtemplate to send the reminder.Click to view `Template Creation Payload` (API Request)
POST https://chatapps.8x8.com/api/v1/accounts/{accountId}/channels/{channelId}/templates{
"language":"en_US",
"name":"appointment_reminder_v1",
"category":"UTILITY",
"components":[
{
"type":"BODY",
"text":"Hi {{1}}, this is a reminder for your appointment on {{2}} at {{3}}. Please reply '1' to Confirm or '2' to Reschedule.",
"examples":[
"Maria",
"Nov 10, 2025",
"10:30 AM"
]
}
]
} -
Step 2: Send the Reminder An automated system (or a user in the Campaigns portal) sends the approved template to the customer 24 hours before their appointment.
Click to view `Template Sending Payload` (API Request)
POST https://chatapps.8x8.com/api/v1/subaccounts/{subAccountId}/messages{
"user":{
"msisdn":"+15551234567"
},
"type":"template",
"content":{
"template":{
"language":"en_US",
"name":"appointment_reminder_v1",
"components":[
{
"type":"body",
"parameters":[
{
"type":"text",
"text":"Maria"
},
{
"type":"text",
"text":"Nov 10, 2025"
},
{
"type":"text",
"text":"10:30 AM"
}
]
}
]
}
}
} -
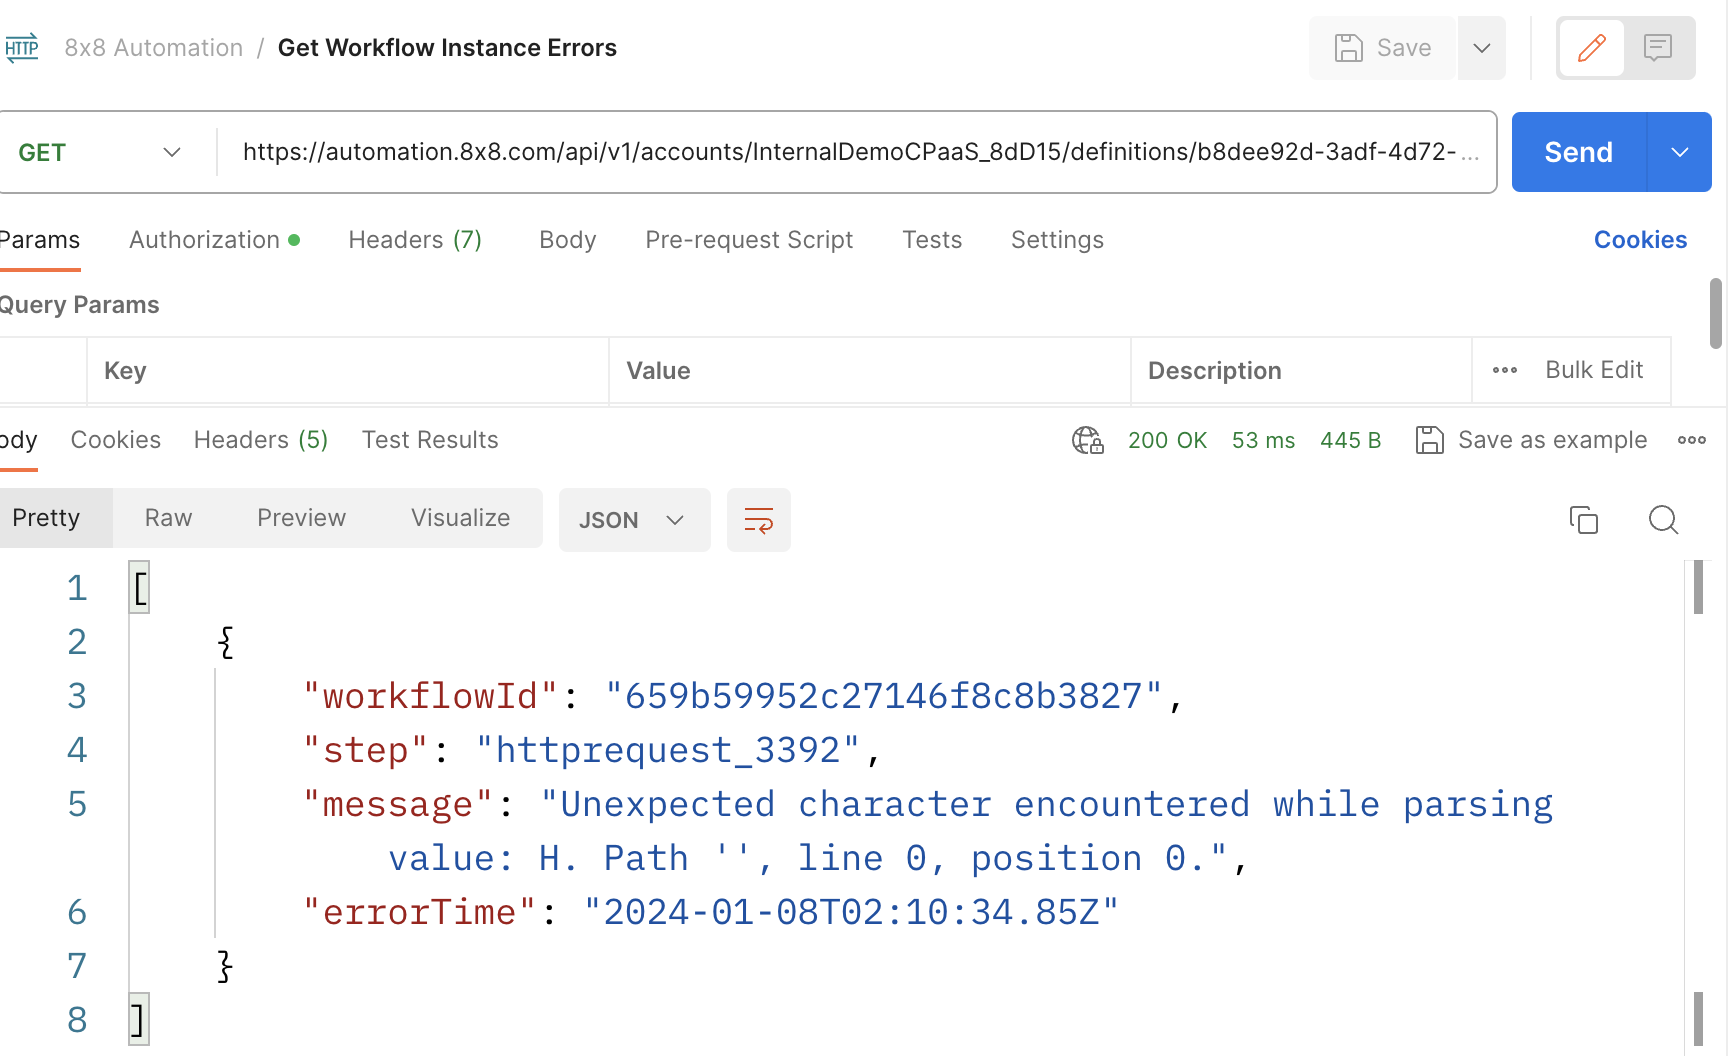
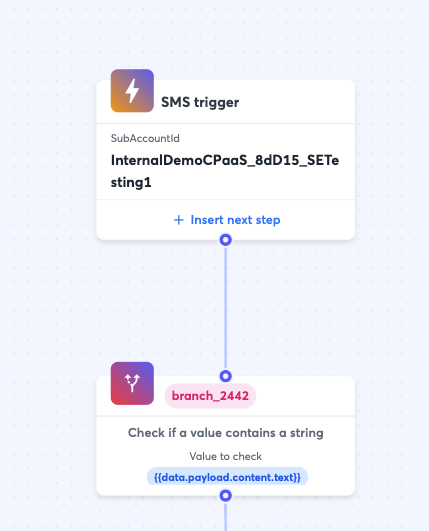
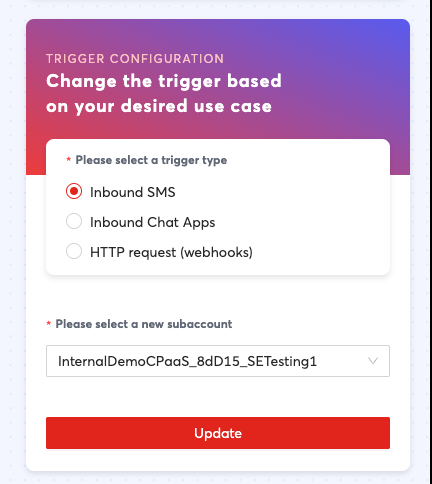
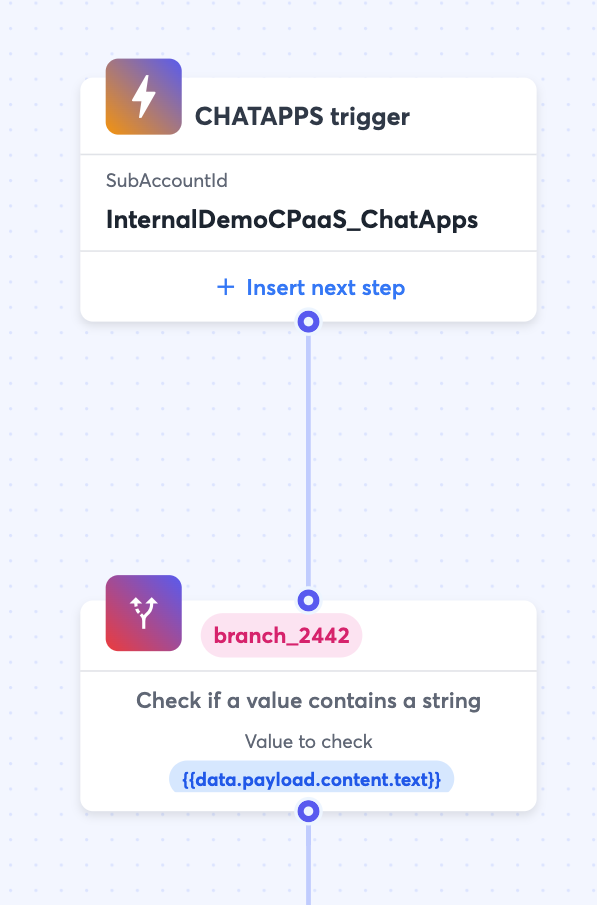
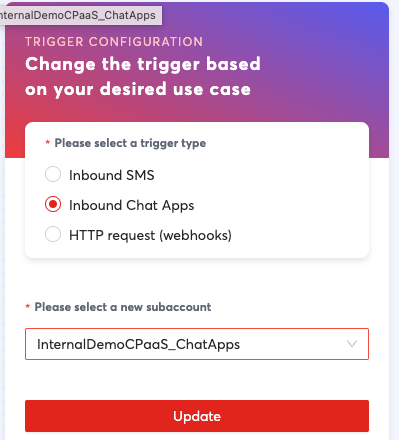
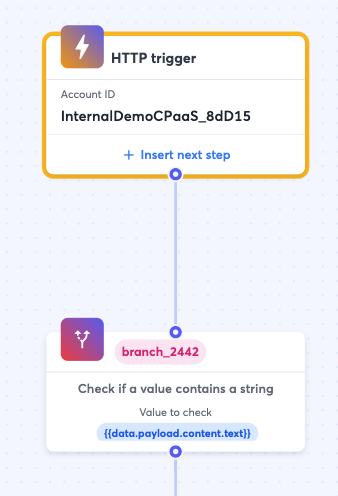
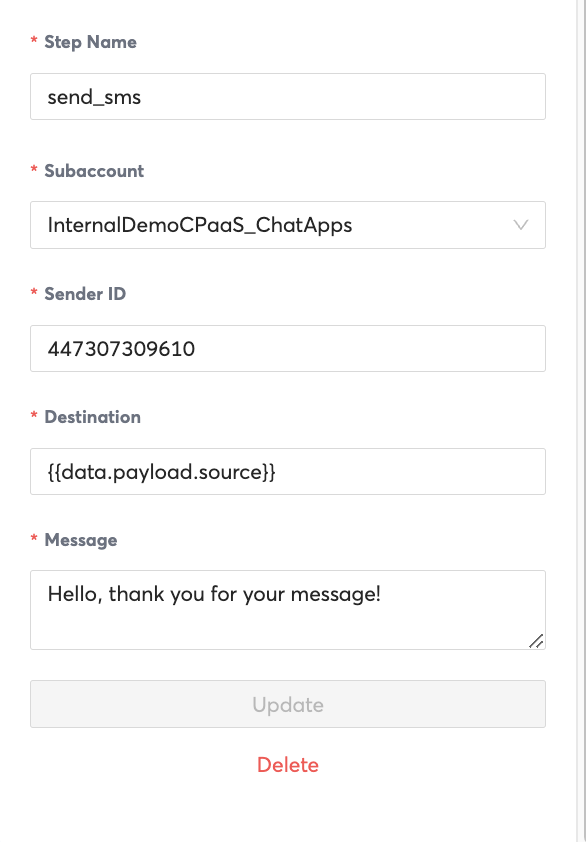
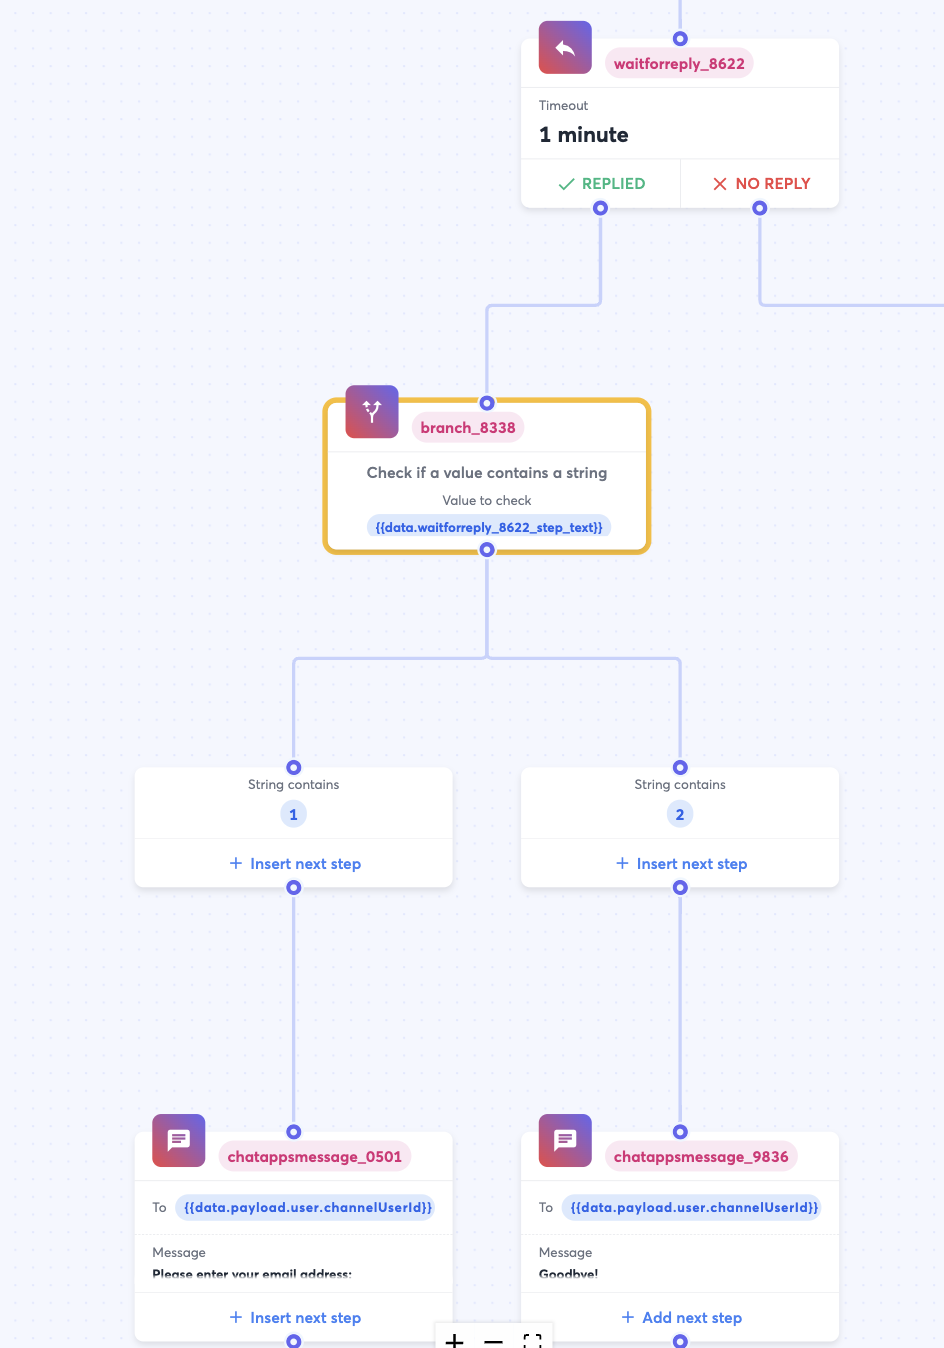
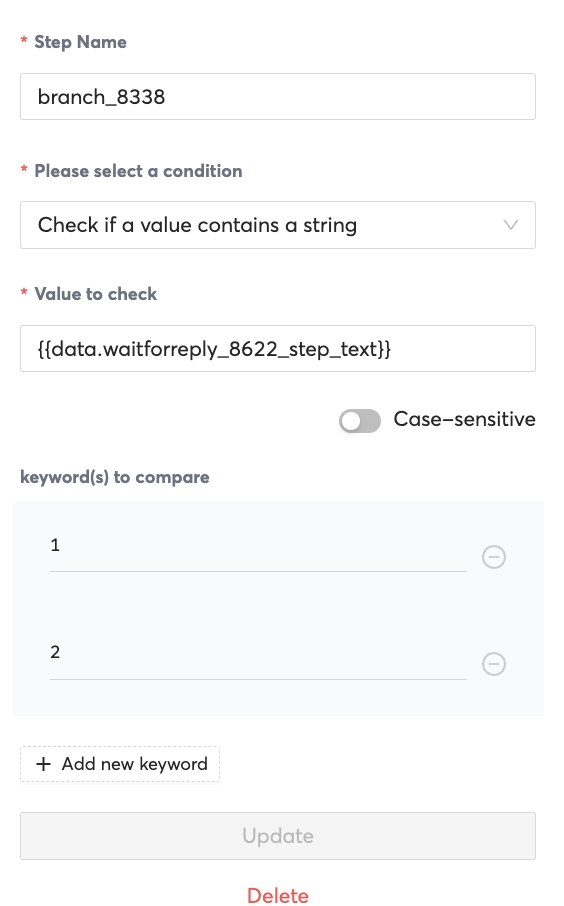
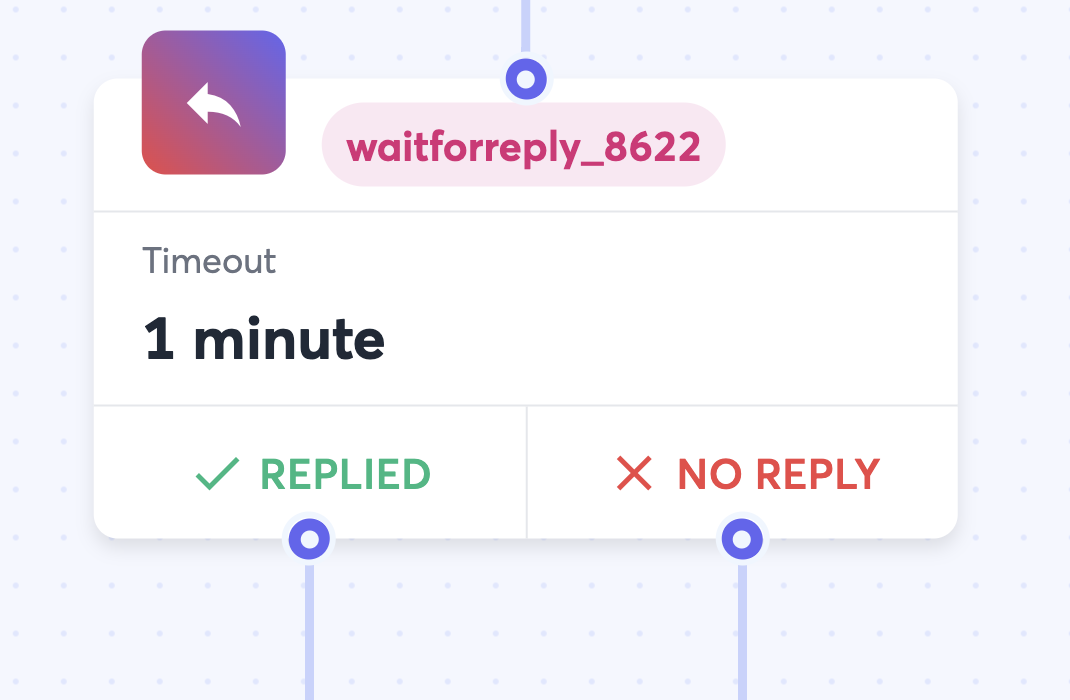
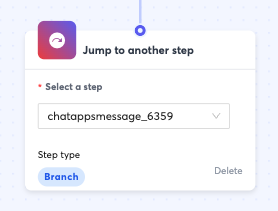
Step 3: Handle the Reply (Automated) An Automation Builder workflow is set to the
Inbound Chat Appstrigger. When the customer replies, the workflow catches the message and executes a Branch step.Click to view `Inbound Webhook Payload` (User replies "1")
{
"namespace":"ChatApps",
"eventType":"inbound_message_received",
"payload":{
"umid":"abc...123",
"subAccountId":"Your_SubAccount",
"timestamp":"2025-11-09T14:35:01.000Z",
"user":{
"msisdn":"+15551234567",
"channelUserId":"15551234567"
},
"recipient":{
"channel":"whatsapp",
"channelId":"8x8-channel-id-..."
},
"type":"Text",
"content":{
"text":"1"
}
}
}
If the user replied "1" (Confirm): The workflow sends a freeform text message (no template needed, as the 24-hour window is open).
Click to view `Automated Response Payload` (Freeform Text)
{
"user":{
"msisdn":"+15551234567"
},
"type":"text",
"content":{
"text":"Thank you, your appointment is confirmed. We look forward to seeing you!"
}
}
If the user replied "2" (Reschedule):
Click to view `Automated Response Payload` (Freeform Text)
{
"user":{
"msisdn":"+15551234567"
},
"type":"text",
"content":{
"text":"To reschedule, please call our office at 1-800-555-1234 or visit our booking page: [your-link].com"
}
}
Order & Delivery Notifications
This scenario details how to automatically send order updates from an e-commerce platform, including a dynamic tracking button.
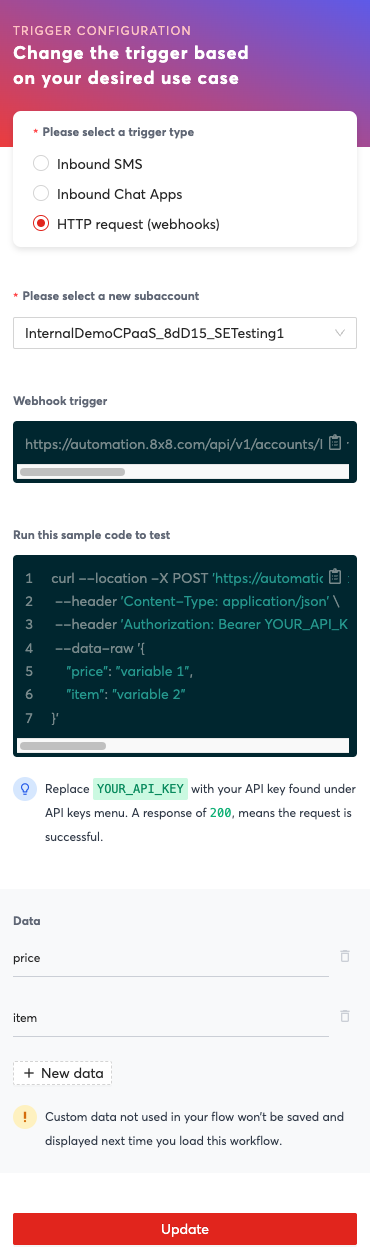
Tools Used: API (or Automation Builder with HTTP Trigger)
The Flow
-
Step 1: Create the Template Create a
UTILITYtemplate with a dynamic URL button for the tracking link.Click to view `Template Creation Payload` (API Request)
POST https://chatapps.8x8.com/api/v1/accounts/{accountId}/channels/{channelId}/templates{
"language":"en_US",
"name":"order_shipped_v2",
"category":"UTILITY",
"components":[
{
"type":"BODY",
"text":"Hi {{1}}, good news! Your order #{{2}} has shipped.",
"examples":[
"Maria",
"987-XYZ"
]
},
{
"type":"BUTTONS",
"buttons":[
{
"type":"URL",
"text":"Track Your Order",
"url":"[https://your.tracker.com/track/](https://your.tracker.com/track/){{1}}",
"examples":[
"987-XYZ"
]
}
]
}
]
} -
Step 2: Send the Notification When your e-commerce backend (e.g., Shopify) flags an order as "shipped," it calls the 8x8 API to send the template.
Click to view `Template Sending Payload` (API Request)
POST https://chatapps.8x8.com/api/v1/subaccounts/{subAccountId}/messages{
"user":{
"msisdn":"+15551234567"
},
"type":"template",
"content":{
"template":{
"language":"en_US",
"name":"order_shipped_v2",
"components":[
{
"type":"body",
"parameters":[
{
"type":"text",
"text":"Maria"
},
{
"type":"text",
"text":"987-XYZ"
}
]
},
{
"type":"button",
"index":"0",
"subType":"url",
"parameters":[
{
"type":"text",
"text":"987-XYZ"
}
]
}
]
}
}
}
Support Deflection with an FAQ Bot
This scenario uses automation to answer common questions and escalate to a live agent. This flow is user-initiated, so no template is required to start.
Tools Used: 8x8 Automation Builder + 8x8 Converse
The Flow
-
Step 1: Customer Asks for Help (User-Initiated) A customer sends: "Hi, I need help with my bill." Your Automation Builder workflow is triggered.
-
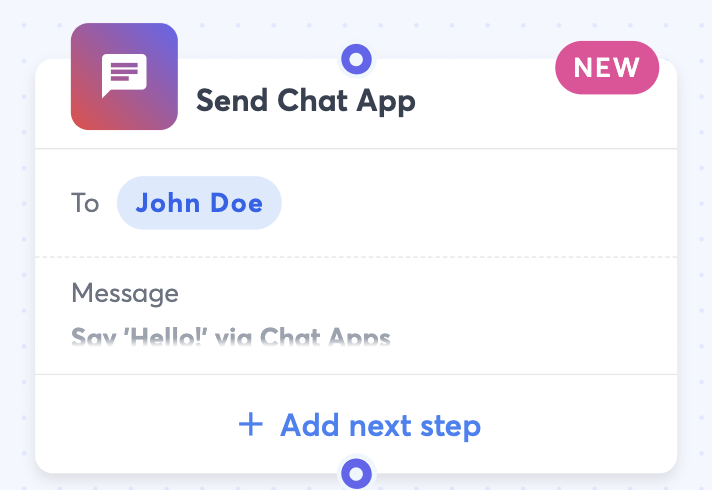
Step 2: Automation Responds with Main Menu The workflow replies with an Interactive Button Message to open the 24-hour window.
Click to view `Automated Response Payload` (Interactive Buttons)
{
"user":{
"msisdn":"+15551234567"
},
"type":"interactive",
"content":{
"interactive":{
"type":"button",
"header":{
"type":"text",
"text":"Welcome to Support!"
},
"body":{
"text":"I can help with common questions. Please select an option:"
},
"action":{
"buttons":[
{
"type":"reply",
"reply":{
"title":"Billing Questions",
"id":"faq_billing"
}
},
{
"type":"reply",
"reply":{
"title":"Tech Support",
"id":"faq_tech"
}
},
{
"type":"reply",
"reply":{
"title":"Talk to Agent",
"id":"escalate_agent"
}
}
]
}
}
}
} -
Step 3: Customer Selects "Billing Questions" The user taps the "Billing Questions" button. Your automation receives a webhook, branches, and sends a follow-up interactive message.
Click to view `Inbound Webhook Payload` (User taps button)
{
"namespace":"ChatApps",
"eventType":"inbound_message_received",
"payload":{
    ...
"type":"Text",
"content":{
"text":"Billing Questions"
}
}
}
Click to view `Automated Response Payload` (Interactive Buttons)
{
"user":{
"msisdn":"+15551234567"
},
"type":"interactive",
"content":{
"interactive":{
"type":"button",
"body":{
"text":
},
"action":{
"buttons":[
{
"type":"reply",
"reply":{
"title":"Yes, thanks!",
"id":"solved"
}
},
{
"type":"reply",
"reply":{
"title":"No, talk to agent",
"id":"escalate_agent_2"
}
}
]
}
}
}
} -
Step 4: Customer Escalates to Agent The user taps "No, talk to agent." The automation executes the
Send to Conversestep and sends a final confirmation text.Click to view `Automated Response Payload` (Freeform Text)
{
"user":{
"msisdn":"+15551234567"
},
"type":"text",
"content":{
"text":"Please hold, I am connecting you with a live agent..."
}
}
Re-engagement Campaigns
This scenario sends a promotional Carousel Template to a list of opted-in customers using the Campaigns tool.
Tools Used: Campaigns + API (for template creation)
The Flow
-
Step 1: Create the Carousel Template First, you must create a
MARKETINGtemplate that contains theCAROUSELcomponent.Click to view `Template Creation Payload` (API Request)
POST https://chatapps.8x8.com/api/v1/accounts/{accountId}/channels/{channelId}/templates{
"language":"en_US",
"name":"summer_sale_carousel_v1",
"category":"MARKETING",
"components":[
{
"type":"BODY",
"text":"Hi {{1}}, our summer sale is on! Swipe through to see our top deals.",
"examples":["Alex"]
},
{
"type":"CAROUSEL",
"cards":[
{
"components":[
{
"type":"HEADER",
"format":"IMAGE",
"examples":["https://.../product_A.png"]
},
{
"type":"BODY",
"text":"Product A - 20% Off"
},
{
"type":"BUTTONS",
"buttons":[
{
"type":"URL",
"text":"Shop Now",
"url":"https://.../product/{{1}}",
"examples":["A"]
}
]
}
]
},
{
"components":[
{
"type":"HEADER",
"format":"IMAGE",
"examples":["https://.../product_B.png"]
},
{
"type":"BODY",
"text":"Product B - Buy One Get One"
},
{
"type":"BUTTONS",
"buttons":[
{
"type":"URL",
"text":"Shop Now",
"url":"https://.../product/{{1}}",
"examples":["B"]
}
]
}
]
}
]
}
]
} -
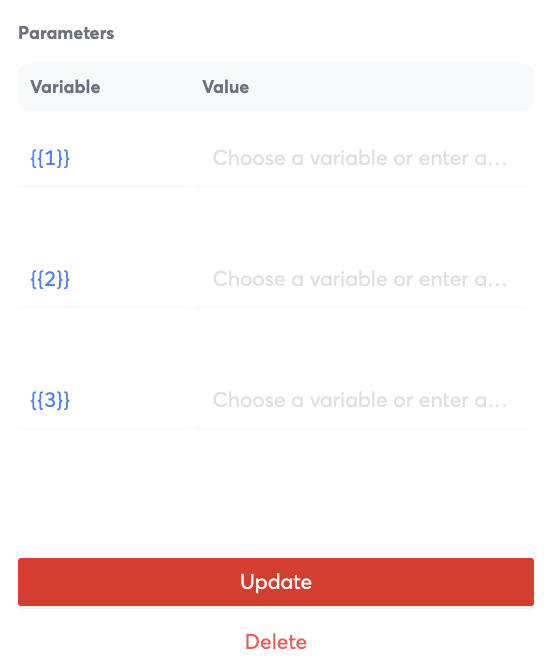
Step 2: Send the Campaign via Portal or API You can send this via the Campaigns tool by mapping CSV columns to the variables. Or, you can send it via the API.
Click to view `Template Sending Payload` (API Request)
POST https://chatapps.8x8.com/api/v1/subaccounts/{subAccountId}/messages{
"user":{
"msisdn":"+15551234567"
},
"type":"template",
"content":{
"template":{
"language":"en_US",
"name":"summer_sale_carousel_v1",
"components":[
{
"type":"body",
"parameters":[
{
"type":"text",
"text":"Alex"
}
]
},
{
"type":"carousel",
"cards":[
{
"cardIndex":0,
"components":[
{
"type":"header",
"parameters":[
{
"type":"image",
"url":"https://.../product_A_live.png"
}
]
},
{
"type":"button",
"index":0,
"subType":"url",
"parameters":[
{
"type":"text",
"text":"A"
}
]
}
]
},
{
"cardIndex":1,
"components":[
{
"type":"header",
"parameters":[
{
"type":"image",
"url":"https://.../product_B_live.png"
}
]
},
{
"type":"button",
"index":0,
"subType":"url",
"parameters":[
{
"type":"text",
"text":"B"
}
]
}
]
}
]
}
]
}
}
}
Simple WhatsApp Support Bot (with API lookup)
This is a complete, user-initiated bot that handles a specific request by calling an external API.
Tools Used: 8x8 Automation Builder + 8x8 Converse
The Flow
-
Step 1: Customer Asks for Help (User-Initiated) Customer sends "Hi". The Automation Builder workflow is triggered.
-
Step 2: Automation Responds with Main Menu The workflow replies with an Interactive Button Message.
Click to view `Automated Response Payload` (Interactive Buttons)
{
"user":{
"msisdn":"+15551234567"
},
"type":"interactive",
"content":{
"interactive":{
"type":"button",
"body":{
"text":"Welcome to support! How can I help you?"
},
"action":{
"buttons":[
{
"type":"reply",
"reply":{
"title":"Check Order Status",
"id":"check_order"
}
},
{
"type":"reply",
"reply":{
"title":"Talk to an Agent",
"id":"escalate_agent"
}
}
]
}
}
}
} -
Step 3: Path 1 - "Check Order Status" The user clicks "Check Order Status." The automation receives the webhook, branches, and replies with a freeform text message.
Click to view `Automated Response Payload` (Freeform Text)
{
"user":{
"msisdn":"+15551234567"
},
"type":"text",
"content":{
"text":"Please reply with your 8-digit order number (e.g., 12345678)."
}
} -
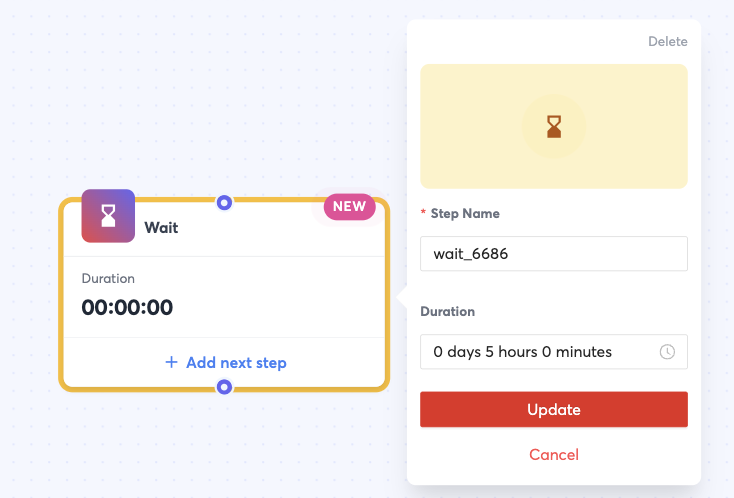
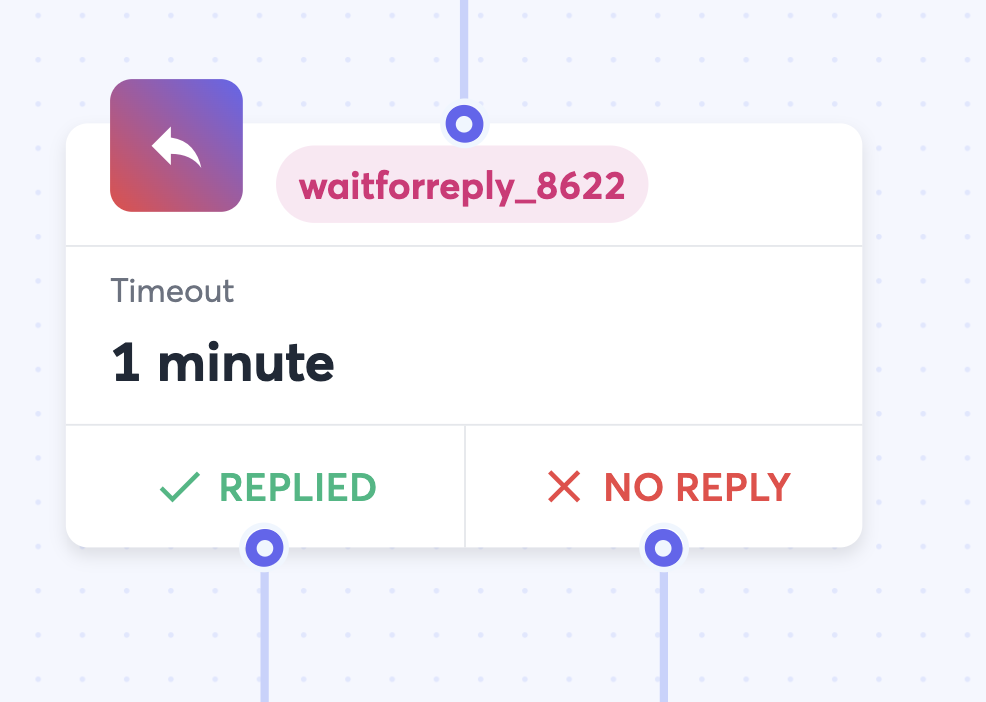
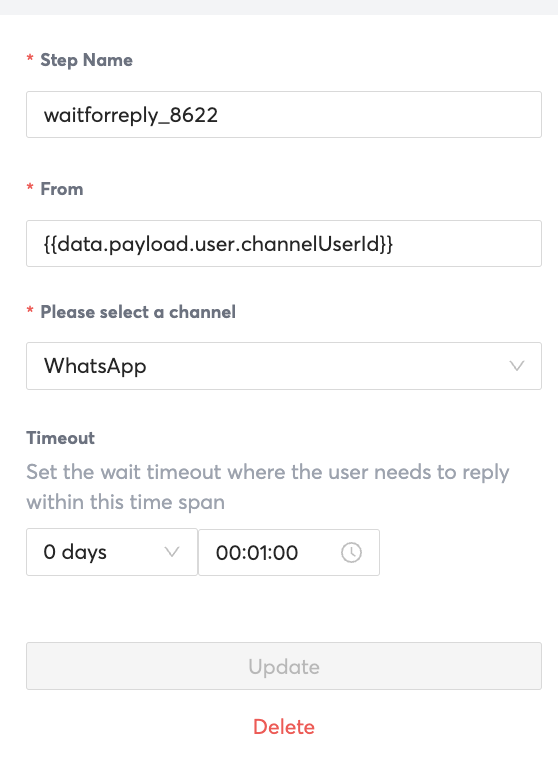
Step 4: User Replies with Order ID The automation, using a Wait For Reply step, receives the order number (e.g., "98765432"). It saves this as a variable (
{{data.order_id}}). -
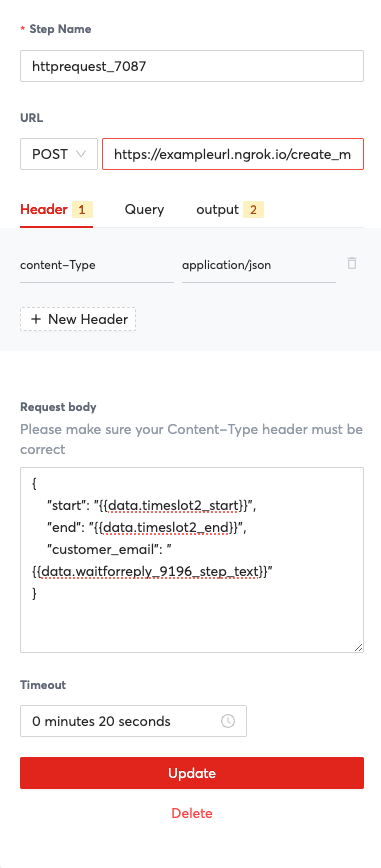
Step 5: Automation Calls External API The automation uses the HTTP Request step to call your internal e-commerce API.
-
Method:
GET -
URL:
https://api.my-ecommerce.com/orders/{{data.order_id}}The automation saves the response (e.g.,{"status": "Shipped"}) as a variable ({{step.responseBody.status}}).
-
-
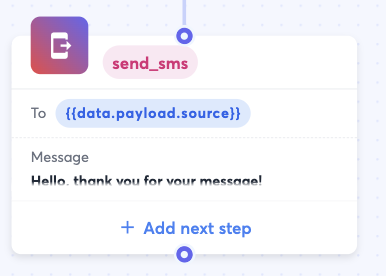
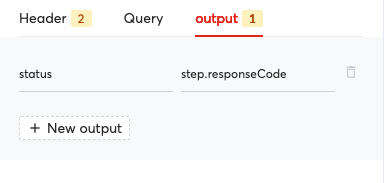
Step 6: Automation Responds with Status The workflow sends a final freeform text message with the data from the API call.
Click to view `Automated Response Payload` (Dynamic Freeform Text)
{
"user":{
"msisdn":"+15551234567"
},
"type":"text",
"content":{
"text":"Your order #{{data.order_id}} status is: {{data.order_status}}. \n\nCan I help with anything else?"
}
}
(Note: The variables
{{data.order_id}}and{{data.order_status}}are populated by the Automation Builder from its saved context.) -
Step 7: Path 2 - "Talk to an Agent" If the user had clicked "Talk to an Agent" in Step 3, the automation would execute the
Send to Conversestep and send a final confirmation message.Click to view `Automated Response Payload` (Freeform Text)
{
"user":{
"msisdn":"+15551234567"
},
"type":"text",
"content":{
"text":"Thank you. I am transferring you to the next available agent. Please hold."
}
}
Source: https://developer.8x8.com/connect/docs/whatsapp/scenarios-tutorials · 8x8 CPaaS Developer Docs. Synced for support deflection.