WhatsApp Template Components Reference
This technical reference provides detailed specifications for all WhatsApp template components, including constraints, formatting rules, and API payload structures. Use this guide when building or debugging template creation requests.
HEADER Component
An optional component for adding a title or rich media to your template. Maximum of one header per template.
Header Types
| Type | Description & Constraints | API Payload for Template Creation |
|---|---|---|
TEXT |
Optional, max 1 per template. Length: Max 60 characters. Parameters: Supports exactly 1 parameter (e.g., Use Case: Personalized subject lines or titles. |
|
IMAGE |
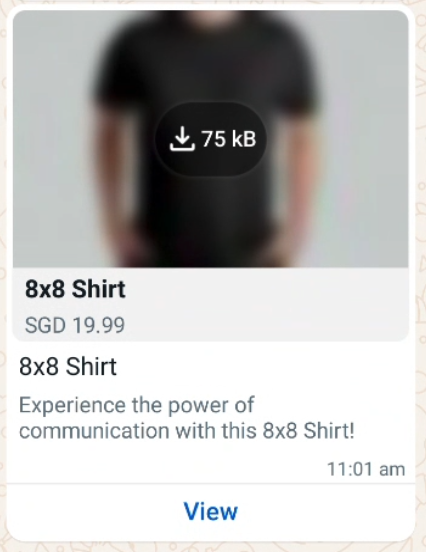
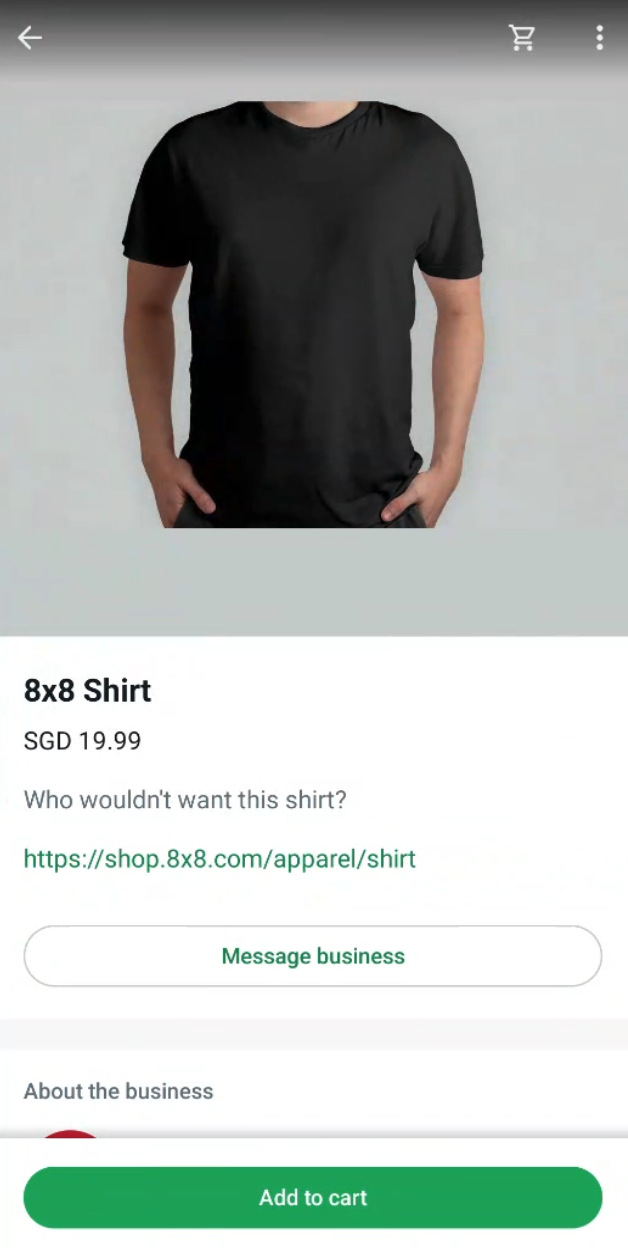
Optional. Requires uploading media to 8x8 first. Formats: Size: Max 5MB (Meta limit). Dimensions: Recommended 800 x 418 px (ratio 1.91:1). Use Case: Product images, promotional banners, receipts. |
|
VIDEO |
Optional. Requires uploading media to 8x8 first. Format: Size: Max 16MB (Meta limit). Duration: Recommended < 60 seconds. Use Case: Product demos, tutorials, announcements. |
|
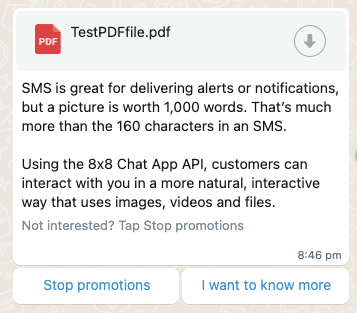
DOCUMENT |
Optional. Requires uploading media to 8x8 first. Format: Size: Max 100MB (Meta limit). Use Case: Invoices, receipts, contracts, statements. |
|
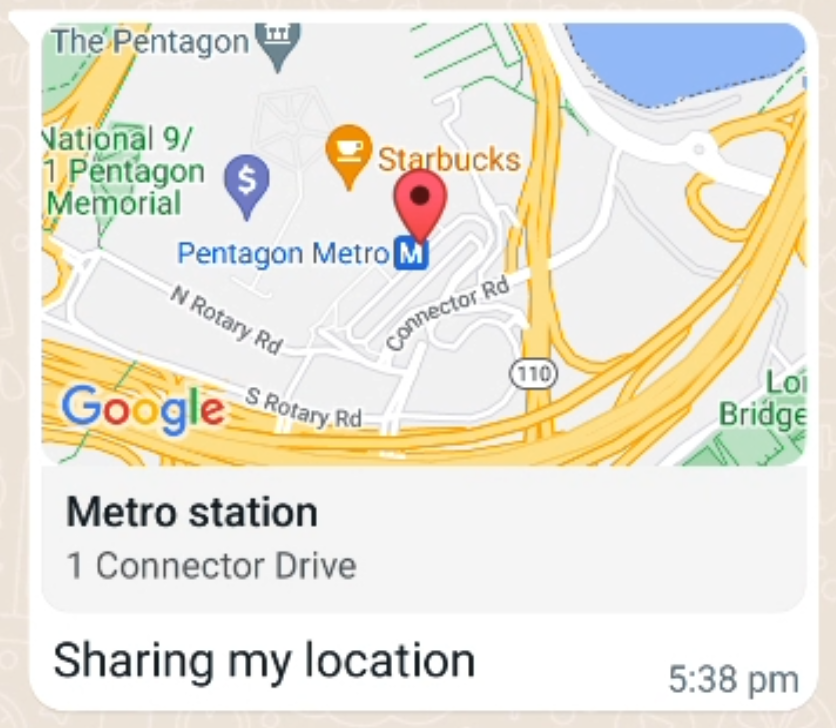
LOCATION |
Optional. Allowed for Format: Static map pin with coordinates. Note: Location data (latitude, longitude, name, address) is provided when sending the message, not at creation. Use Case: Store locations, delivery tracking, appointment addresses. |
|
Media URL Requirement
For IMAGE, VIDEO, and DOCUMENT headers, you need to provide a media URL in the examples array when creating the template. You have two options:
- Upload to 8x8: Use the Upload Media API to obtain a permanent URL
- Self-host: Provide your own publicly accessible HTTPS URL
8x8 Upload Endpoint:
POST https://chatapps.8x8.com/api/v1/subaccounts/{subAccountId}/files
See Also:
- File & Media Management - Complete guide for both upload and self-hosting options
BODY Component
The main text content of your template. This is the only required component and the only component that supports multiple parameters.
Specifications
| Property | Requirement | Details |
|---|---|---|
Required |
Yes |
Every template must have exactly one BODY component |
Max Length |
1024 characters |
Including variables (e.g., |
Parameters |
limited |
Use |
Formatting |
Markdown-style formatting supported |
Supported formatting:
Important: When using in JSON payloads, proper escaping is required. Use |
Emojis |
Allowed |
Count toward character limit (typically 2-4 chars each) |
API Payload Example
{
"type":"BODY",
"text":"Hi {{1}}, your order {{2}} is confirmed and will arrive by {{3}}.",
"examples":["Maria","ABC-123","Dec 15"]
}
Best Practices
- Keep it concise: Users read on mobile devices
- Use parameters wisely: Only parameterize data that changes (names, dates, IDs)
- Static text first: Start with static text for Meta review clarity
-
No parameters at edges: Don't start or end with
{{1}}
FOOTER Component
An optional component for adding small print, legal text, or brand attribution.
Specifications
| Property | Requirement | Details |
|---|---|---|
Required |
No |
Optional, max 1 per template |
Max Length |
60 characters |
Strictly enforced by Meta |
Parameters |
Not supported |
Footer must be static text only |
Formatting |
Plain text |
No Markdown, HTML, or emojis recommended |
API Payload Example
{
"type":"FOOTER",
"text":"Not you? Contact support."
}
Common Use Cases
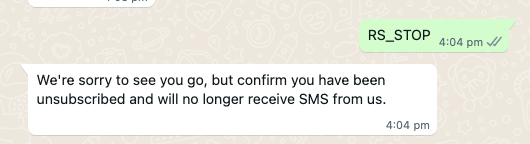
- Unsubscribe instructions: "Reply STOP to opt out"
- Legal disclaimers: "Terms apply"
- Brand attribution: "Powered by YourCompany"
- Support contact: "Need help? Reply to this message"
BUTTONS Component
An optional component to add interactive buttons. Buttons enable users to take action with a single tap.
Button Types & Specifications
| Button Type | Description & Constraints | API Payload Example |
|---|---|---|
Quick Reply |
Sends a predefined text string back to your business when tapped. Limit: Up to 10 per template. Text Length: Max 25 characters. Response: User tap sends button text to your webhook. Use Case: Menu options, confirmation (Yes/No), feedback. |
|
URL / Call to Action |
Opens a web browser to the specified URL. Limit: Up to 2 URL buttons per template. Text Length: Max 25 characters. URL Length: Max 2000 characters. Parameters: Supports 1 variable at end of URL (e.g., Use Case: Track order, view invoice, book appointment. |
|
Phone Number |
Initiates a phone call to the specified number when tapped. Limit: Max 1 per template. Text Length: Max 25 characters. Number Format: Max 20 characters, alphanumeric. Country Code: Required (2-letter ISO code). Use Case: Call support, emergency contact, sales inquiry. |
|
OTP Copy Code |
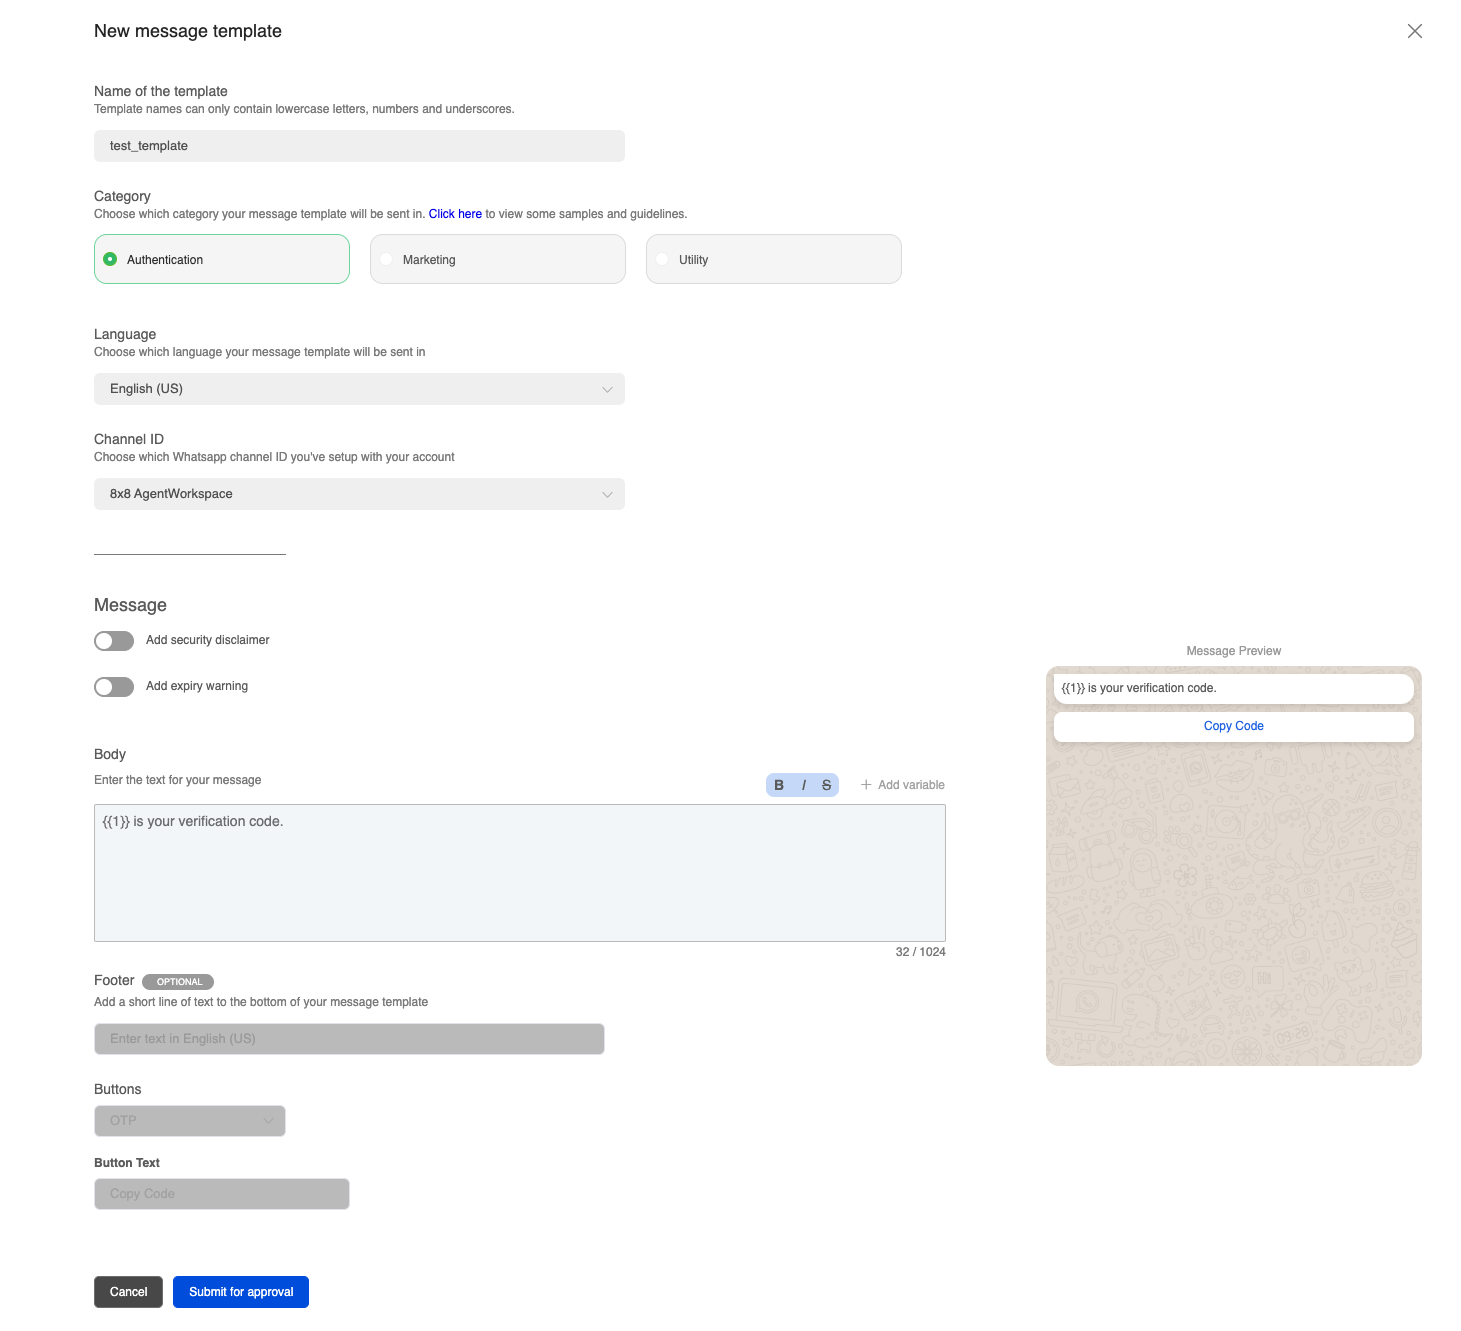
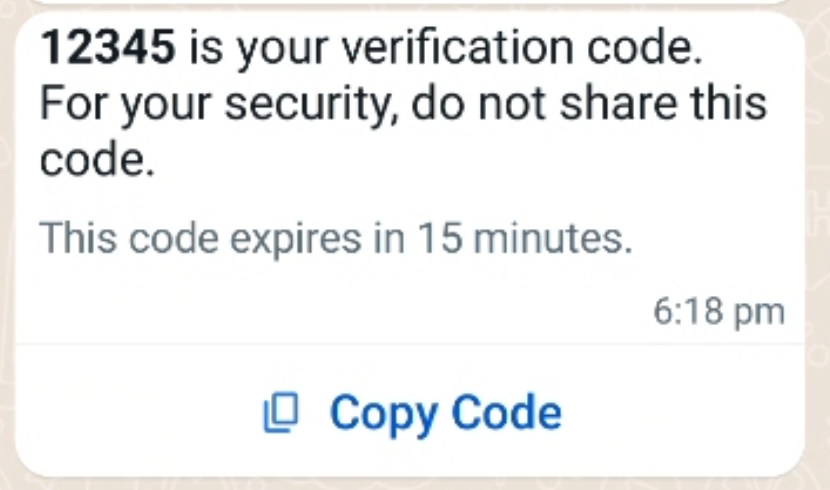
Copies an OTP code to clipboard for one-tap autofill. Category: Limit: Max 1 per template. Text: Fixed as "Copy Code" (not customizable). Autofill: Integrates with iOS/Android autofill. Use Case: Login verification, password reset, 2FA. |
|
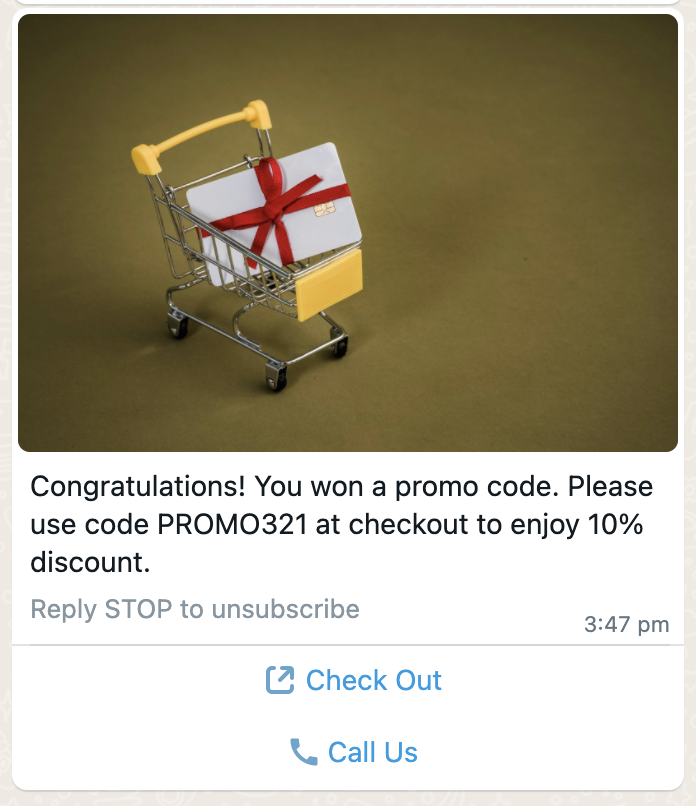
Copy Offer Code |
Copies a promotional code to clipboard for easy redemption. Category: Limit: Max 1 per template. Text: Fixed as "Copy offer code" (not customizable). Code Length: 4-15 characters. Use Case: Discount codes, promo campaigns, loyalty rewards. |
|
Flow Button |
Opens a WhatsApp Flow when tapped, allowing structured data collection via guided forms. Limit: Max 1 Flow button per template. Text Length: Max 25 characters. Flow ID: Required. Must be a published Flow (obtained from Flow Configuration API). Flow Action: Optional. Defaults to Navigate Screen: Optional. Specifies the screen ID to open (from Flow JSON). Required if you want to start at a specific screen. Use Case: Appointment booking, lead qualification, feedback surveys, onboarding forms. See: WhatsApp Flows for complete Flow implementation guide. |
|
Button Combination Rules
Total Button Limit: Maximum of 10 buttons across all types combined.
Mixing Button Types:
- Quick Reply buttons can be mixed with URL/Phone buttons
- Copy Offer Code buttons can be mixed with other CTA buttons (URL/Phone/Quick Reply)
- Flow buttons can be mixed with other CTA buttons (URL/Phone/Quick Reply)
- When mixing, buttons of the same type must be consecutive (e.g., all URL buttons together, then all Quick Reply buttons together, or vice versa - do not intermix)
- OTP Copy Code buttons cannot be mixed with any other button types (must be used alone)
Valid Examples:
- ✅
[URL, URL, Quick Reply, Quick Reply] - ✅
[Quick Reply, Quick Reply, URL, URL] - ✅
[PHONE_NUMBER, URL, Quick Reply, Quick Reply] - ✅
[Quick Reply, Quick Reply, Quick Reply, PHONE_NUMBER, URL] - ✅
[COPY_CODE, URL, Quick Reply]- Copy Offer Code can mix with other CTA buttons - ✅
[FLOW, Quick Reply, Quick Reply]- Flow button can mix with Quick Reply buttons - ✅
[FLOW, URL]- Flow button can mix with URL buttons - ✅
[OTP]- OTP Copy Code buttons must be used alone - ❌
[URL, Quick Reply, URL, Quick Reply]- Invalid (intermixed) - ❌
[OTP, Quick Reply]- Invalid (OTP Copy Code cannot mix with other types) - ❌
[OTP, URL]- Invalid (OTP Copy Code cannot mix with other types) - ❌
[OTP, FLOW]- Invalid (OTP Copy Code cannot mix with other types)
Desktop Display Limitations:
- Templates with 4+ buttons may not render properly on WhatsApp Desktop
- Mixed button types (URL + Quick Reply) may prompt "View on phone"
- Test templates on both mobile and desktop before launching campaigns
Button Array Structure
Buttons are defined within a BUTTONS component:
{
"type":"BUTTONS",
"buttons":[
{
"type":"URL",
"text":"Track Order",
"url":"https://myapp.com/track/{{1}}",
"examples":["12345"]
},
{
"type":"FLOW",
"text":"Book Appointment",
"flowId":"1234567890123456"
},
{
"type":"quick_reply",
"text":"Contact Support"
},
{
"type":"quick_reply",
"text":"Main Menu"
}
]
}
CAROUSEL Component
A special template type for MARKETING category that displays a horizontally scrollable list of up to 10 "cards." Each card can have its own image/video, text, and buttons.
Carousel Specifications
| Property | Requirement | Details |
|---|---|---|
Category |
|
Cannot be used for UTILITY or AUTHENTICATION |
Card Count |
1-10 cards |
Minimum 1 card, maximum 10 cards |
Card Structure |
Header + Body + Buttons |
Each card has its own components array |
Card Component Requirements
Each card within the carousel must contain:
-
HEADER (Required)
- Must be IMAGE or VIDEO format
- Same size/format constraints as standard headers (IMAGE: max 5MB, VIDEO: max 16MB)
- Each card can have a different image/video
-
BODY (Required)
- Max Length: 160 characters (shorter than standard templates)
- Supports parameters:
{{1}},{{2}}, etc. - Each card can have different body text
-
BUTTONS (Required)
- Each card must have at least 1 button
- Max 2 buttons per card
- Button types allowed: URL (with dynamic parameter), Quick Reply
- All cards must have the same button configuration (same number and types)
Carousel API Payload Structure
{
"language":"en_US",
"name":"product_carousel_demo",
"category":"MARKETING",
"components":[
{
"type":"body",
"text":"Hi {{1}}, check out our featured products! Special offer: {{2}}% off.",
"examples":["Alex","25"]
},
{
"type":"carousel",
"cards":[
{
"components":[
{
"type":"header",
"format":"image",
"examples":["https://chatapps.8x8.com/files/product1.jpg"]
},
{
"type":"body",
"text":"Product A - Now {{1}}",
"examples":["$49.99"]
},
{
"type":"buttons",
"buttons":[
{
"type":"url",
"text":"Buy Now",
"url":"https://mystore.com/product/{{1}}",
"examples":["product-a"]
},
{
"type":"quick_reply",
"text":"Add to Cart"
}
]
}
]
},
{
"components":[
{
"type":"header",
"format":"image",
"examples":["https://chatapps.8x8.com/files/product2.jpg"]
},
{
"type":"body",
"text":"Product B - Limited {{1}}",
"examples":["Stock"]
},
{
"type":"buttons",
"buttons":[
{
"type":"url",
"text":"Buy Now",
"url":"https://mystore.com/product/{{1}}",
"examples":["product-b"]
},
{
"type":"quick_reply",
"text":"Add to Cart"
}
]
}
]
}
]
}
]
}
Carousel Best Practices
- Consistent Design: Use similar image dimensions and styling across all cards
- Clear Value: Each card should showcase a distinct product/offer
- Actionable Buttons: Every card needs clear CTAs
- Test on Mobile: Carousels are mobile-optimized; test scrolling behavior
- Limit Parameters: Too many variables make templates hard to maintain
Parameter Formatting Rules
WhatsApp templates support two parameter types: positional and named.
Positional Parameters (Recommended)
Format: {{1}}, {{2}}, {{3}}, etc.
Rules:
- Parameters must be sequential:
{{1}},{{2}},{{3}}(no skipping) - Order matters when sending: parameters are matched by position
- Can be used in: BODY (unlimited), HEADER text (max 1), URL buttons (max 1 at end)
Example:
{
"type":"BODY",
"text":"Hi {{1}}, order {{2}} ships on {{3}}",
"examples":["John","ORD-123","Dec 10"]
}
When sending, provide parameters in order:
{
"type":"body",
"parameters":[
{"type":"text","text":"John"},
{"type":"text","text":"ORD-123"},
{"type":"text","text":"Dec 10"}
]
}
Named Parameters
Format: {{first_name}}, {{order_number}}, {{delivery_date}}, etc.
Rules:
- Allows providing parameters out of order when sending
- More readable for templates with many variables
- Still requires sequential numbering in some Meta systems
Example:
{
"type":"BODY",
"text":"Hi {{customer_name}}, order {{order_id}} ships on {{ship_date}}"
}
Parameter Constraints
General Rules:
- No parameters at start/end: Don't begin or end body text with a parameter
-
Examples required: Every parameter must have a sample value in
examplesarray - Character limits apply: Parameter examples count toward component character limits
-
No special characters: Don't use
#,$,%in parameter values
Component-Specific Limits:
- BODY: Unlimited parameters
- HEADER (text): Max 1 parameter
- URL buttons: Max 1 parameter (must be at end of URL)
- FOOTER: No parameters allowed
Parameter Examples Requirement
When creating a template, you must provide sample values for every parameter:
{
"type":"BODY",
"text":"Hi {{1}}, your {{2}} order arrives {{3}}.",
"examples":["Maria","Premium","tomorrow"]
}
Meta uses these examples to:
- Validate template format and category
- Preview how the template will appear
- Test parameter substitution logic
Template Limits & Quotas
Per-WABA Limits
| Limit Type | Unverified Business | Verified Business |
|---|---|---|
Total Templates |
250 templates |
6,000 templates |
Creation Rate |
100 per hour |
100 per hour |
Languages |
Unlimited |
Unlimited |
Component Limits
| Component | Max Count | Max Length | Parameters |
|---|---|---|---|
HEADER |
1 |
60 chars (text only) |
1 (text only) |
BODY |
1 (required) |
1024 chars |
Unlimited |
FOOTER |
1 |
60 chars |
None |
BUTTONS |
10 total |
25 chars per button |
1 (URL only) |
CAROUSEL |
10 cards |
160 chars per card body |
Per card |
Related Resources
For Creating Templates:
- WhatsApp over 8x8 API - API endpoint and authentication
- Template Message API Library - Complete Create & Send payload examples
- Message Types & Templates - High-level concepts and portal guide
For Sending Templates:
- WhatsApp over 8x8 API - Send endpoint overview
- Template Message API Library - Send payload examples for all types
For Template Compliance:
- Governance, Security & Compliance - Meta's template policies
- Operations, Monitoring & Troubleshooting - Template rejection reasons and fixes
Source: https://developer.8x8.com/connect/docs/whatsapp/template-components-reference · 8x8 CPaaS Developer Docs. Synced for support deflection.


 Sample notification via ZNS
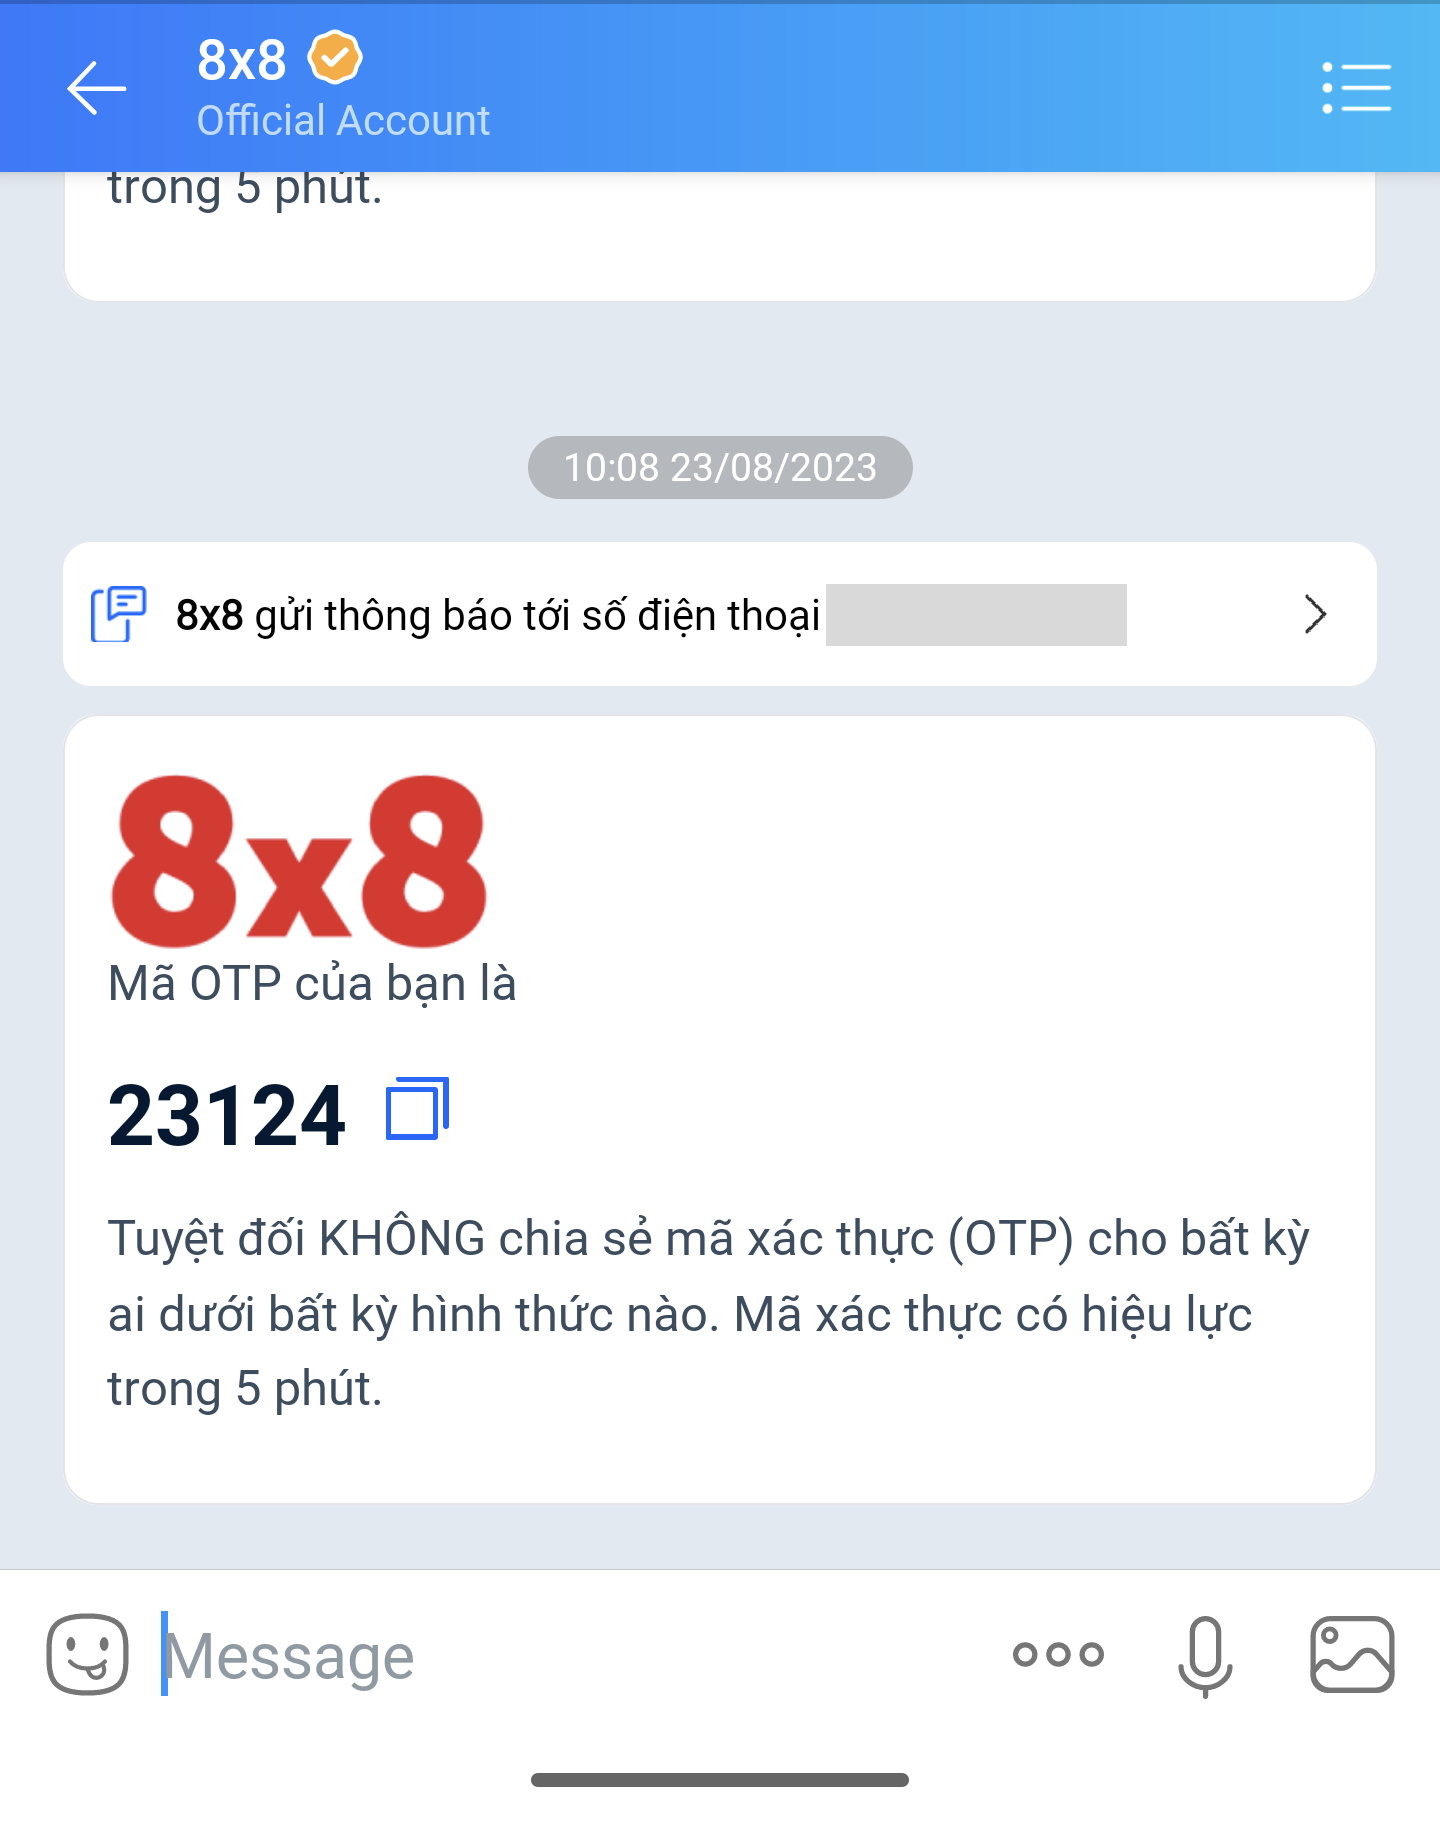 Sample OTP via ZNS

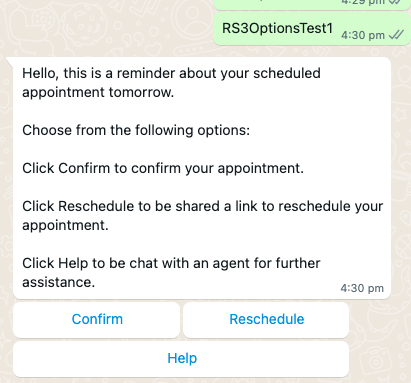
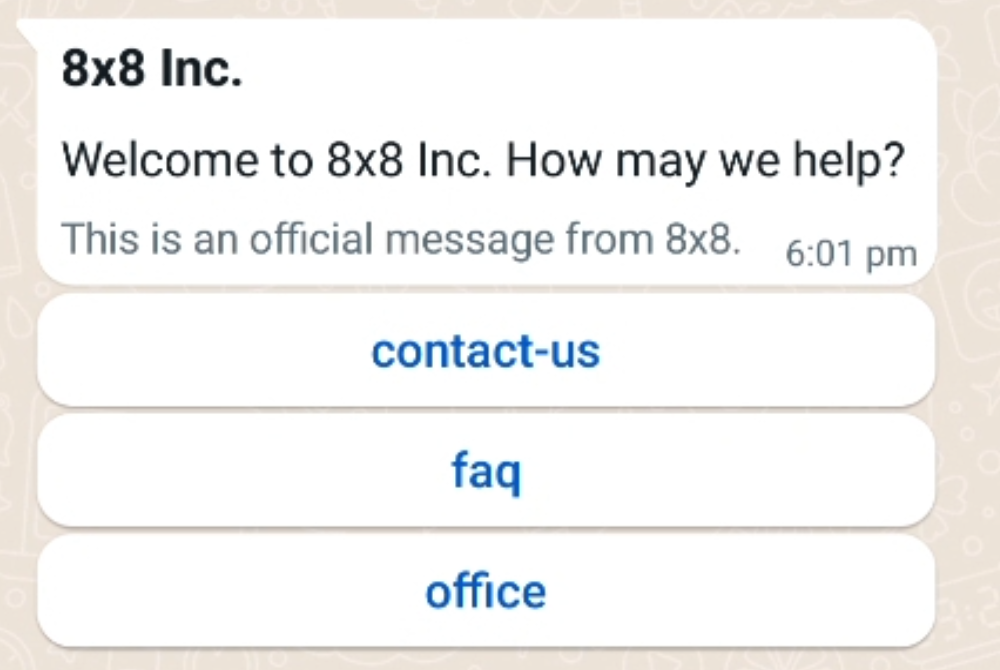 If the user clicks on each button, it will send the corresponding reply.
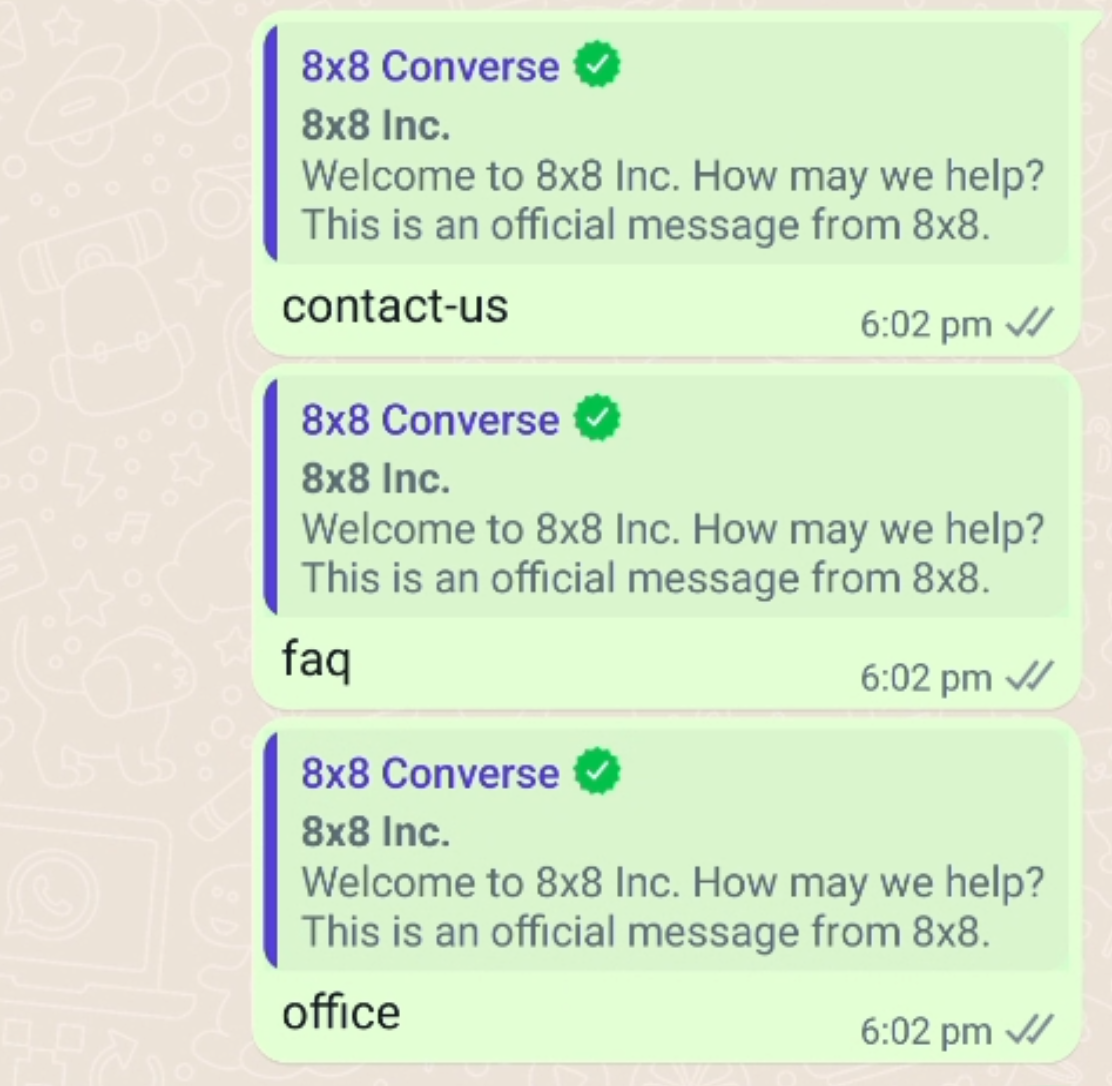
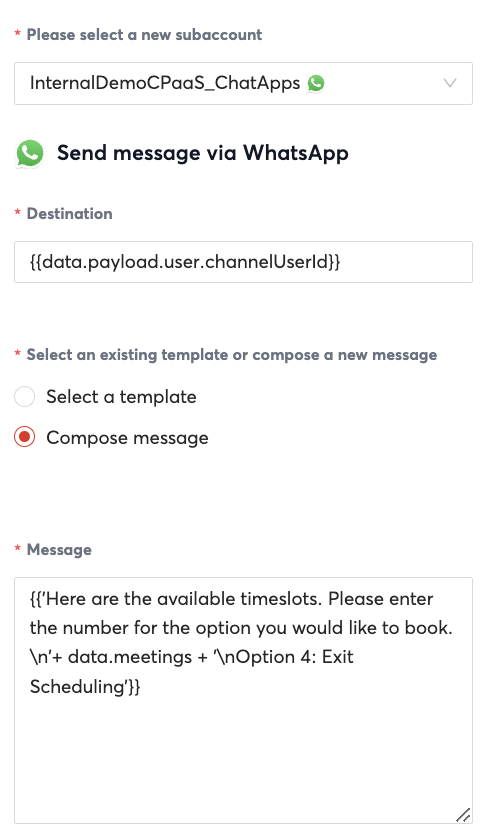
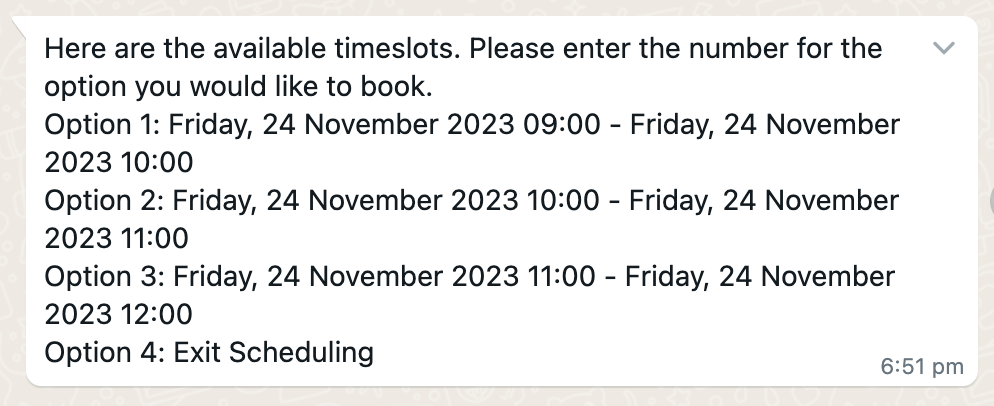
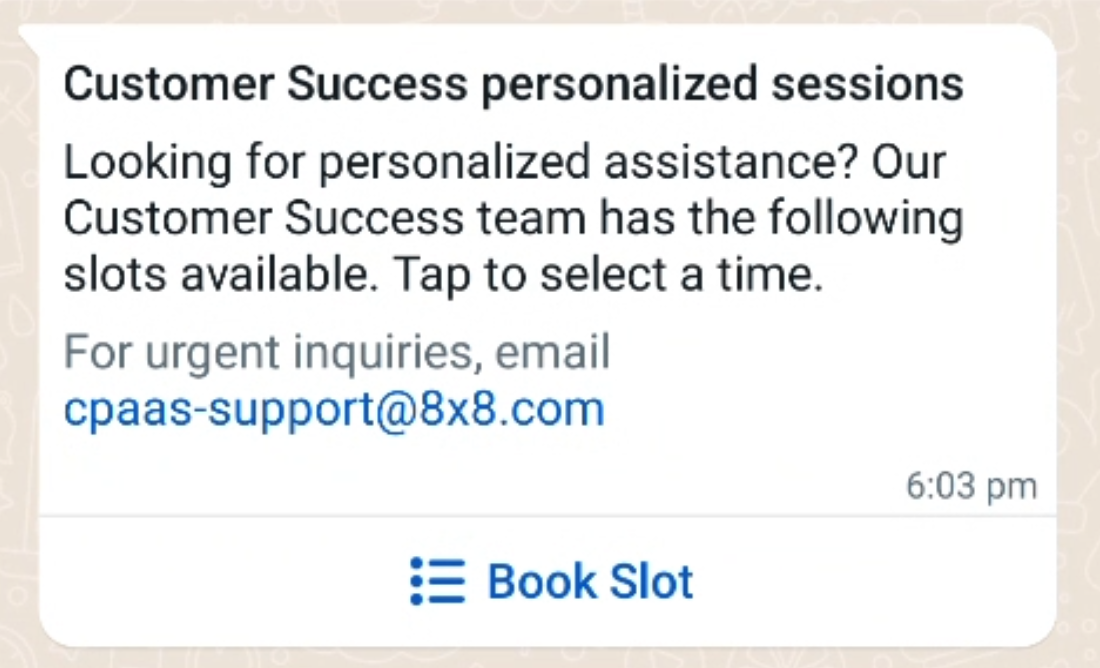 If the customer selects the "Book Slot" option then they will be presented with the options for
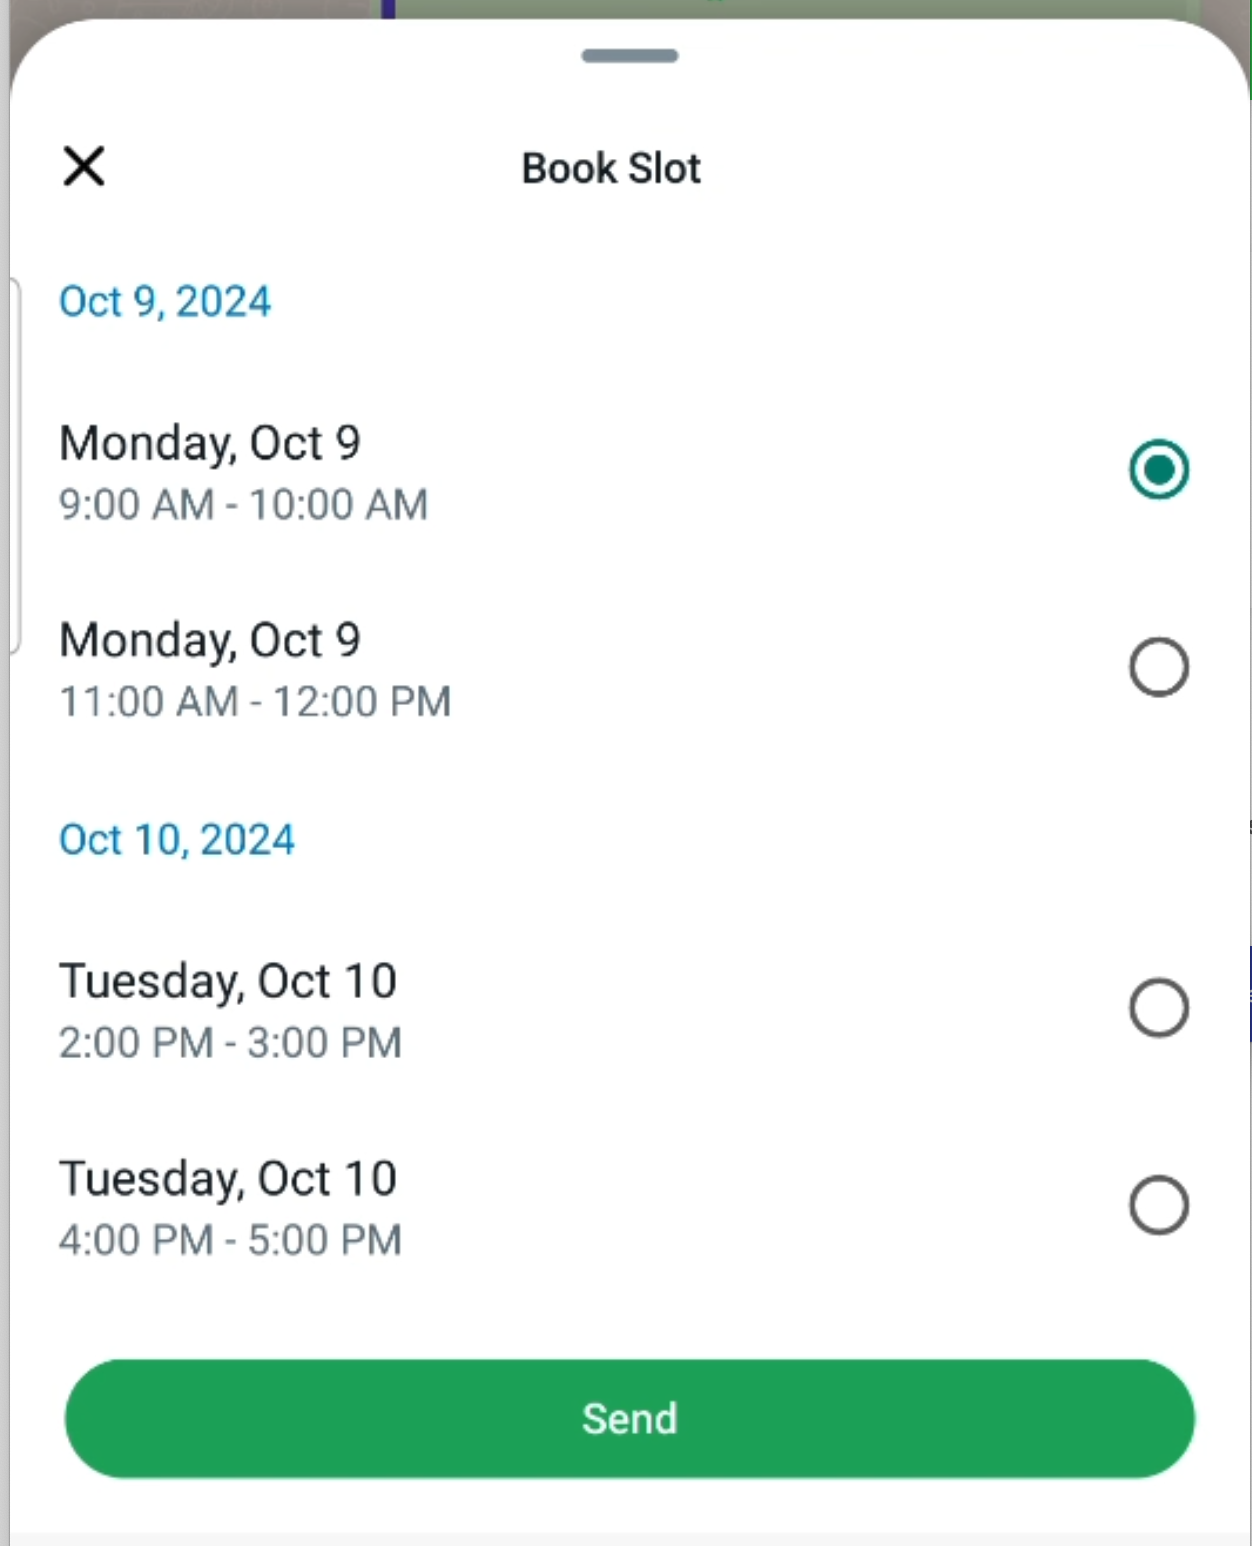 After clicking "Send" then the user will send the corresponding reply.
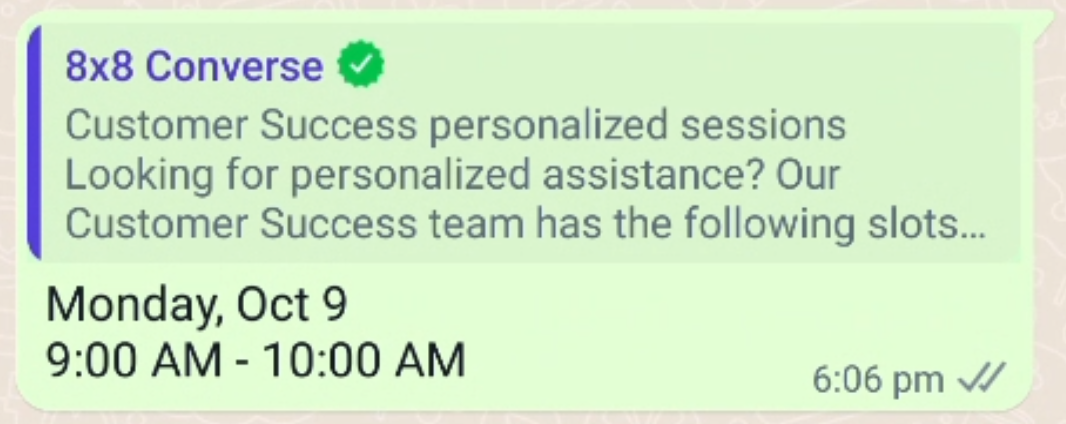


 Viber text messages can include URL
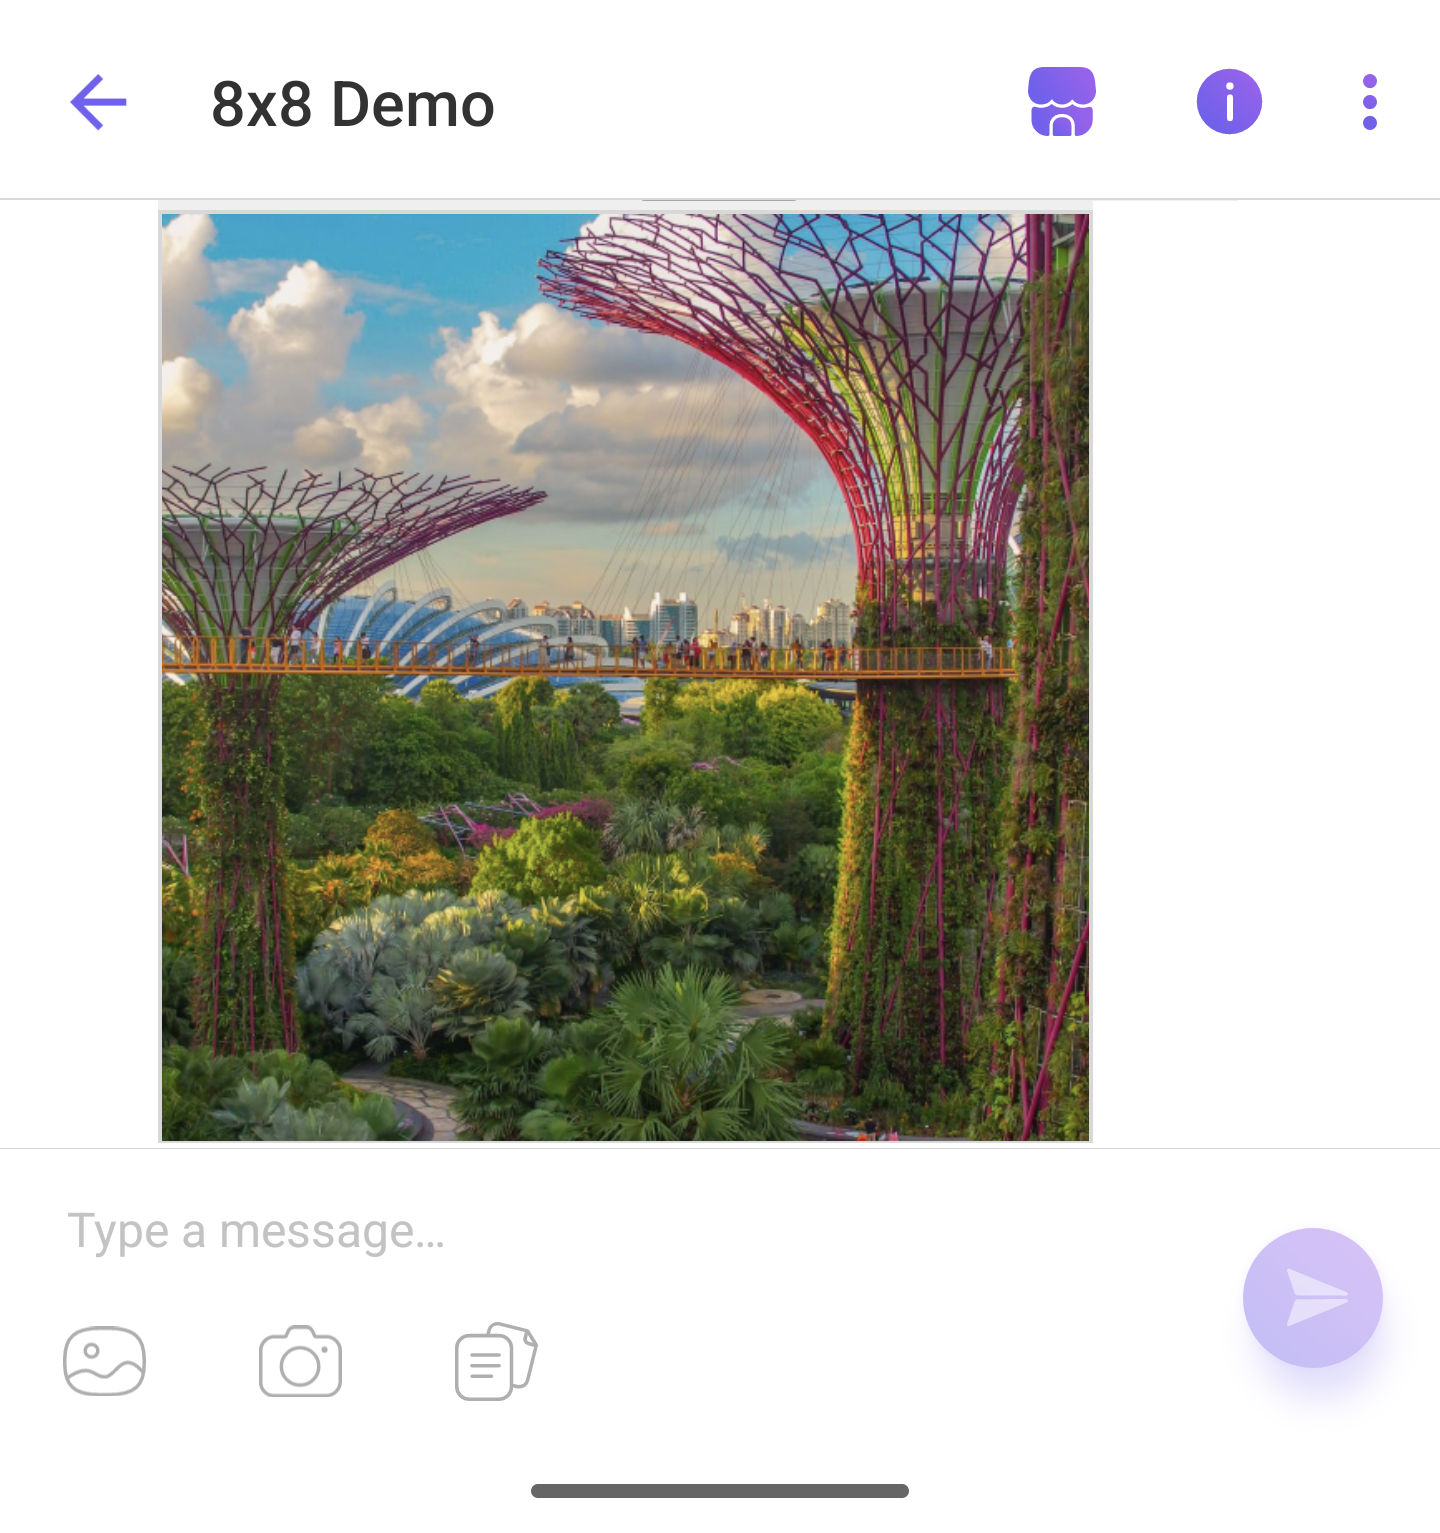 Viber Rich Media: Image only message
 Viber Rich Media: Text and Image
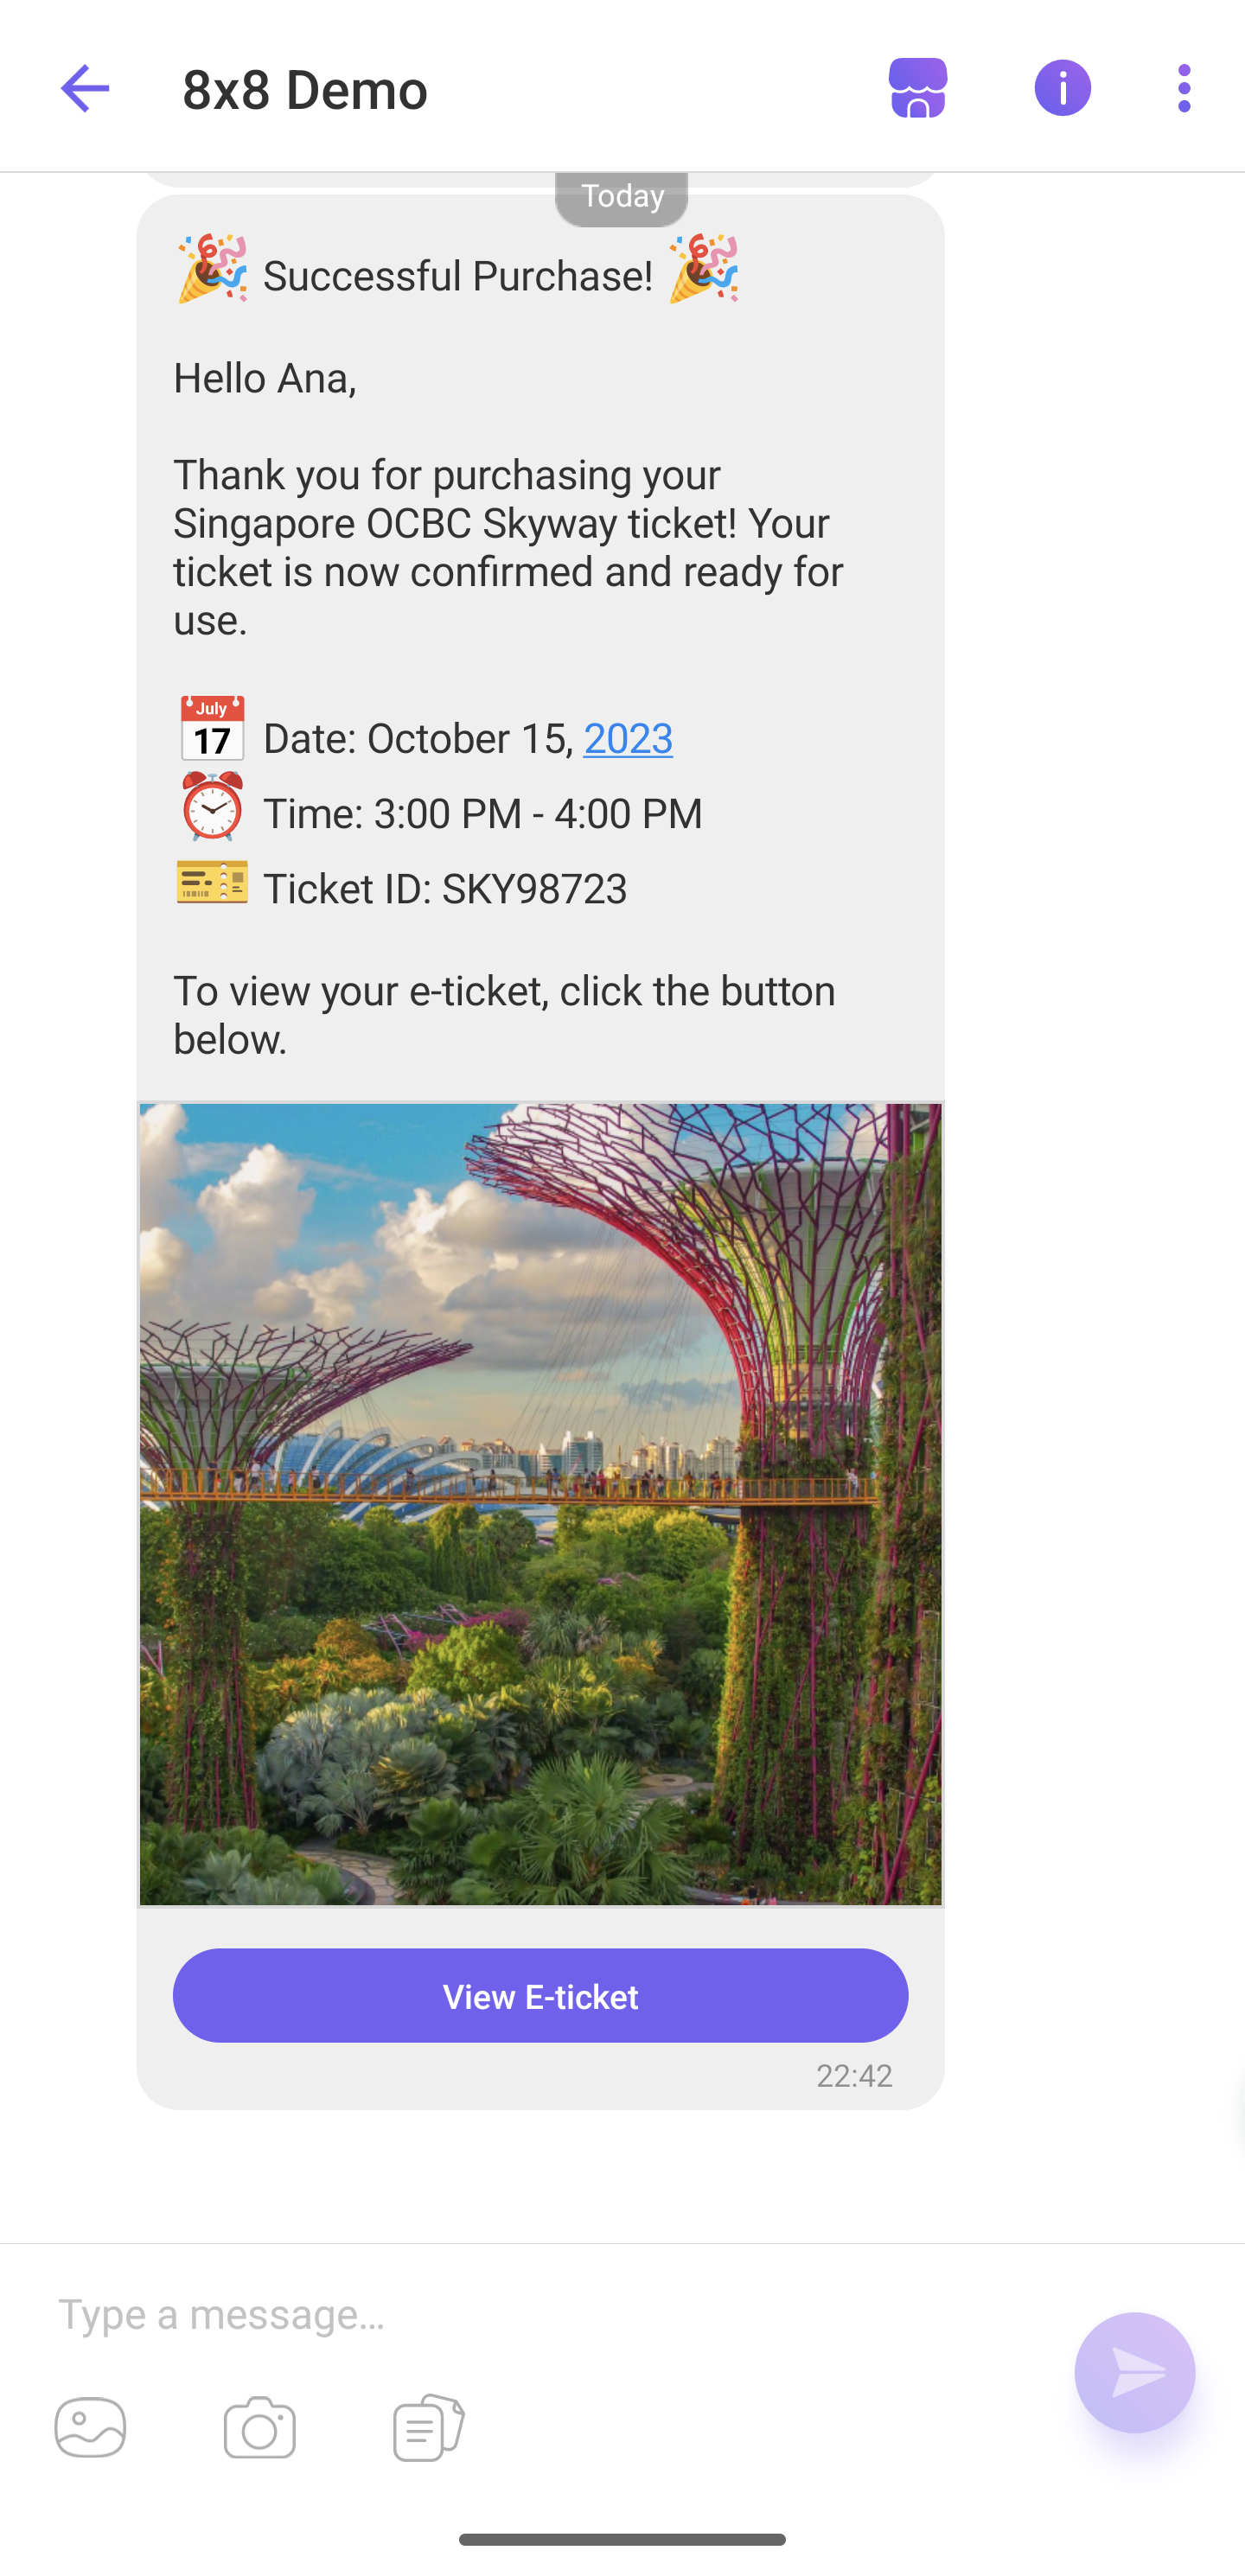 Viber Rich Media: Text + Image + Button
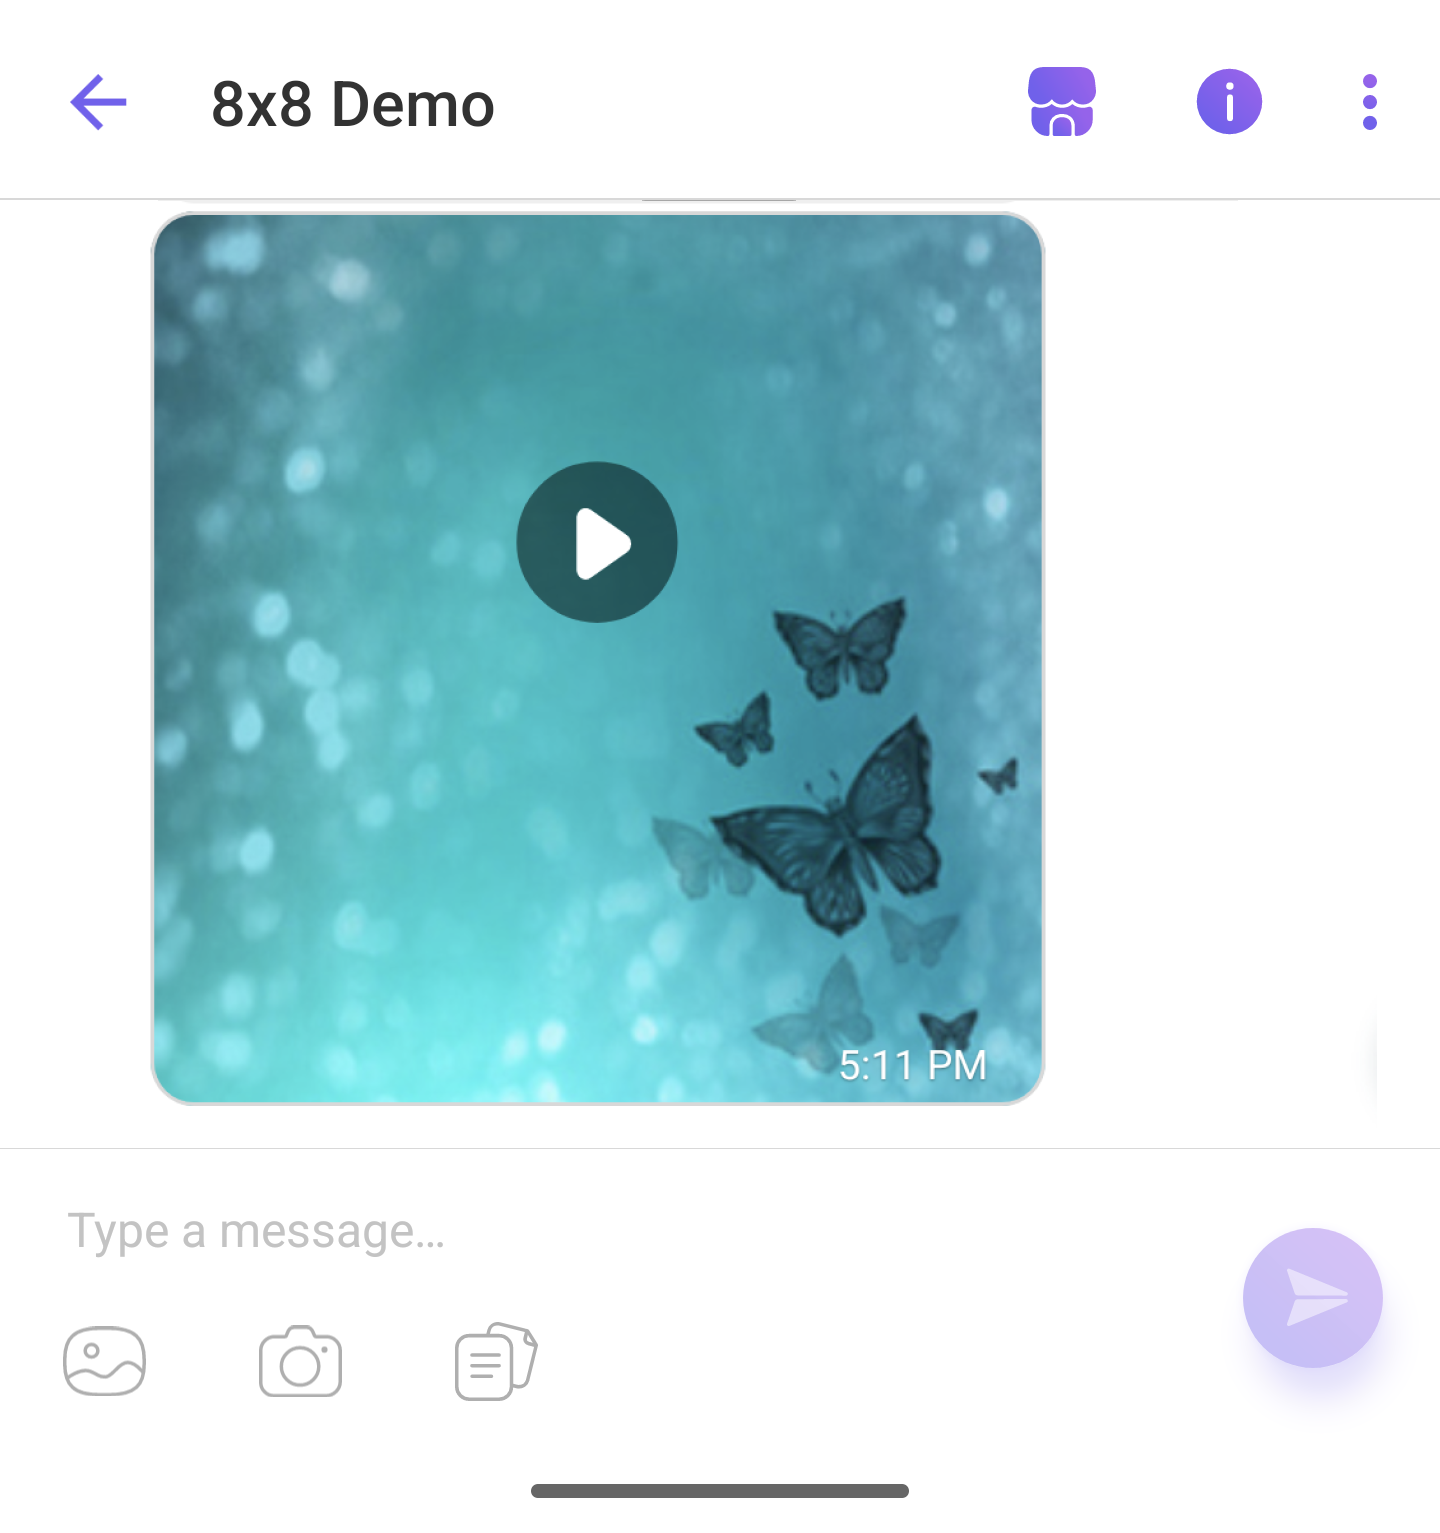 Viber Rich Media: Video-only message
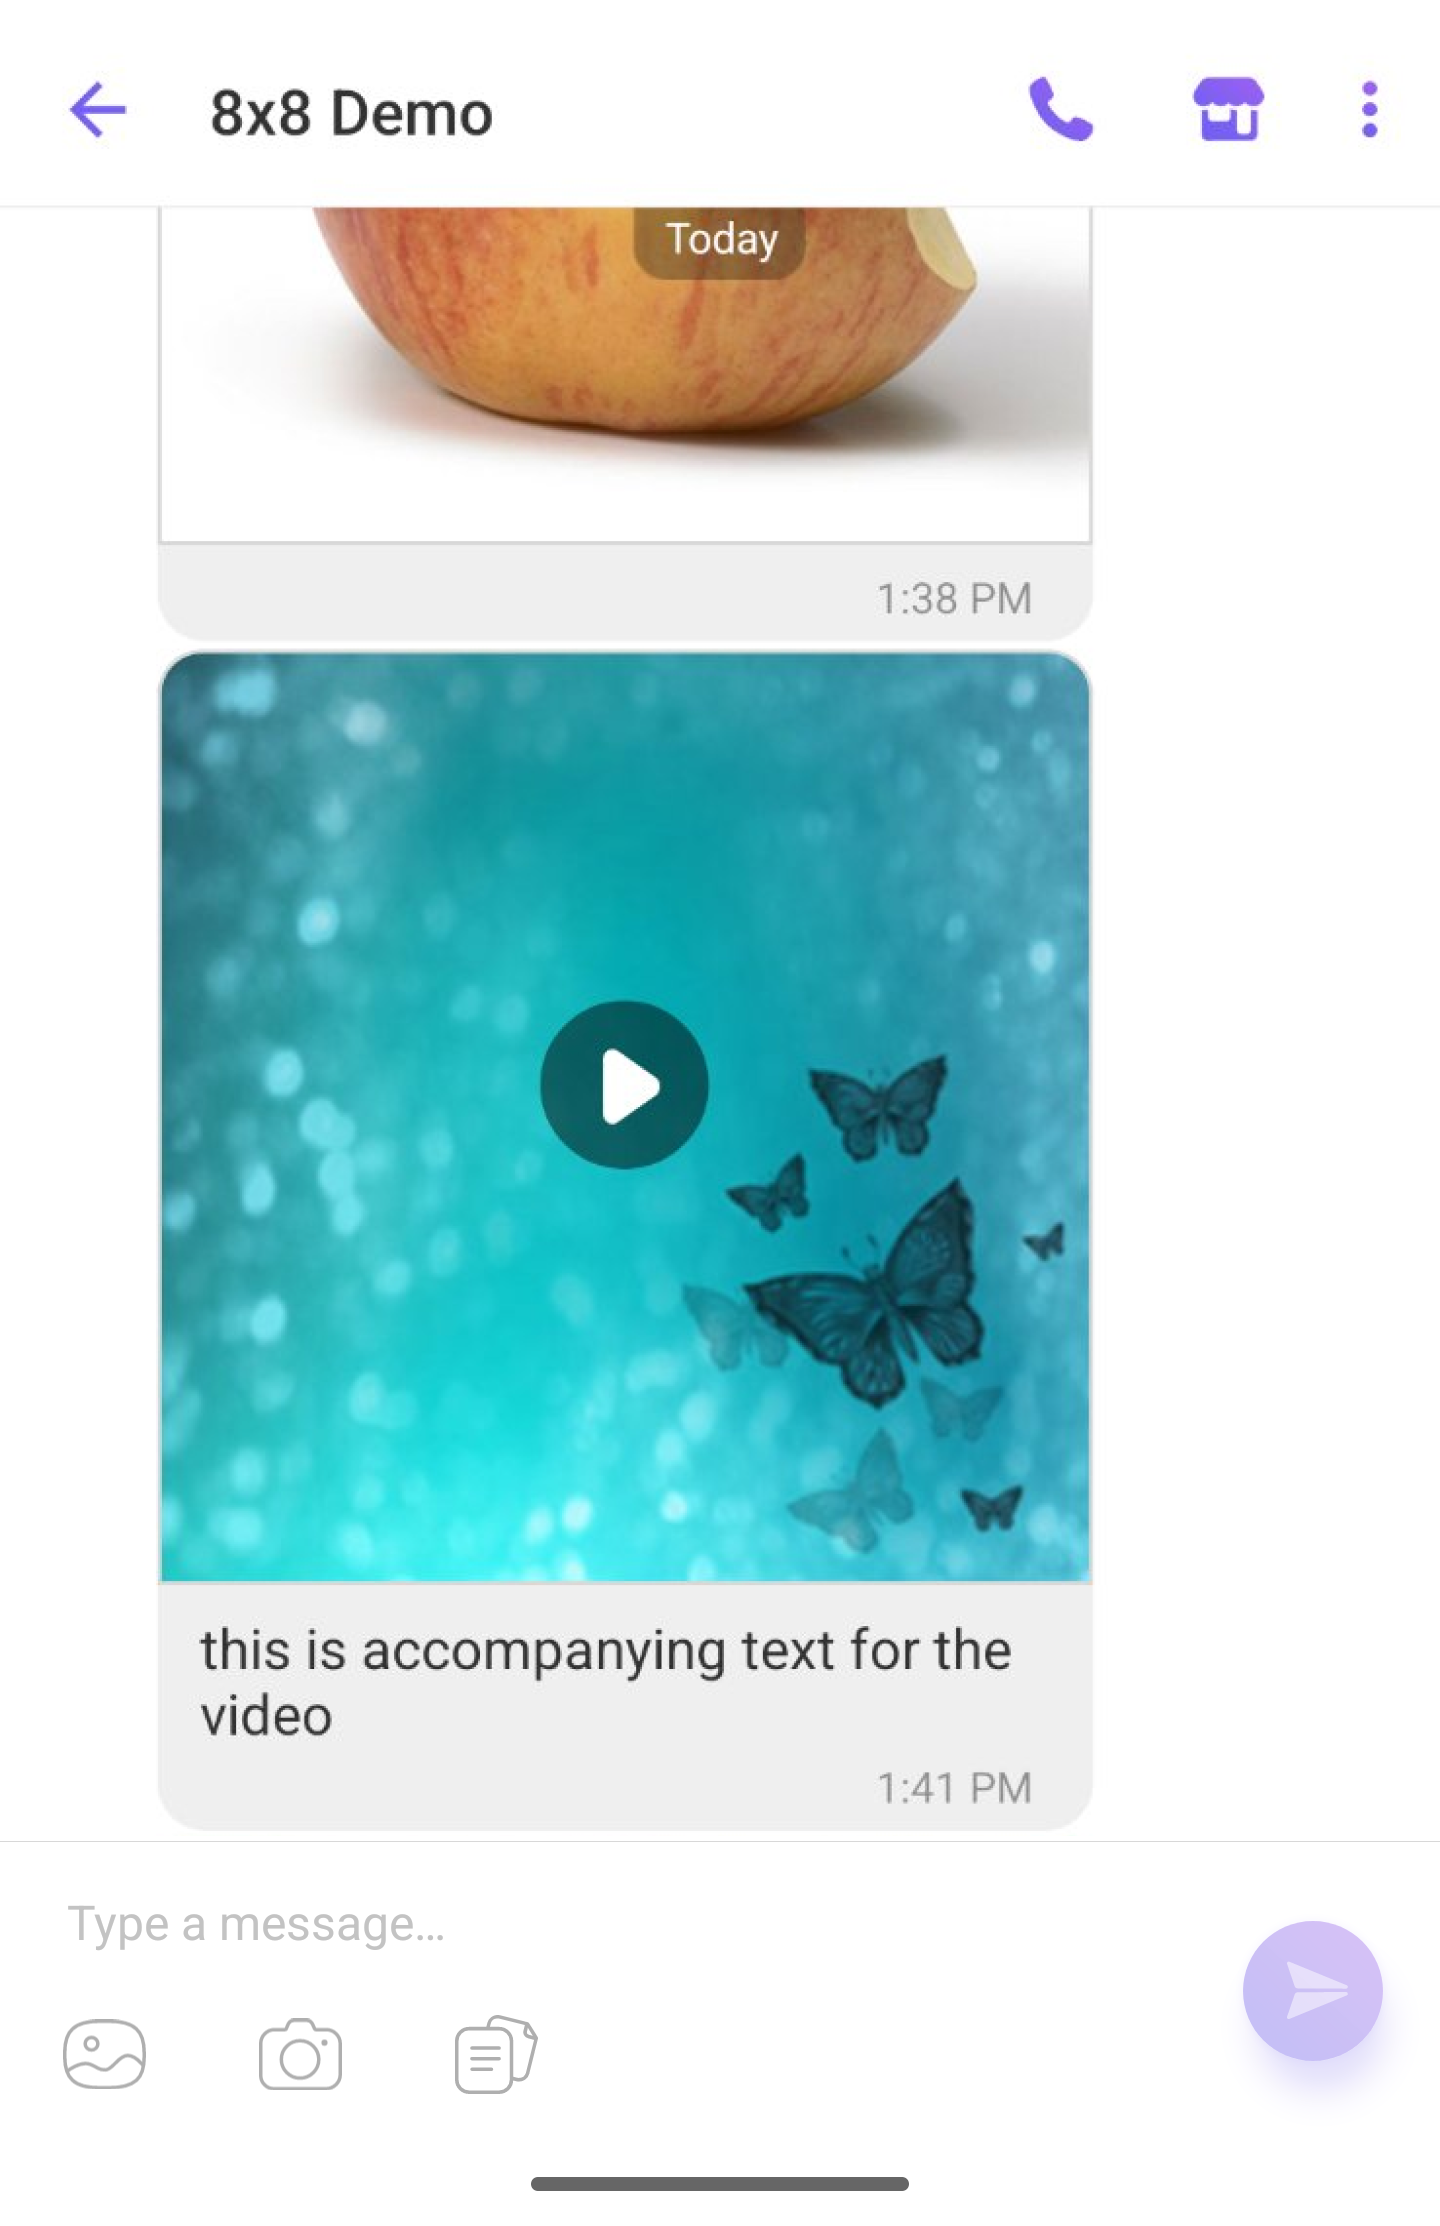 Viber Rich Media: Text + Video
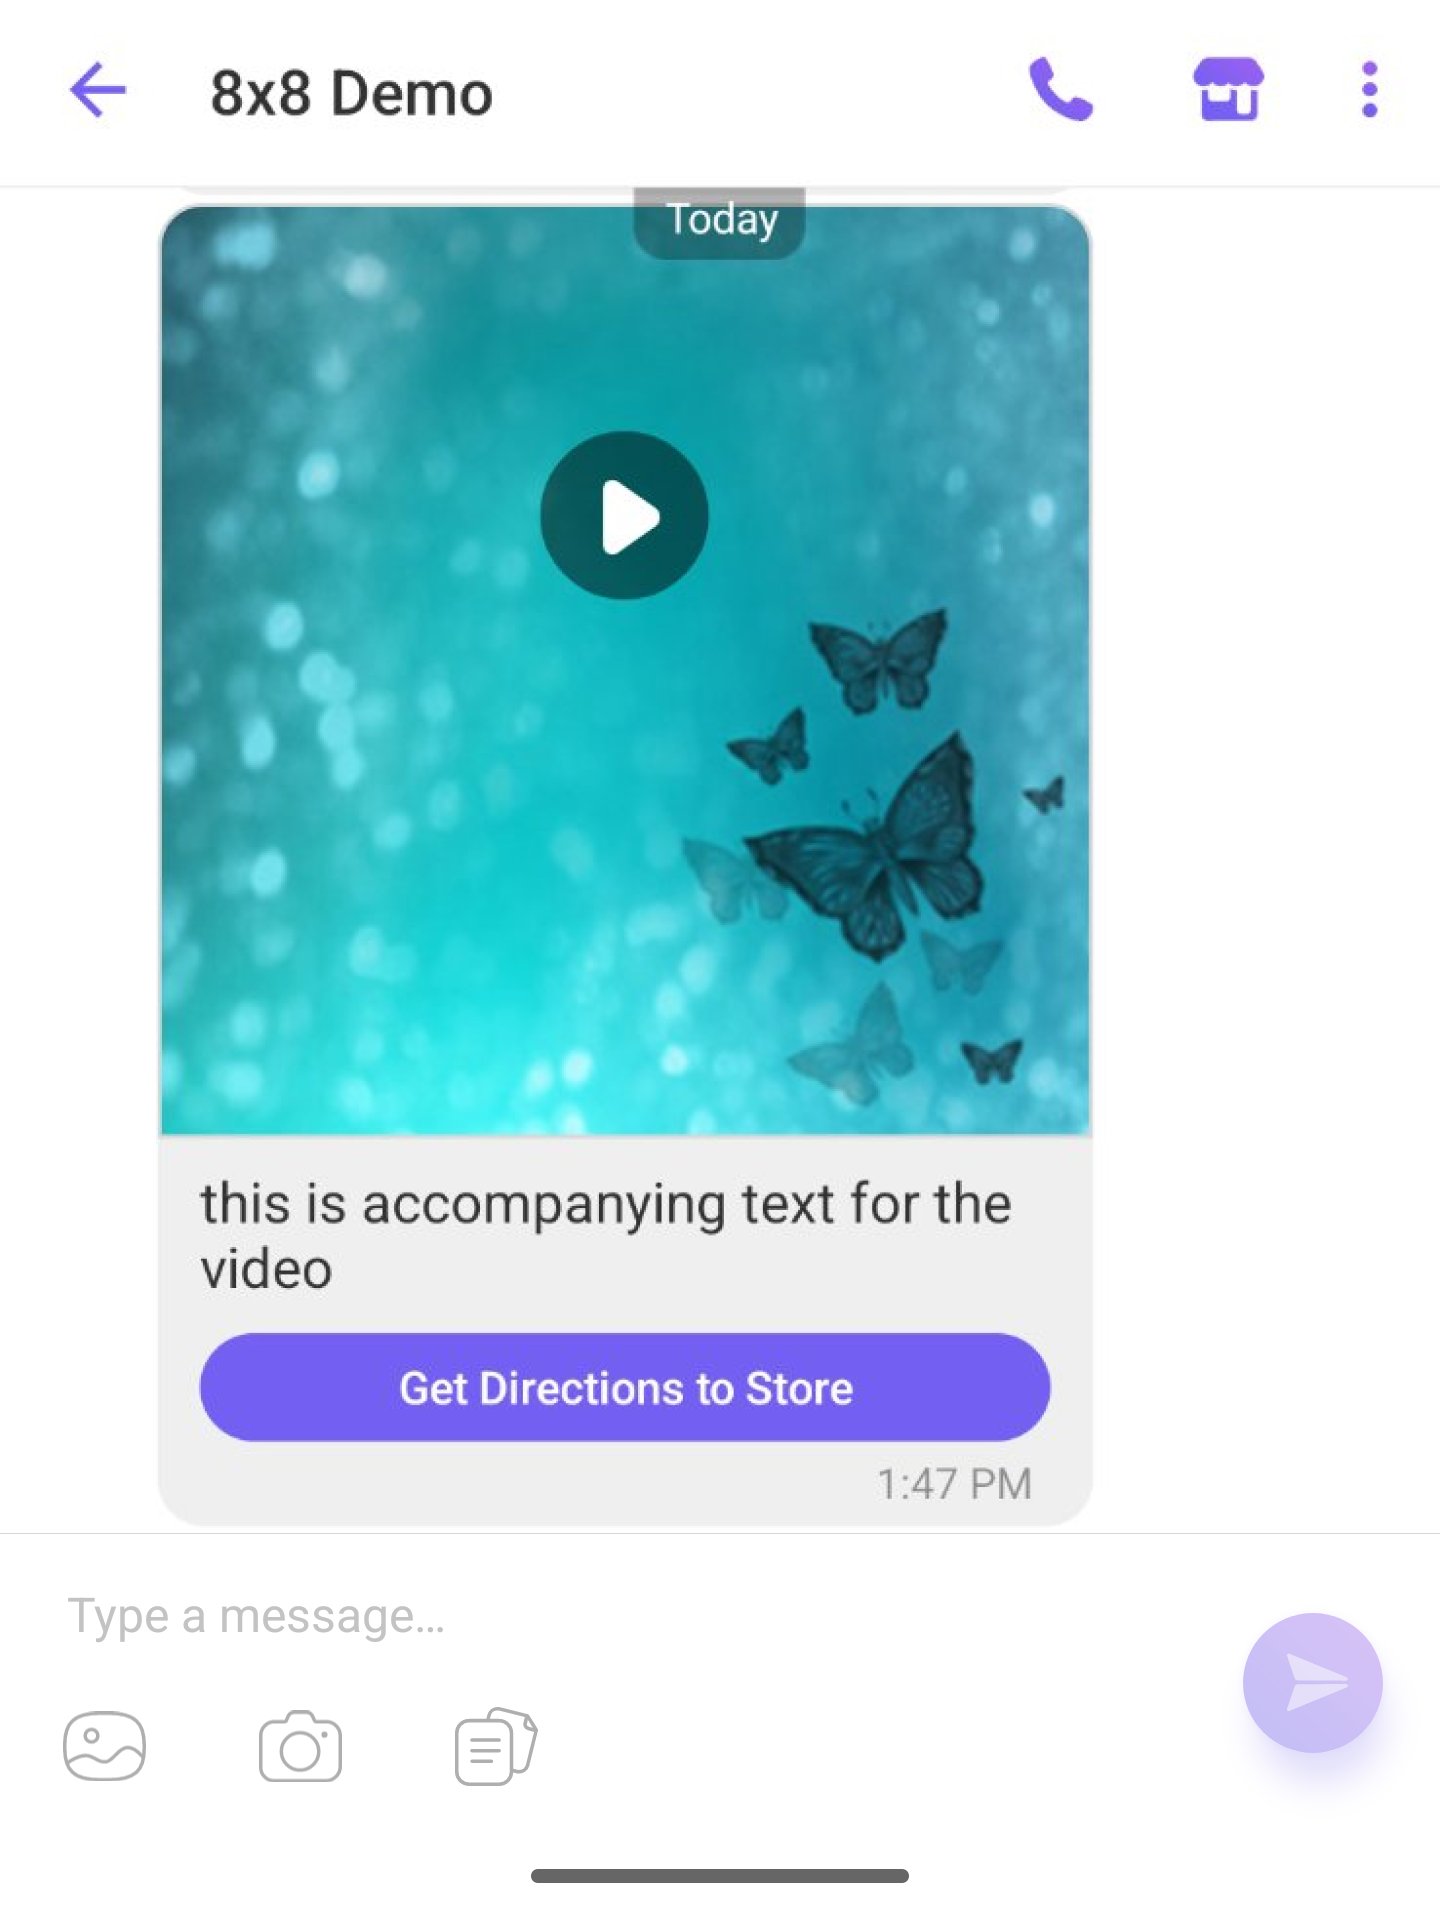 Viber Rich Media: Text + Video + Image
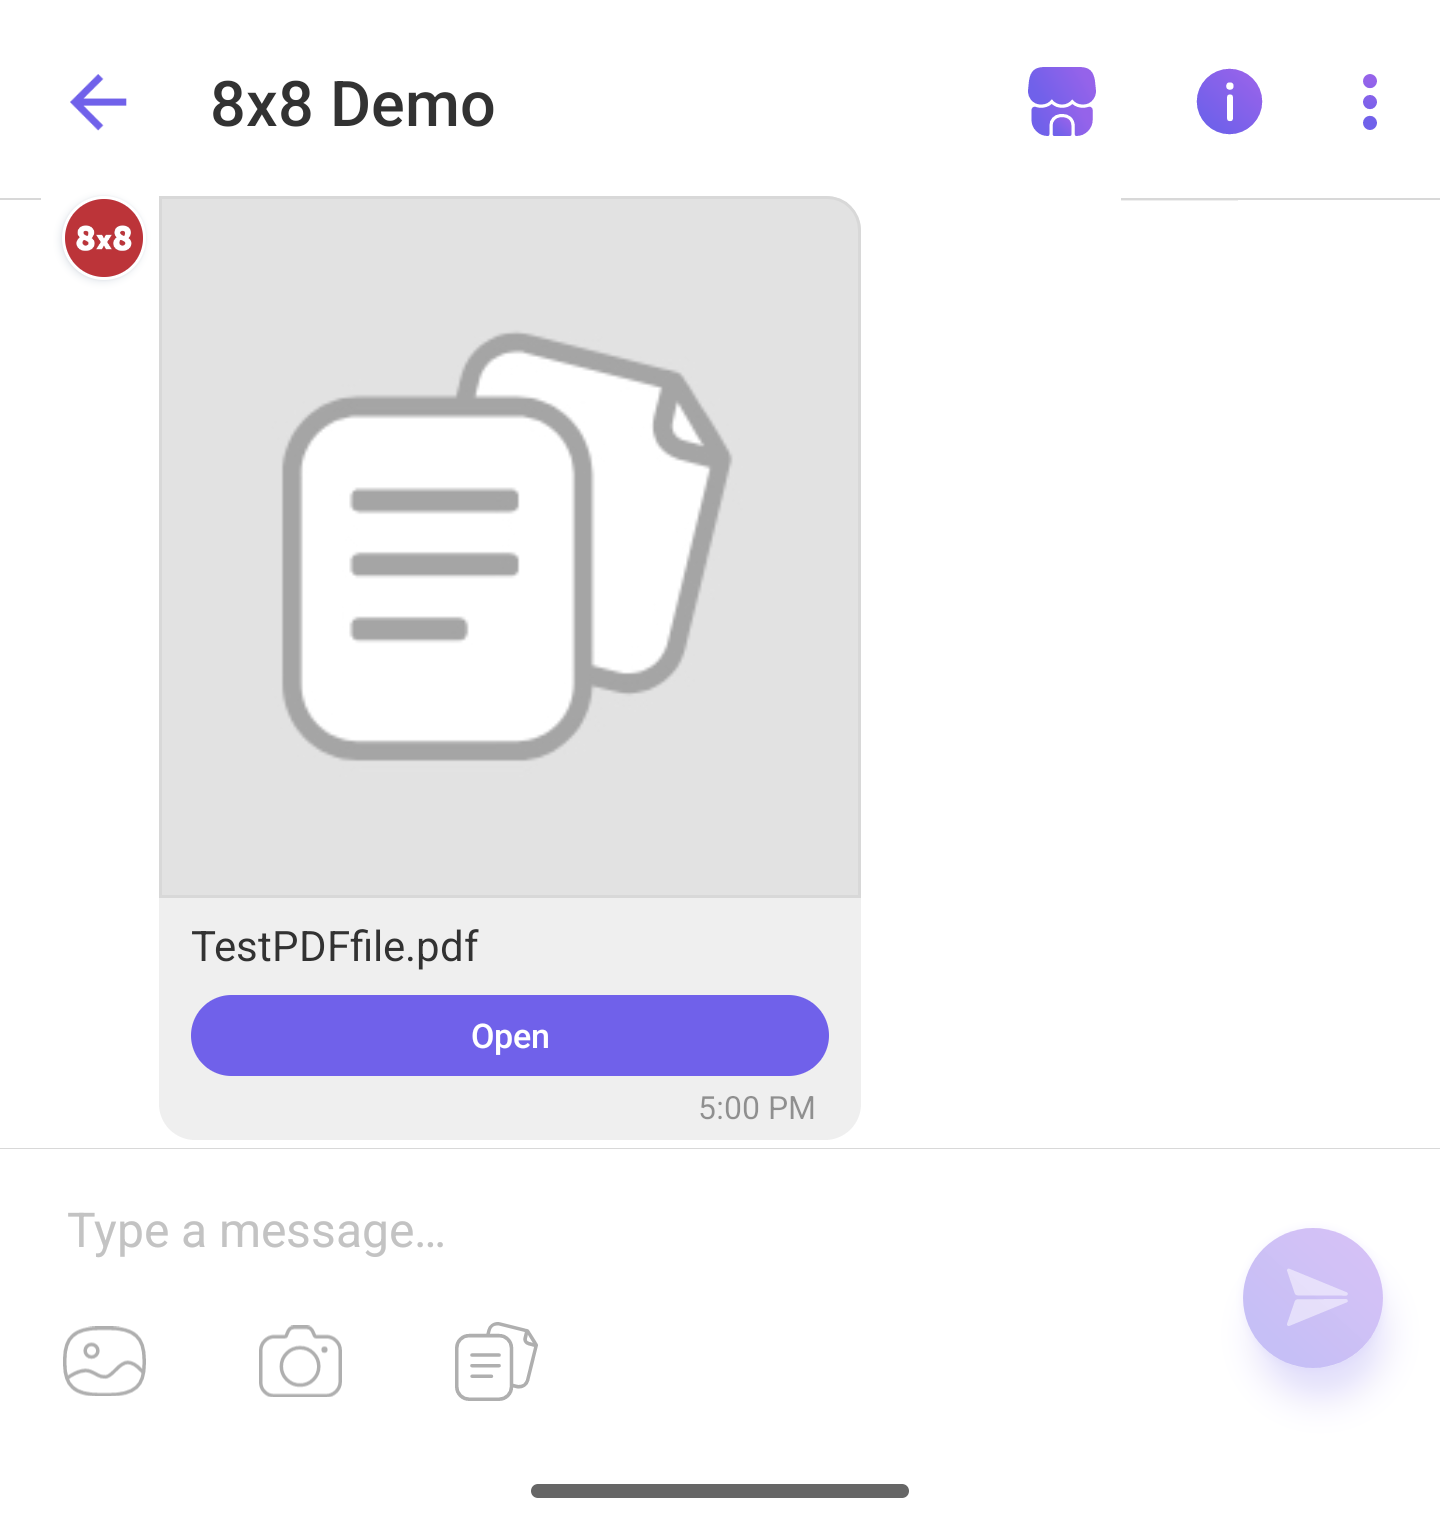 Viber Rich Media: File-only message
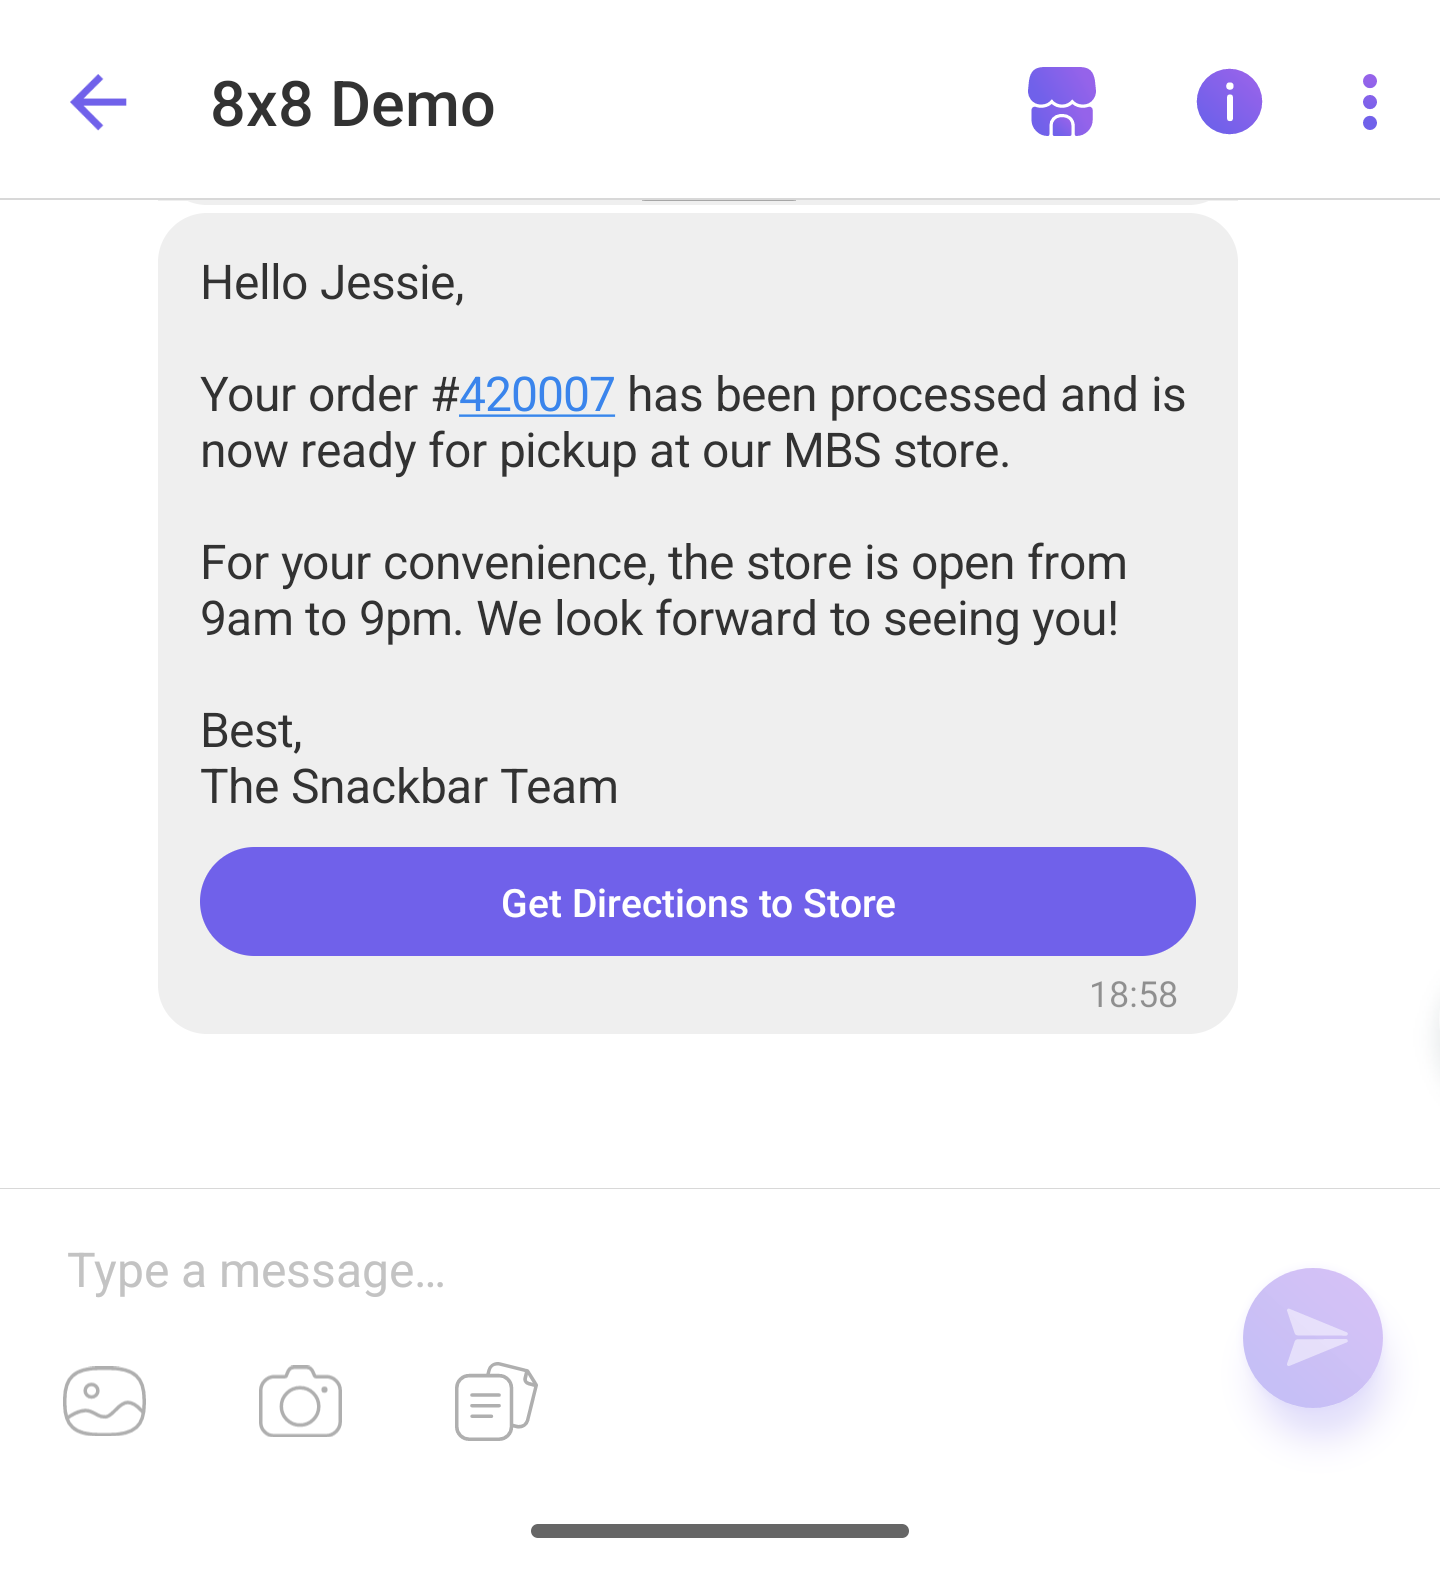 Viber Rich Media: text and call-to-action button
 Viber Rich Media message: Text and Image
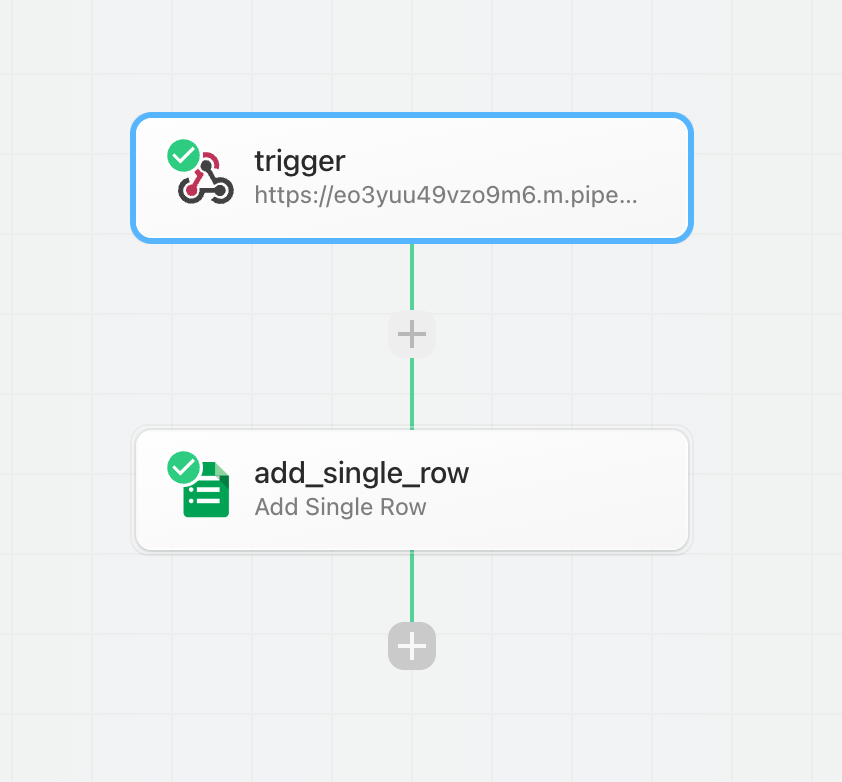
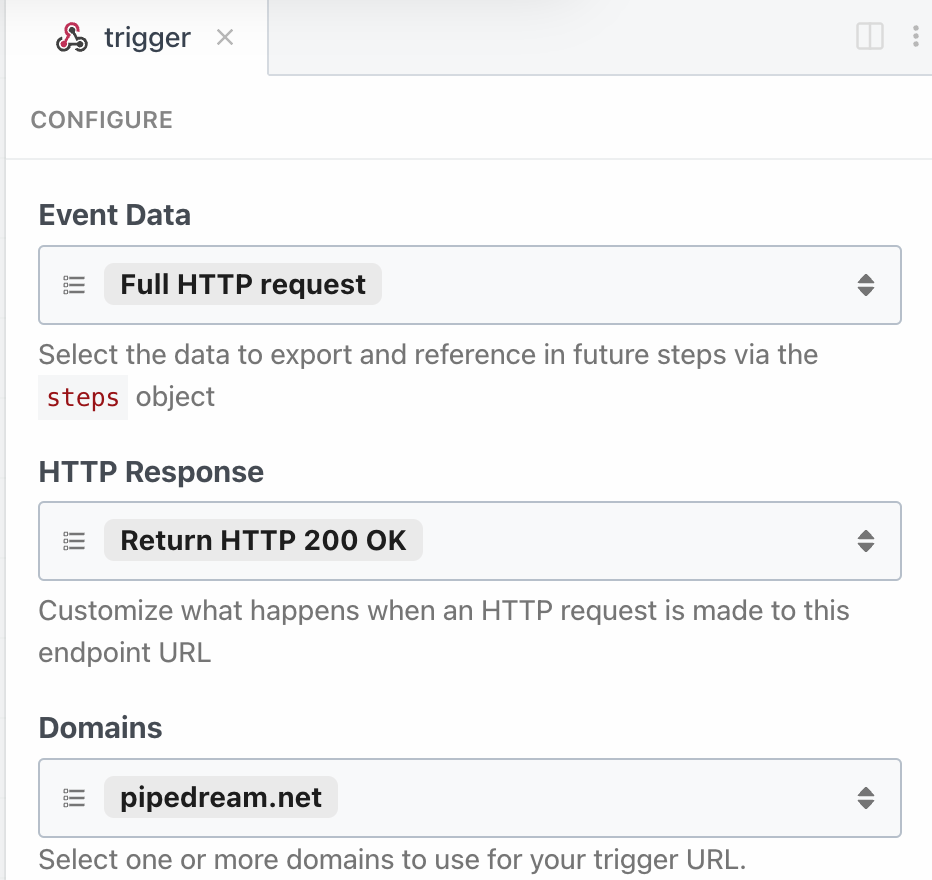
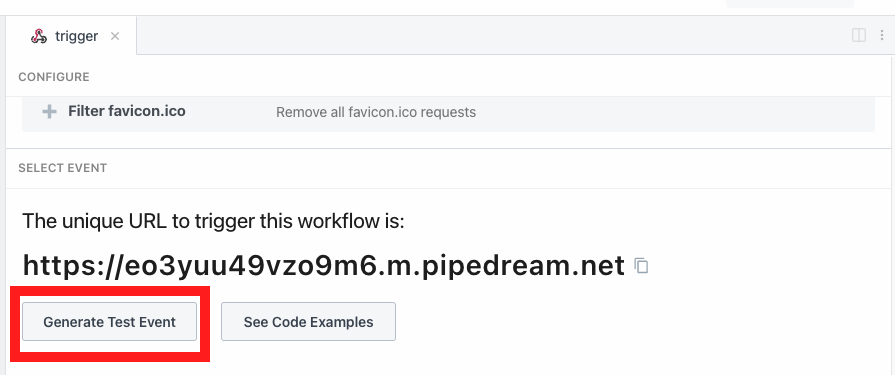
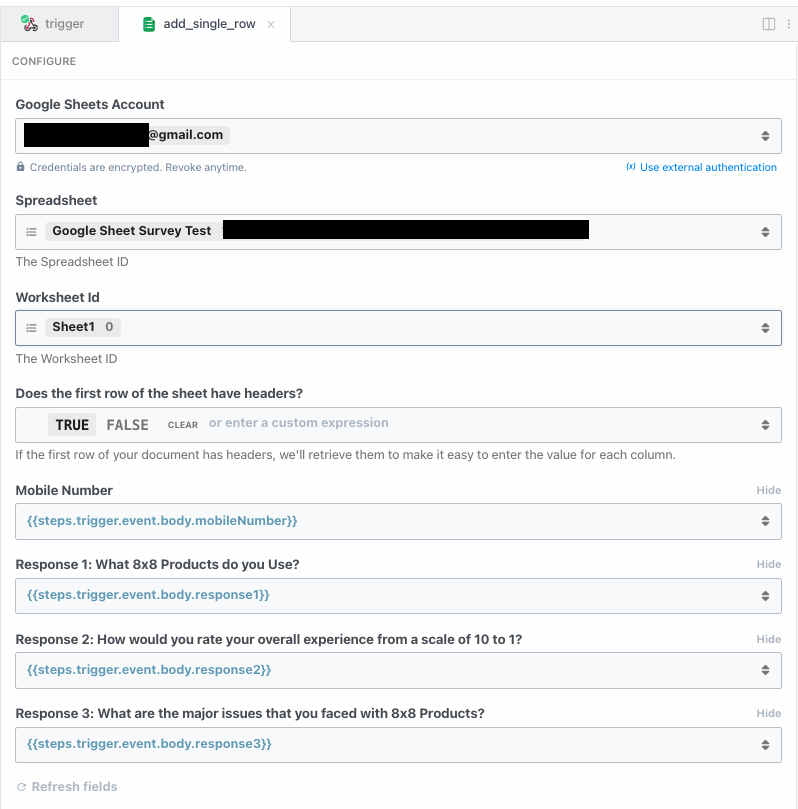
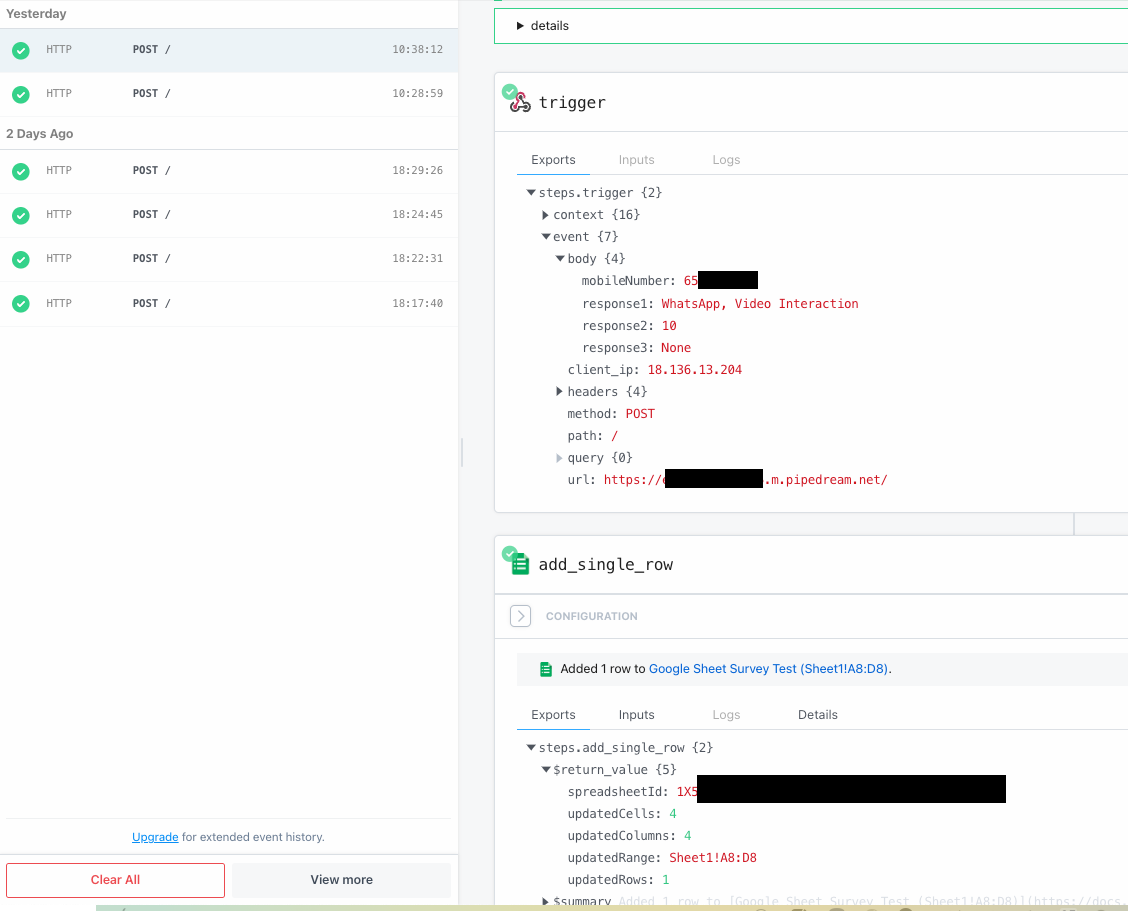
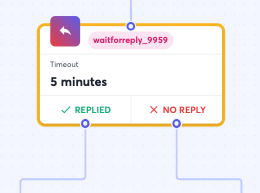
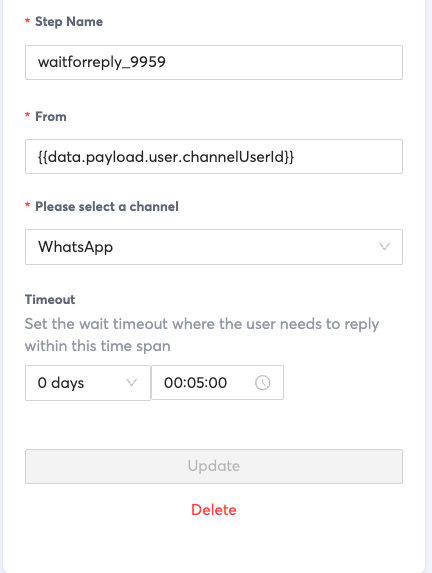
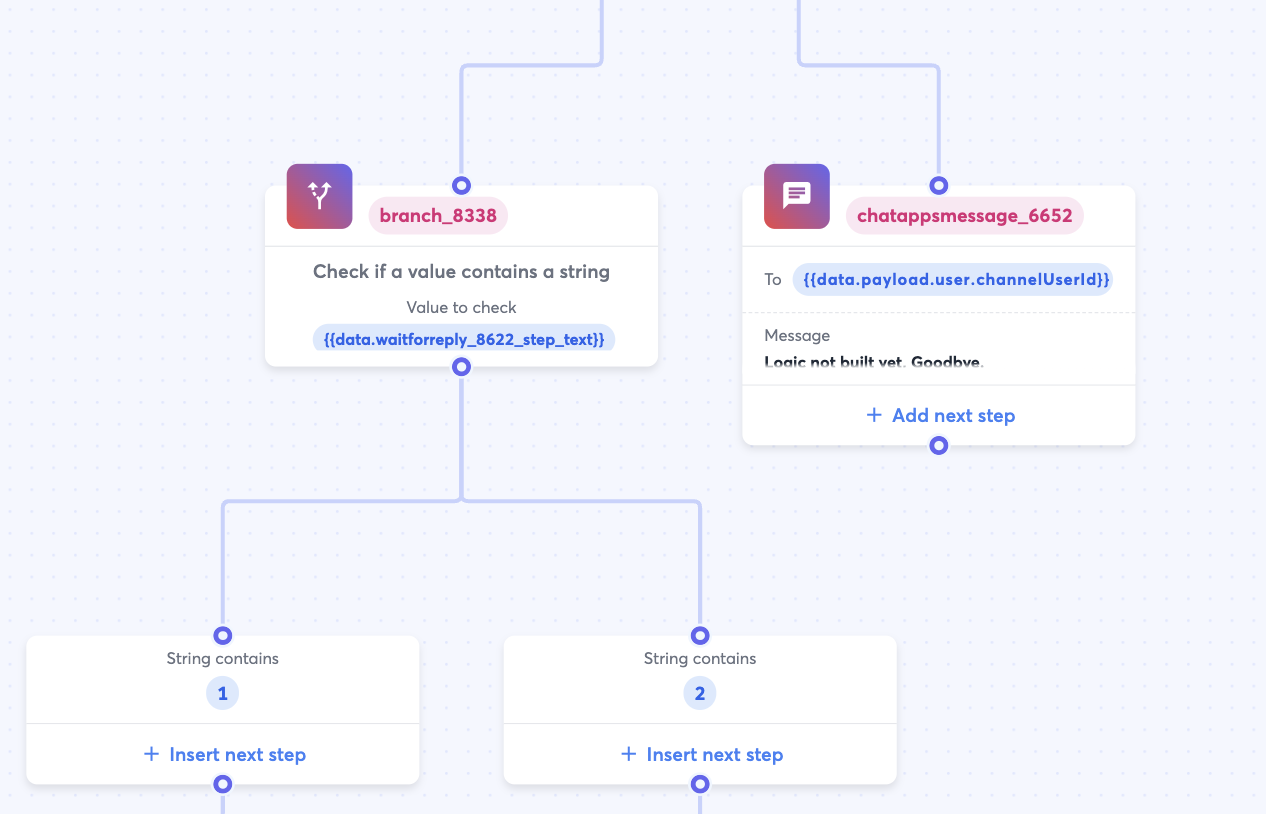
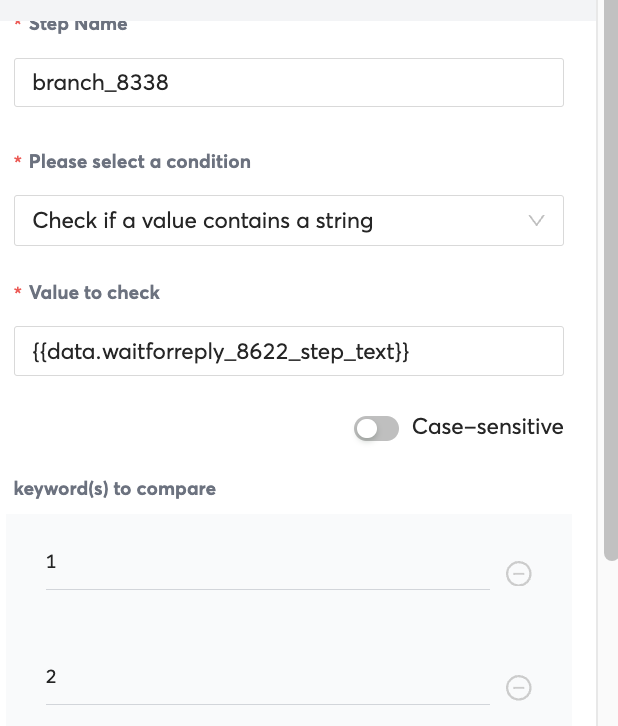
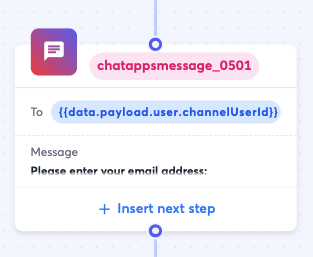
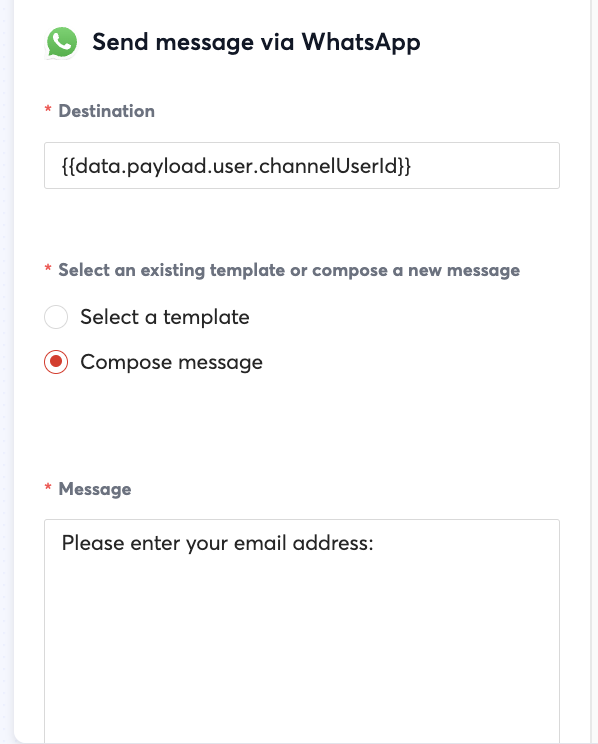
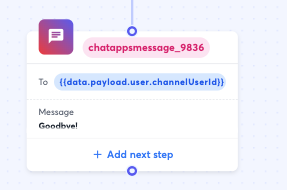
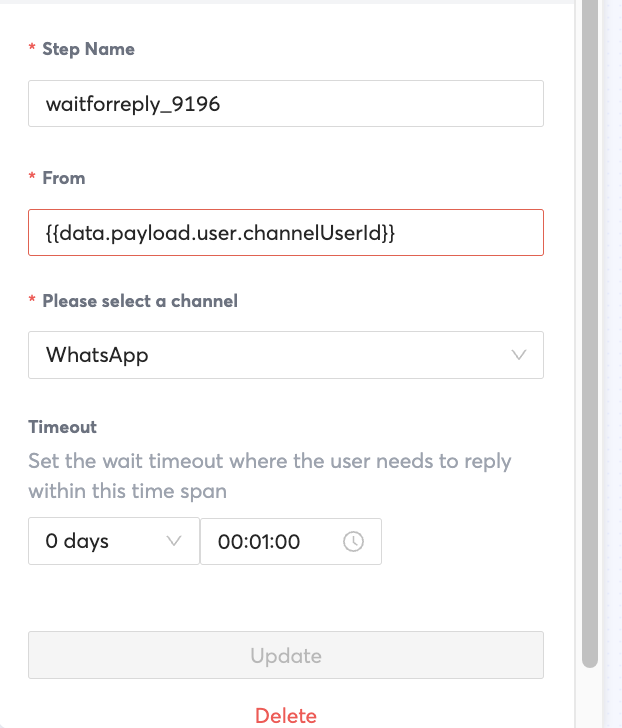
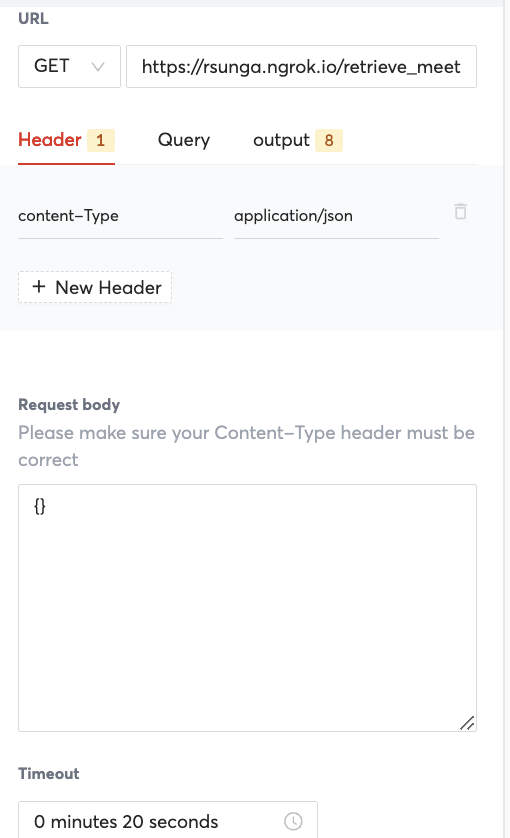
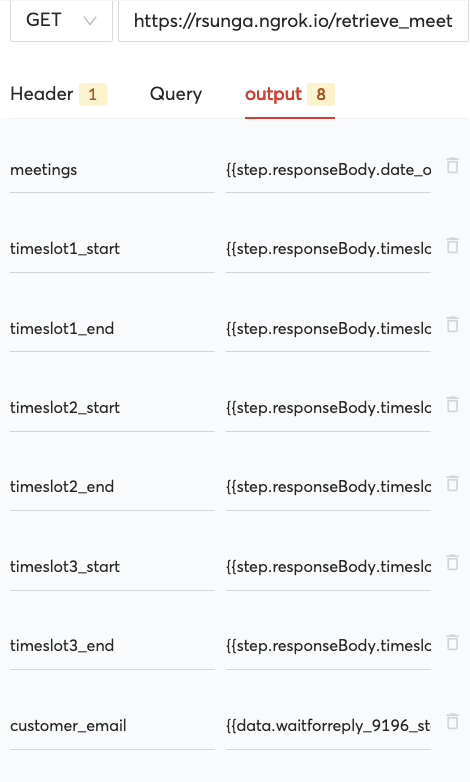
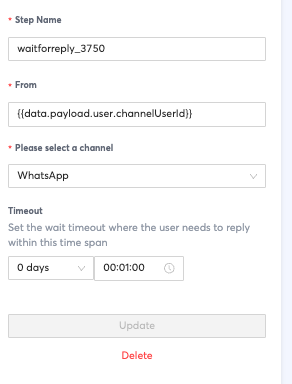
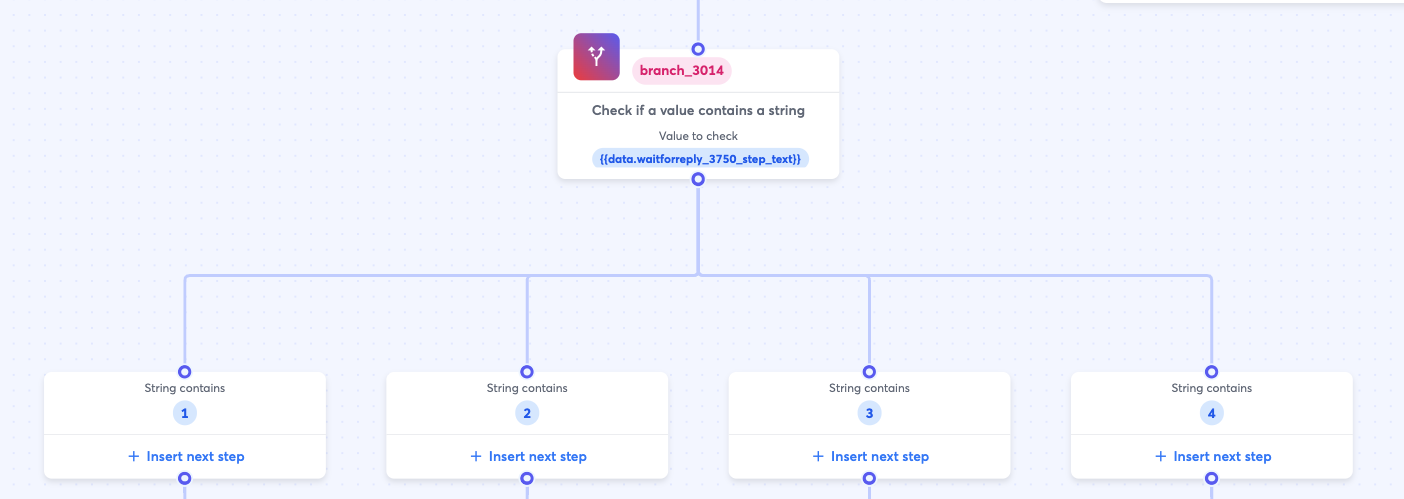
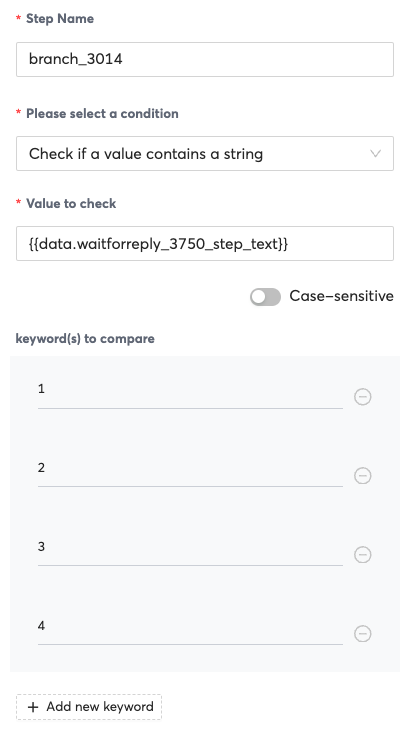
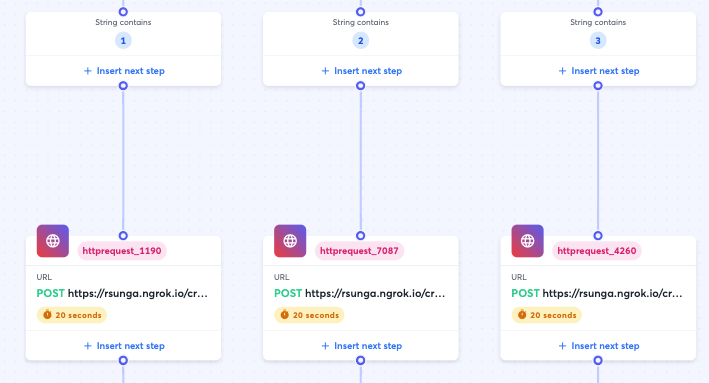
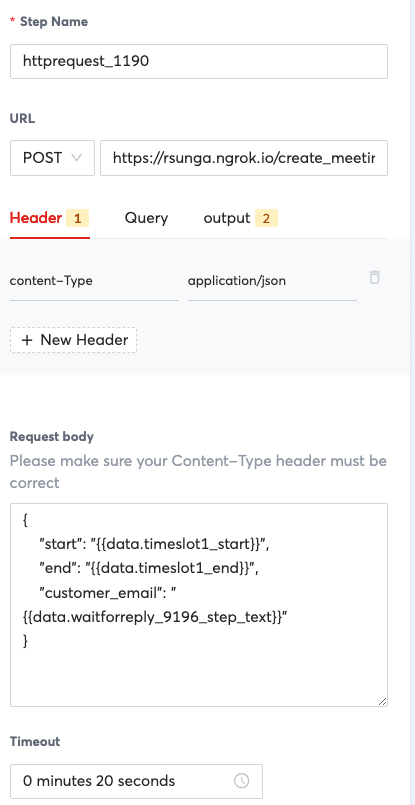
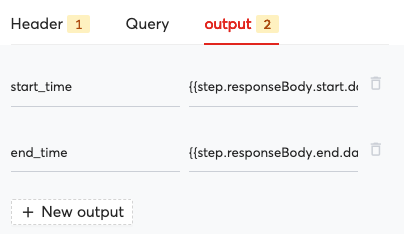
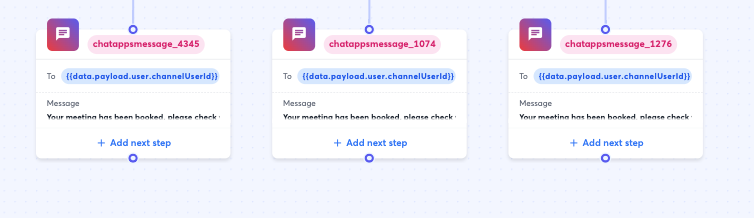
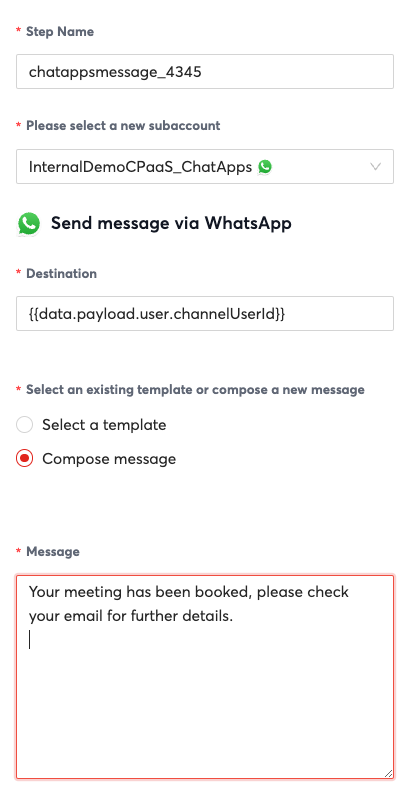
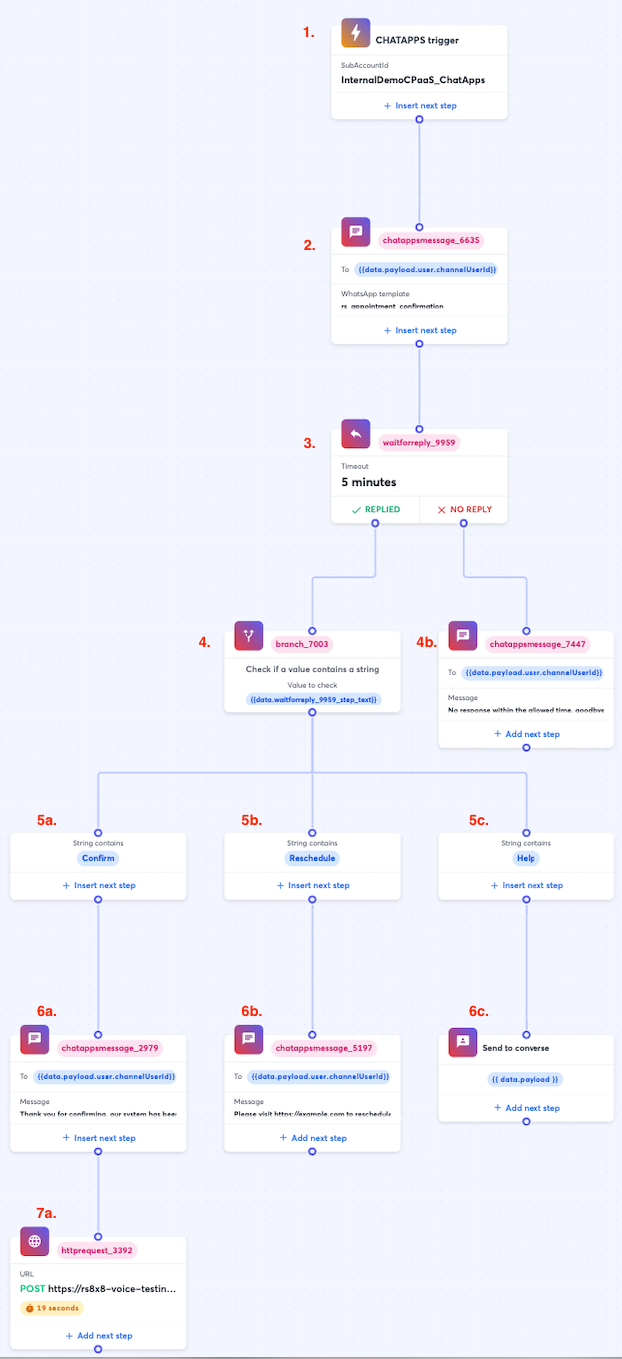
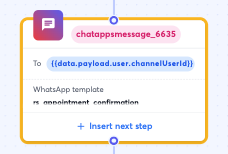
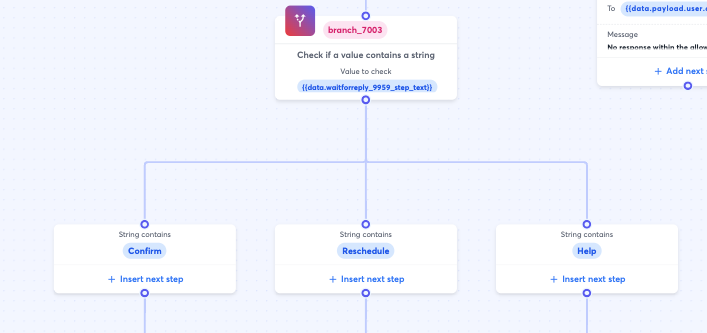
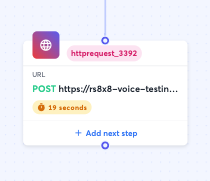
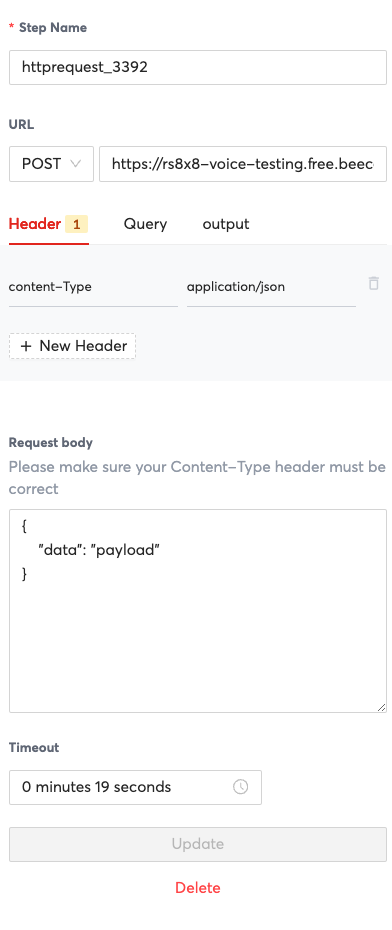
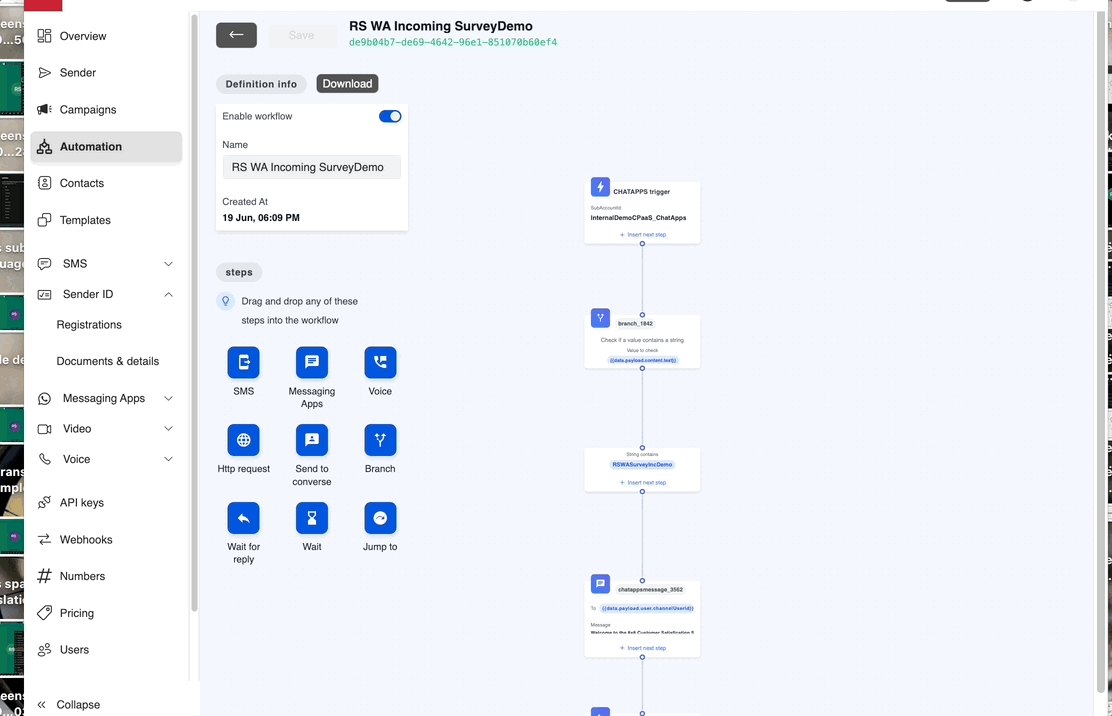 It is comprised of Messaging Apps, Branches, Wait for Replies and a single HTTP Request Step. If you choose to modify the flow you may also need to modify the request body to Pipedream at the end depending on the questions that you ask.
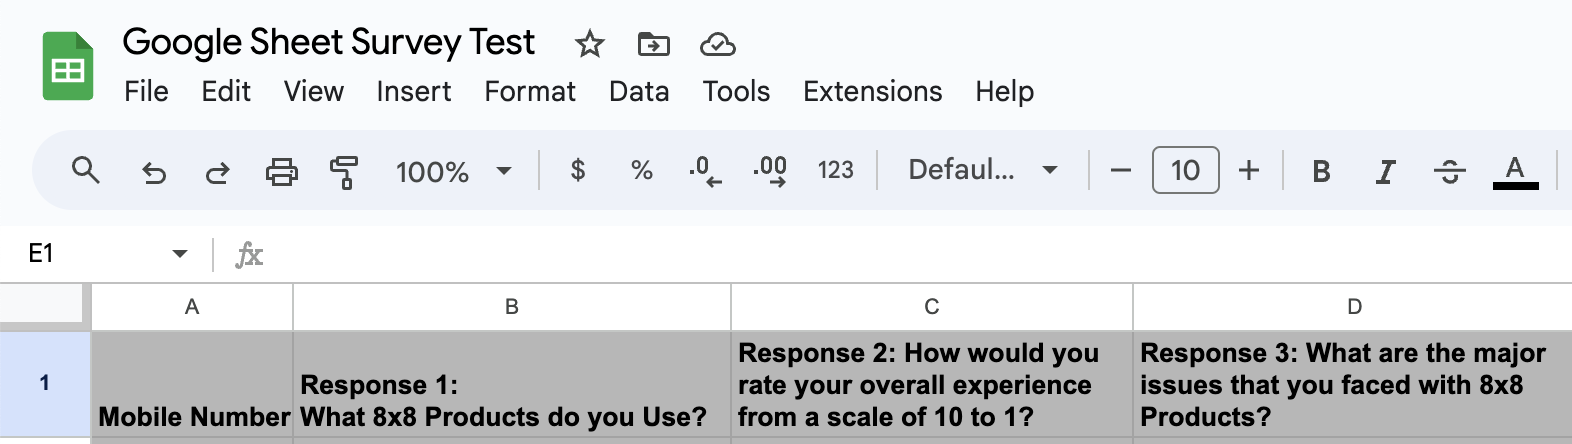


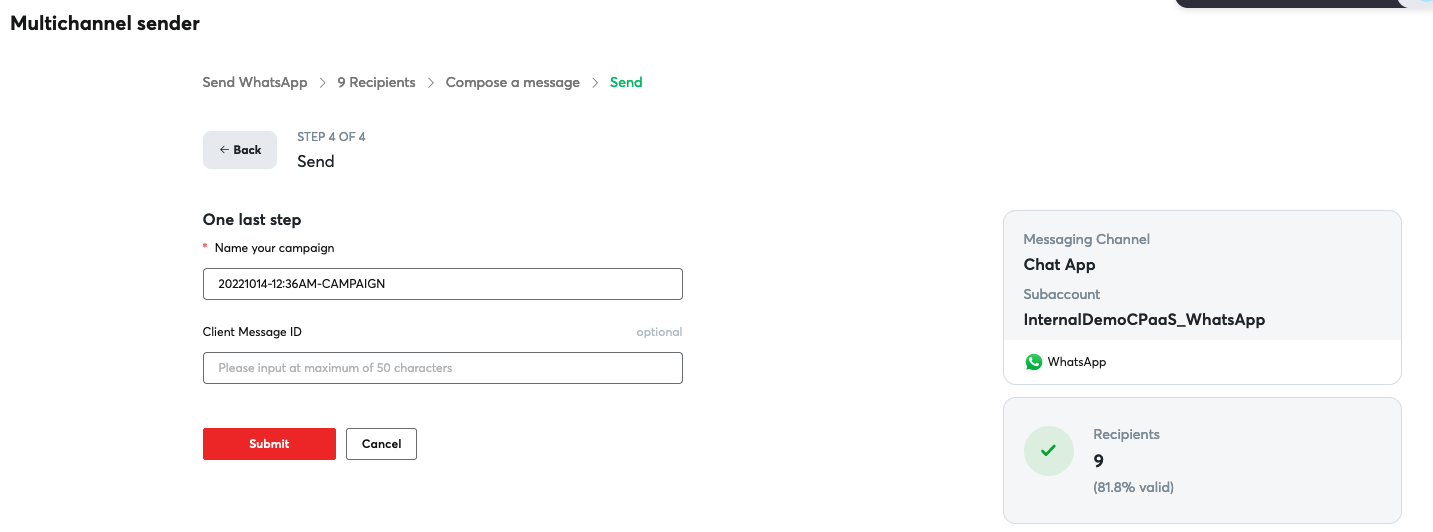
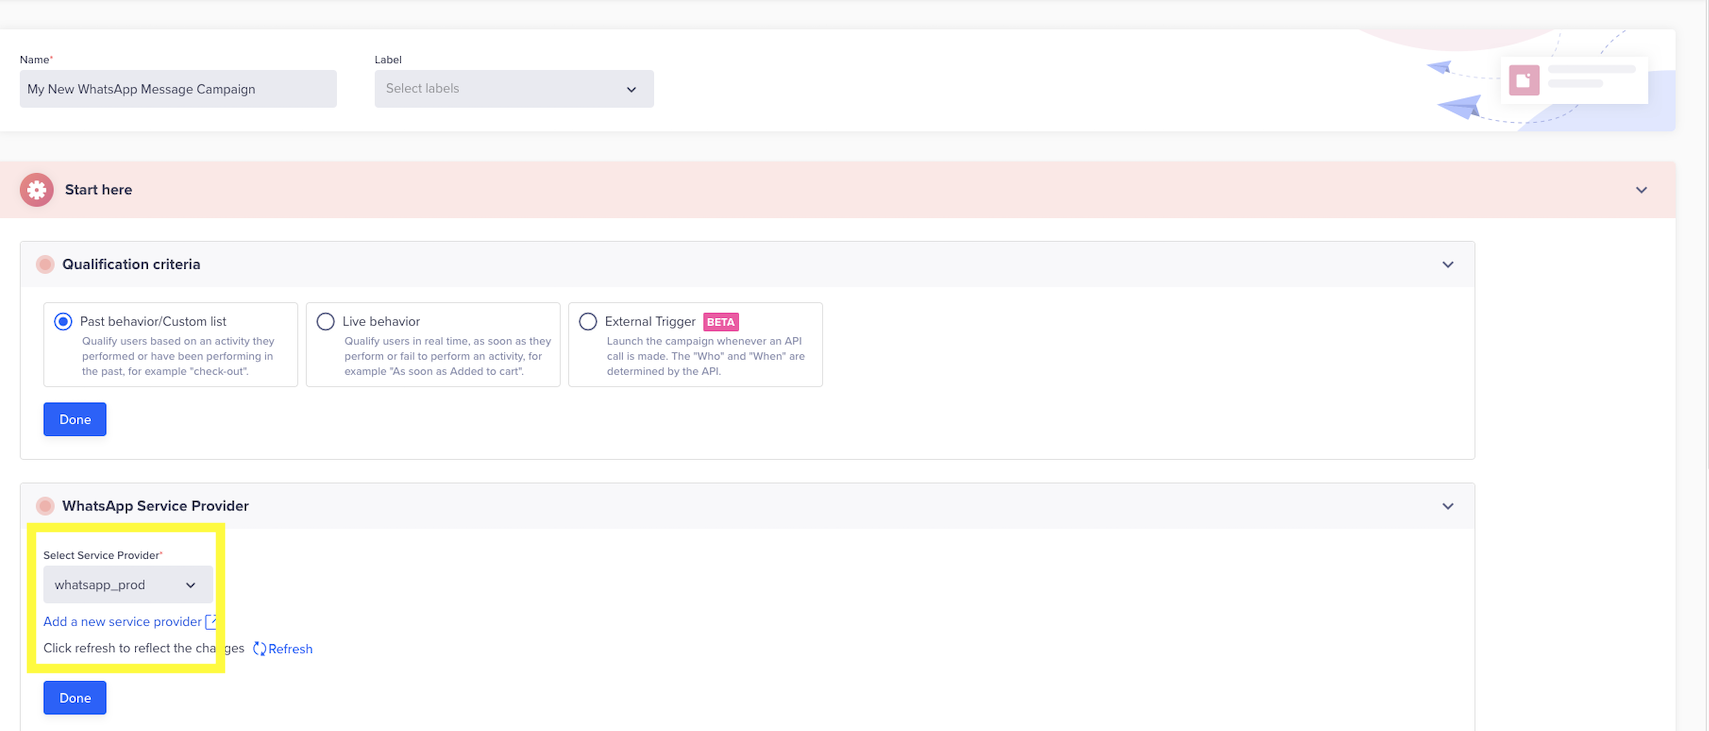
 Whatsapp Sender Configuration on MoEngage
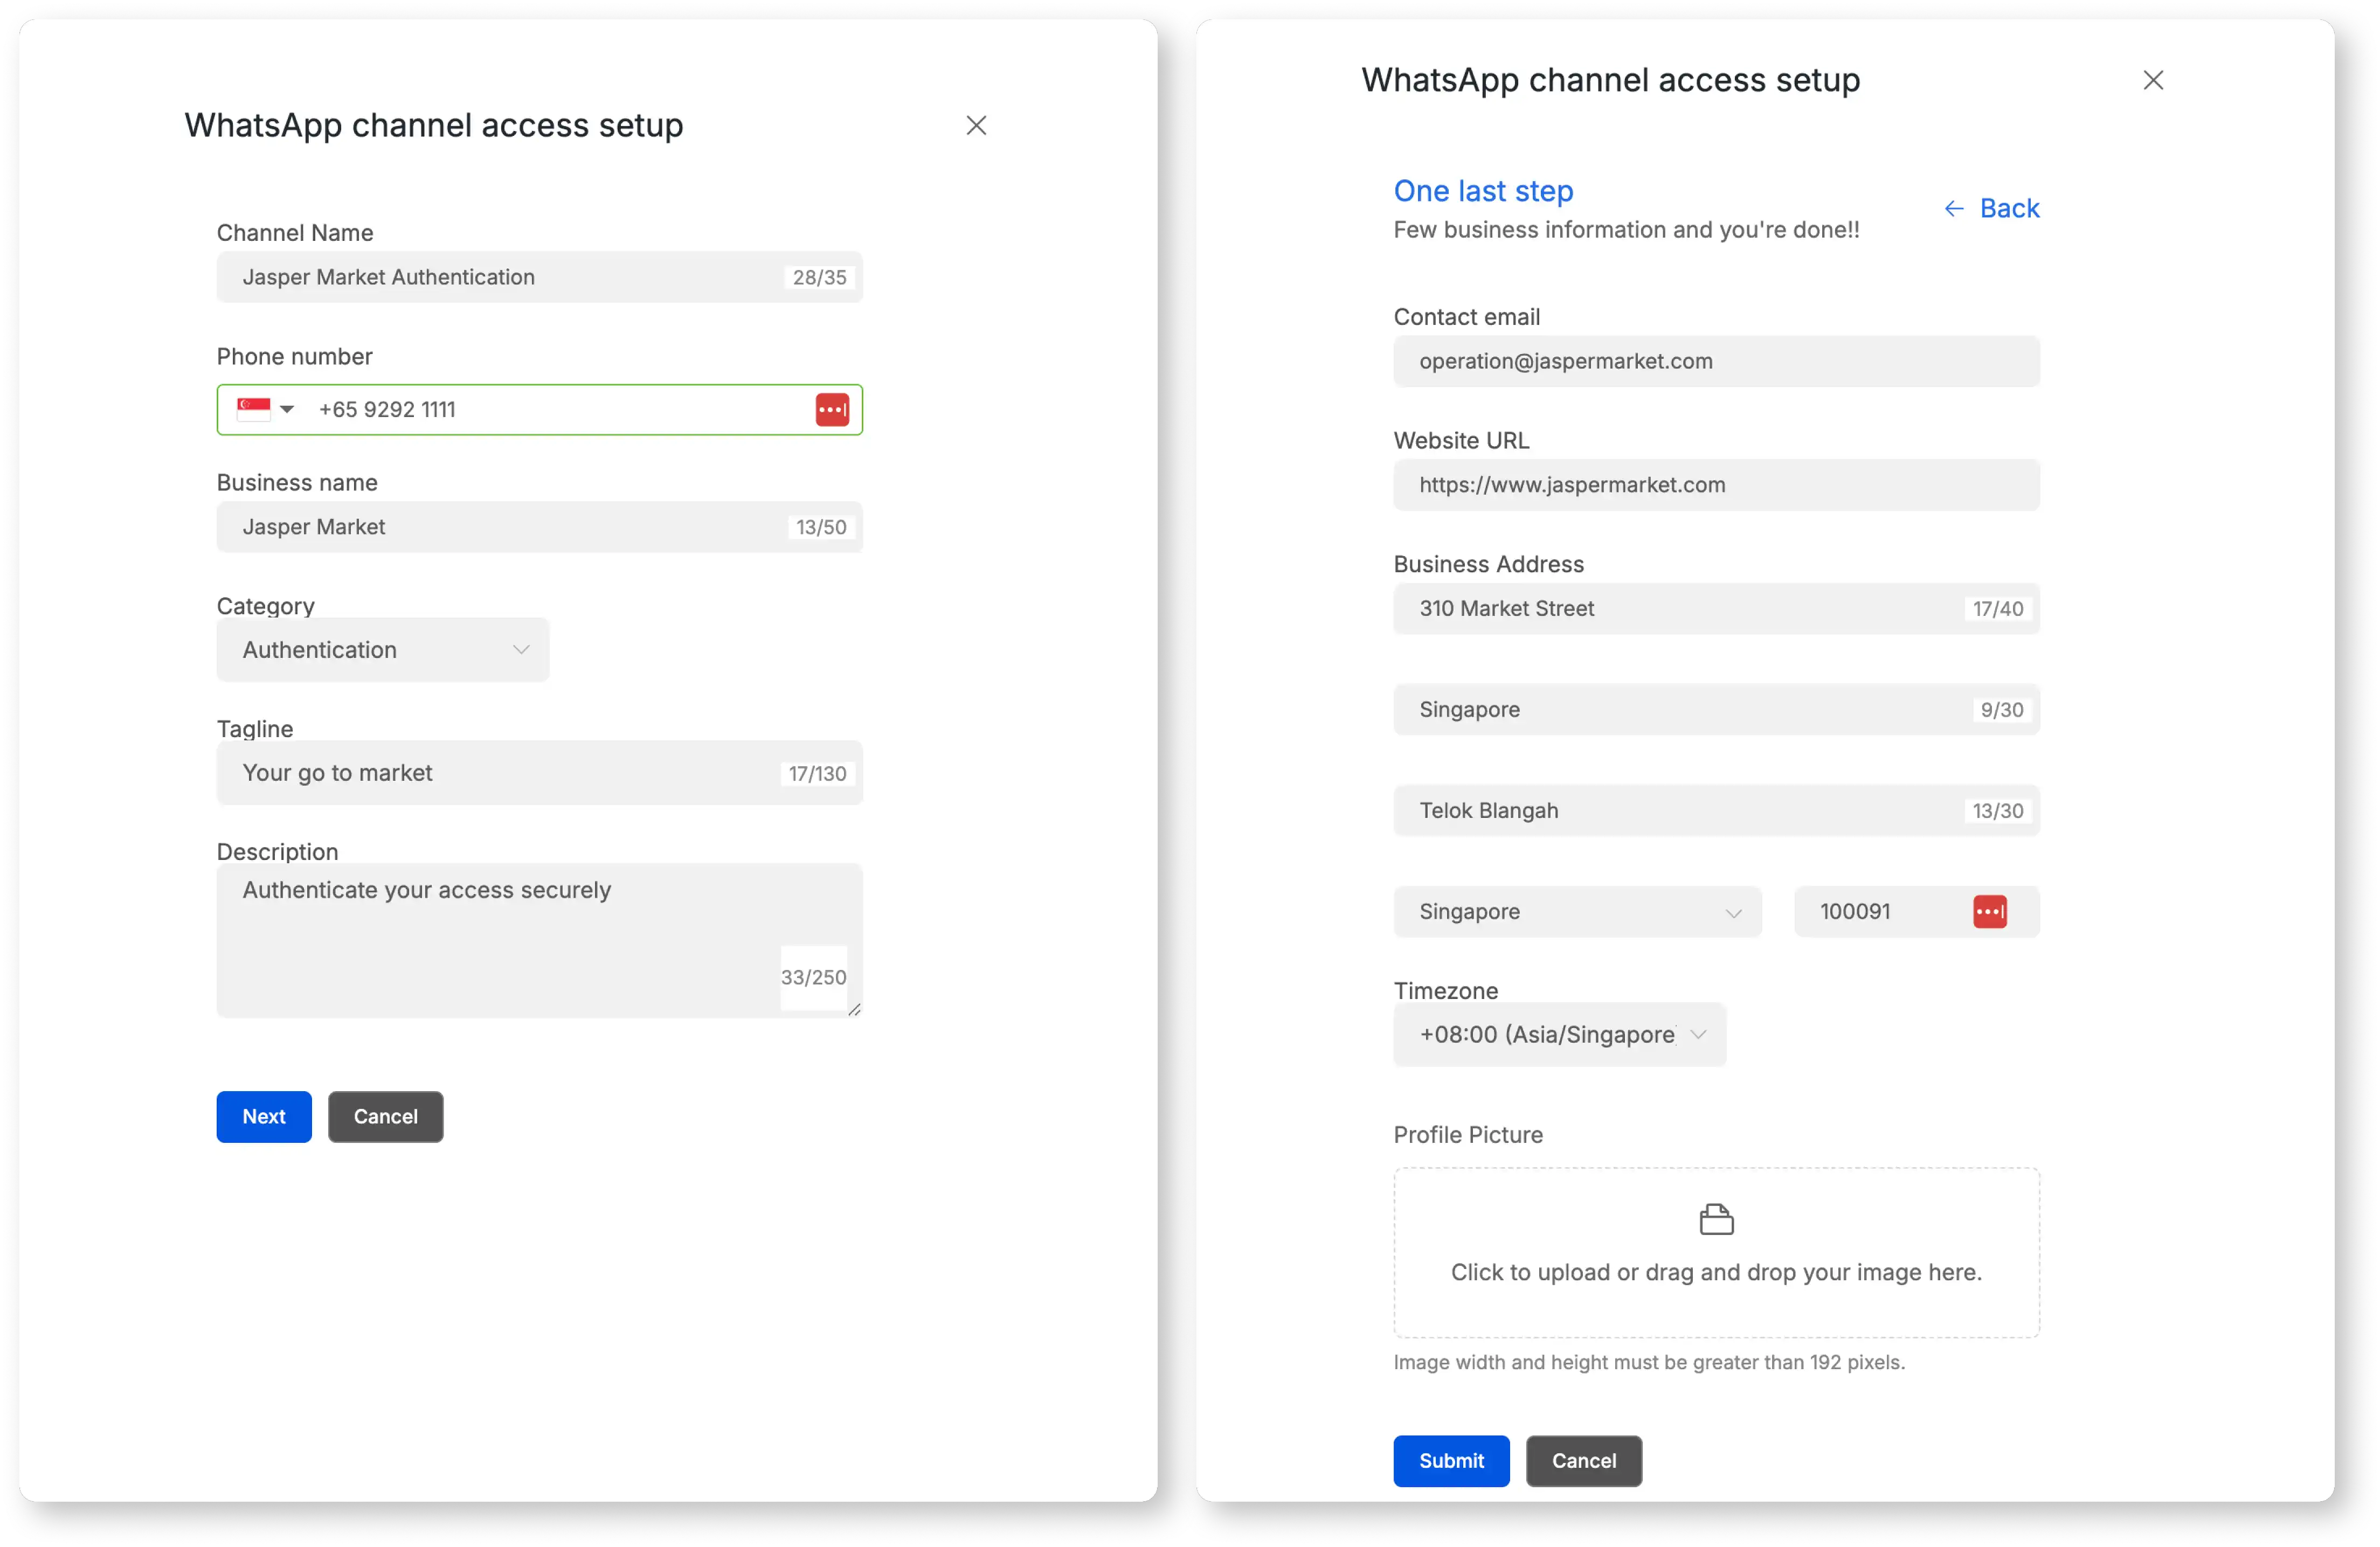
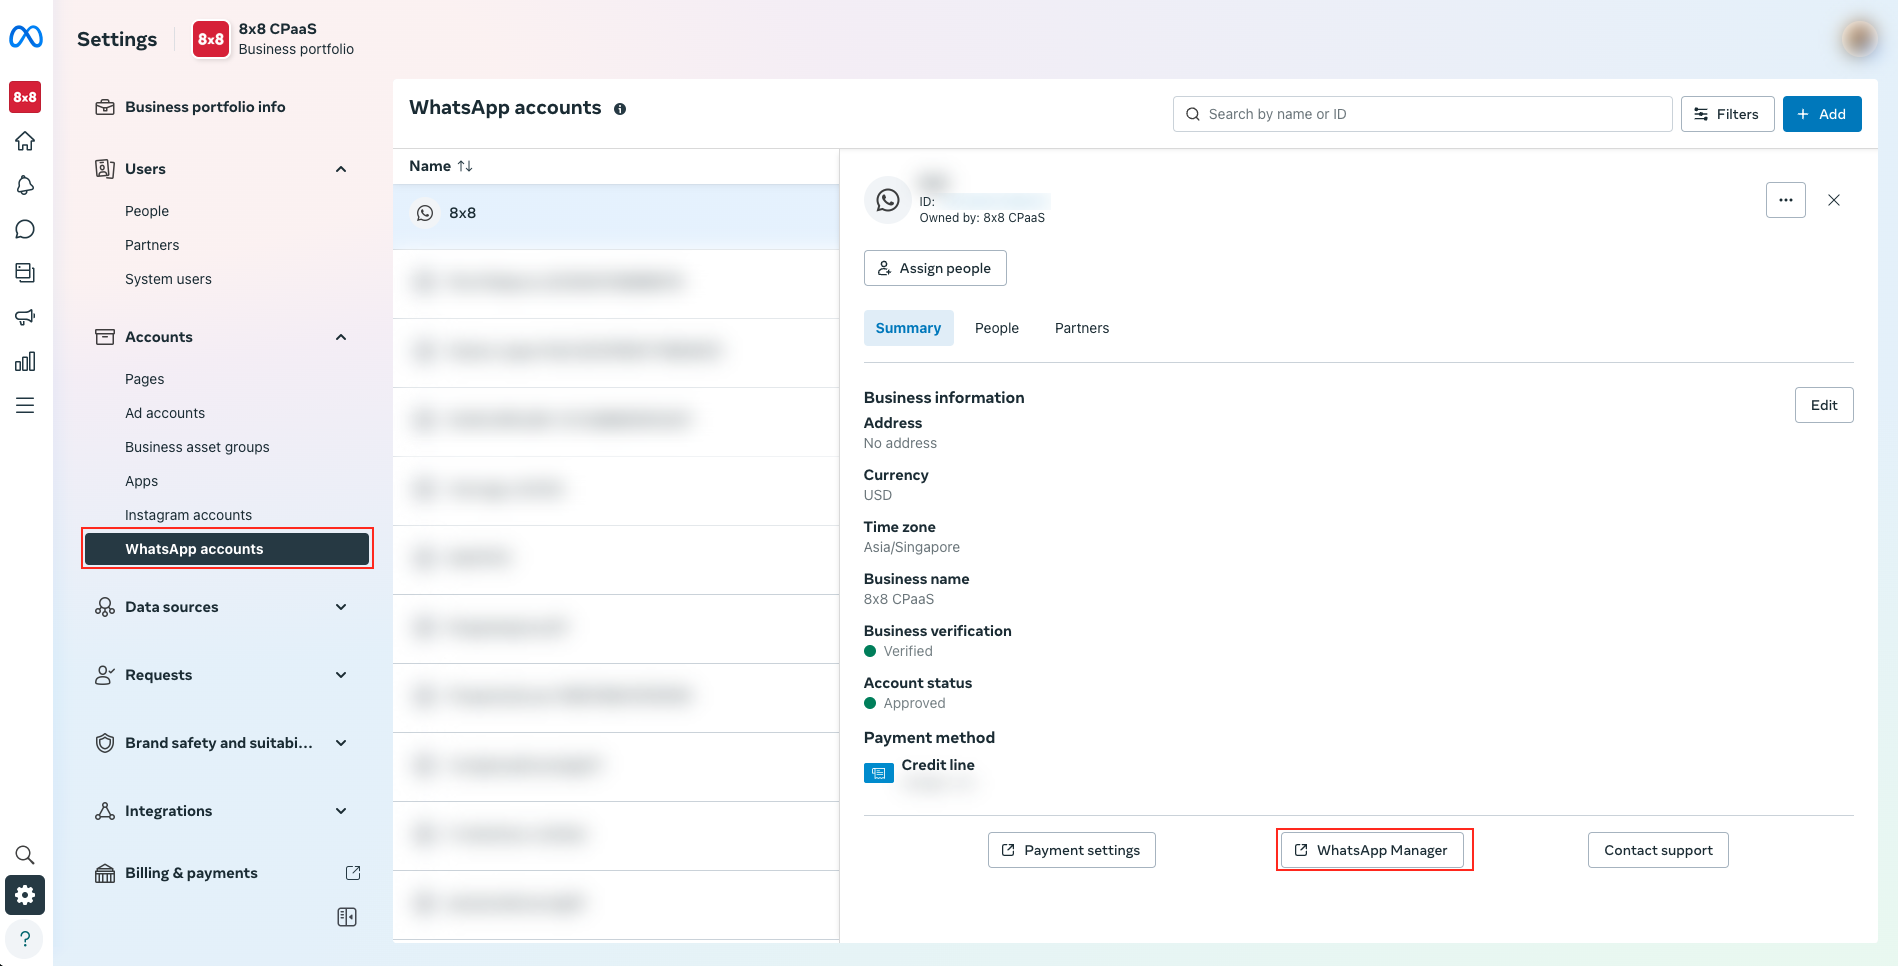 3. Click the WhatsApp Manager button, usually located on the right side of the screen.
4. In the WhatsApp Manager interface, select Message templates from the left-hand navigation panel.
3. Click the WhatsApp Manager button, usually located on the right side of the screen.
4. In the WhatsApp Manager interface, select Message templates from the left-hand navigation panel.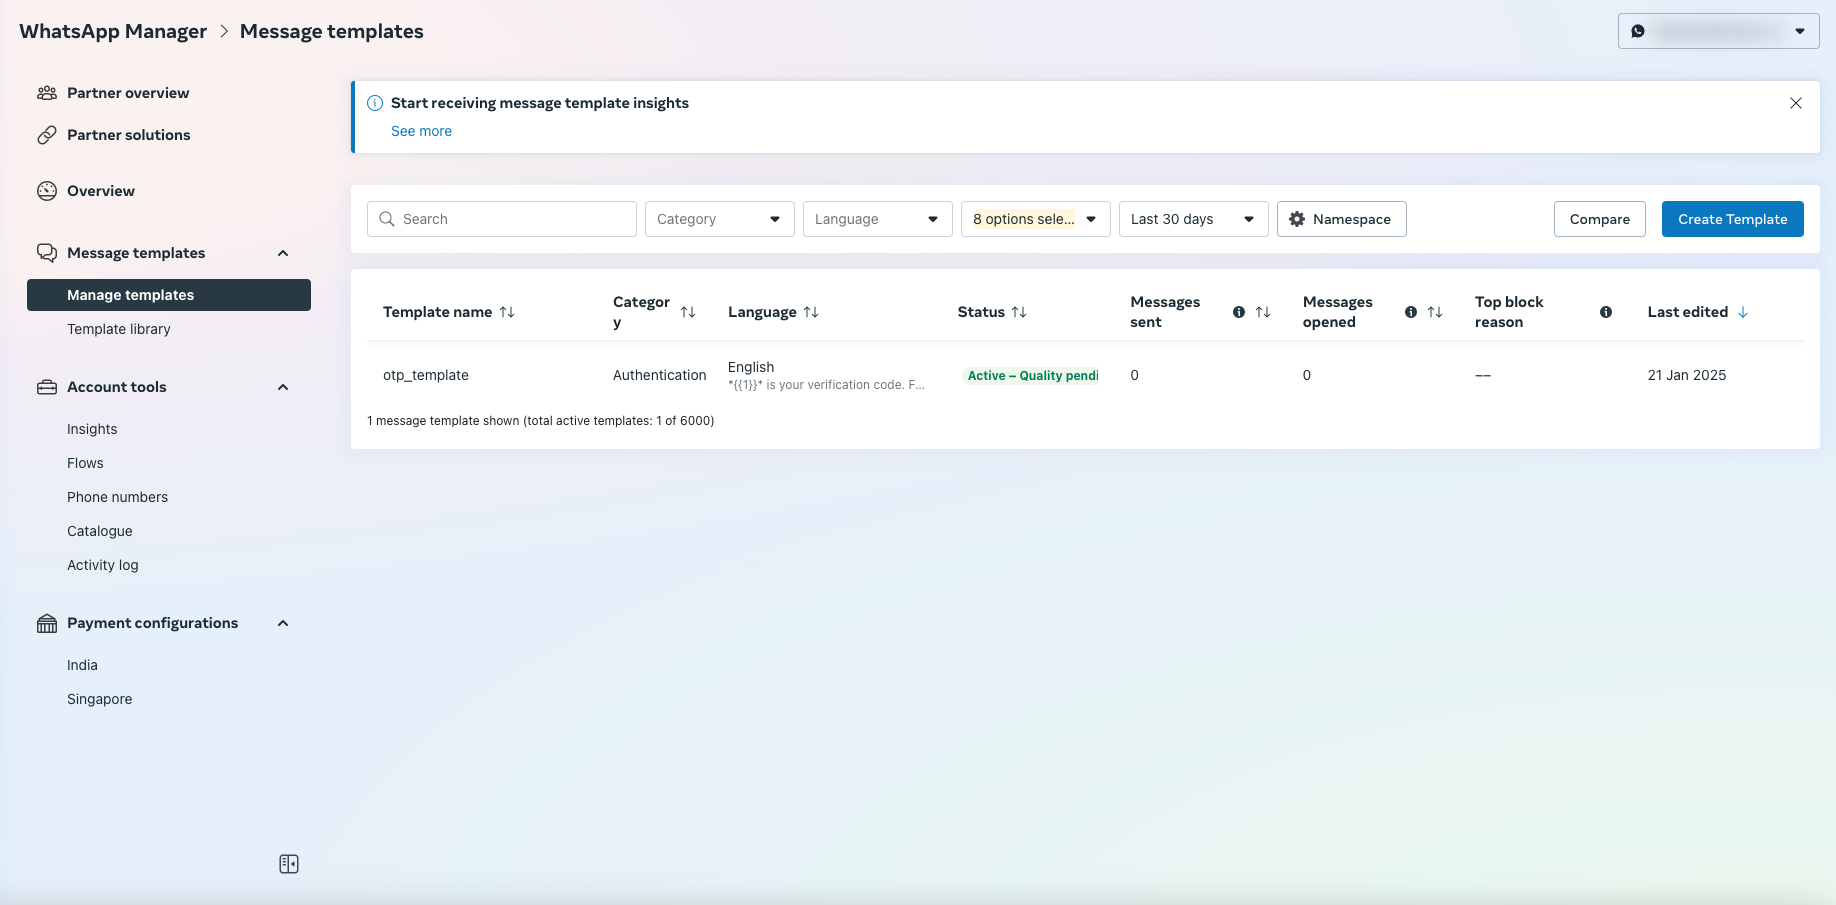 5. Locate the specific Utility or Authentication template you wish to configure. Click on the template name or an associated 'Edit' button.
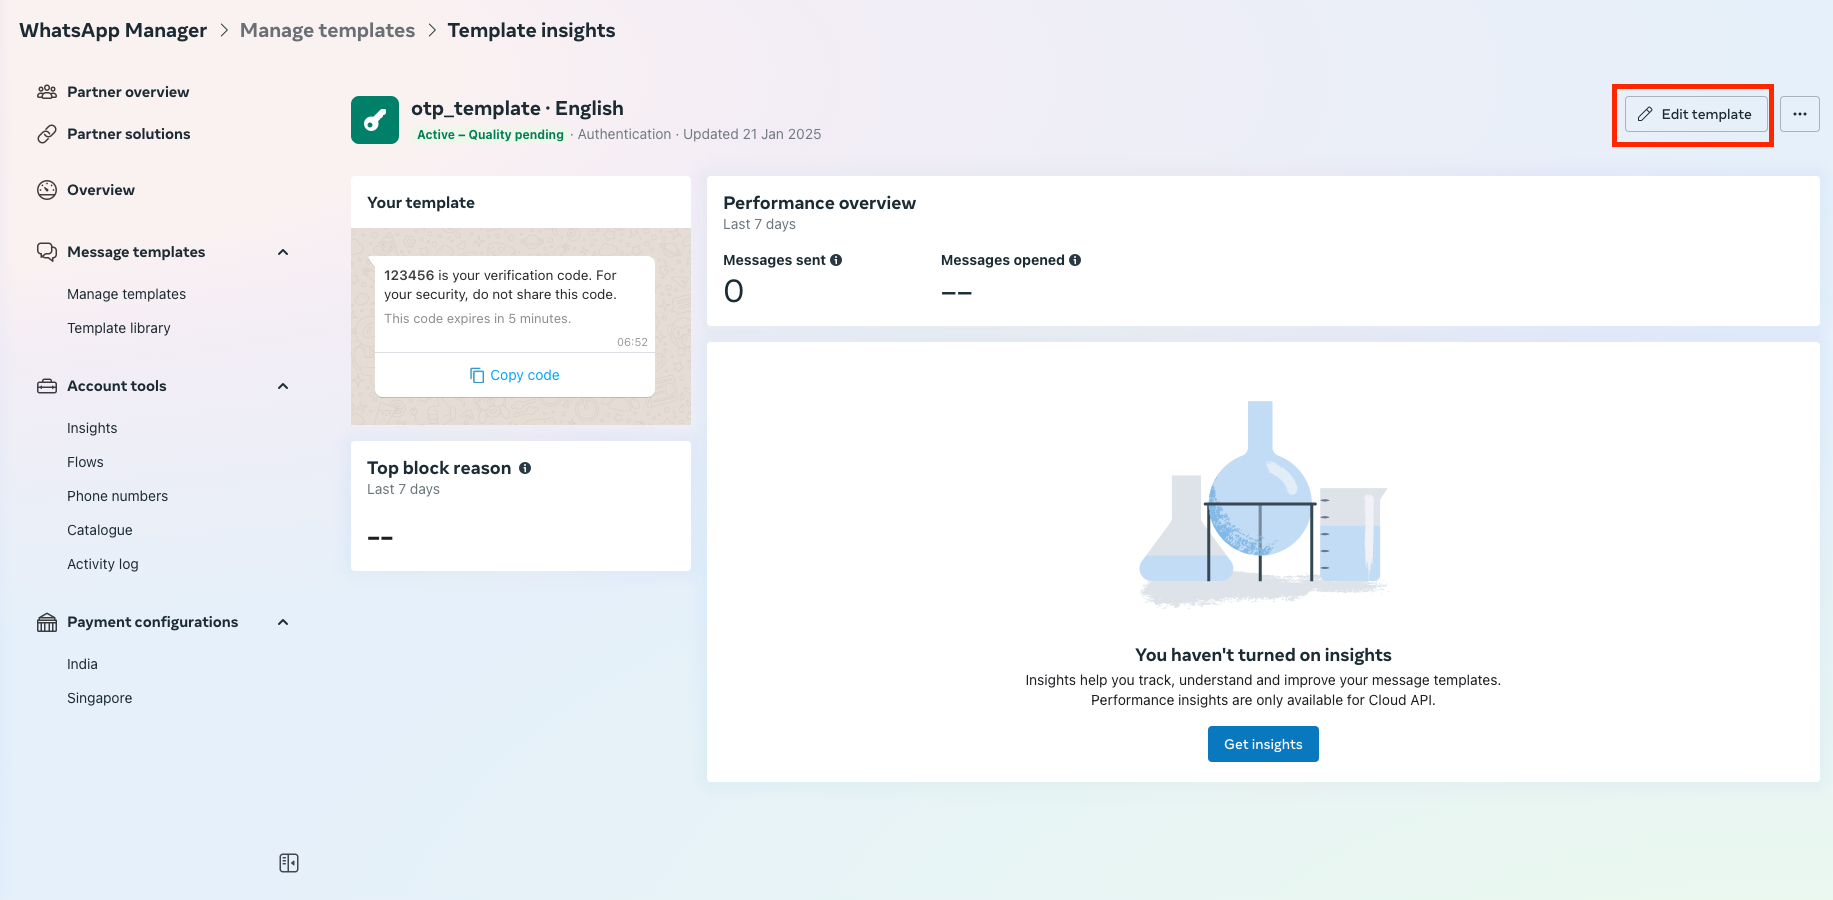 6. On the template editing screen, scroll towards the bottom to find the Message validity period
7. Adjust the value in the input field to your desired TTL. You can typically specify the duration in seconds, minutes, hours, or days.
6. On the template editing screen, scroll towards the bottom to find the Message validity period
7. Adjust the value in the input field to your desired TTL. You can typically specify the duration in seconds, minutes, hours, or days.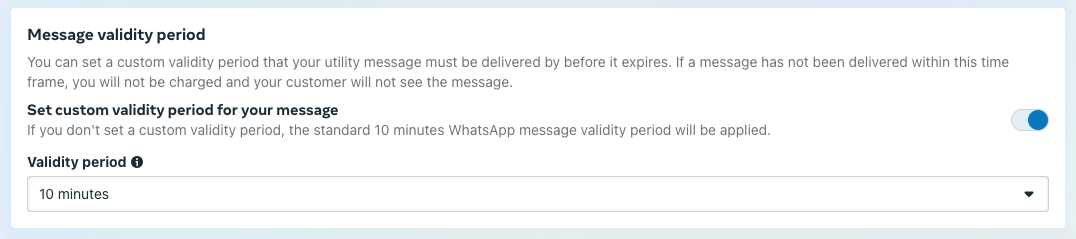
 7. Enter your Android app information:
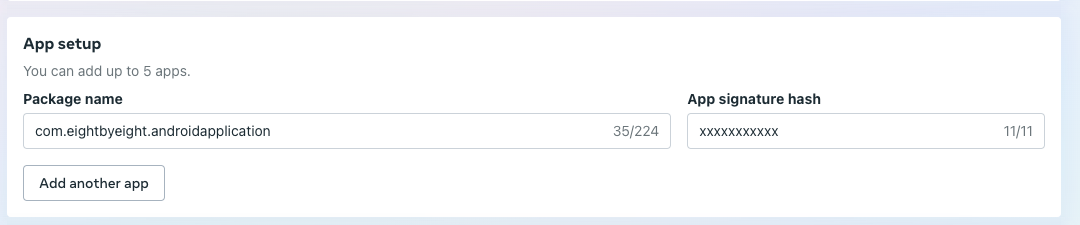 8. Optional: Adjust the message validity period (time-to-live) at the bottom of the page. This ensures the WhatsApp message doesn't get sent beyond the validity period, which allows you to orchestrate alternative channels such as SMS OTP or Voice OTP
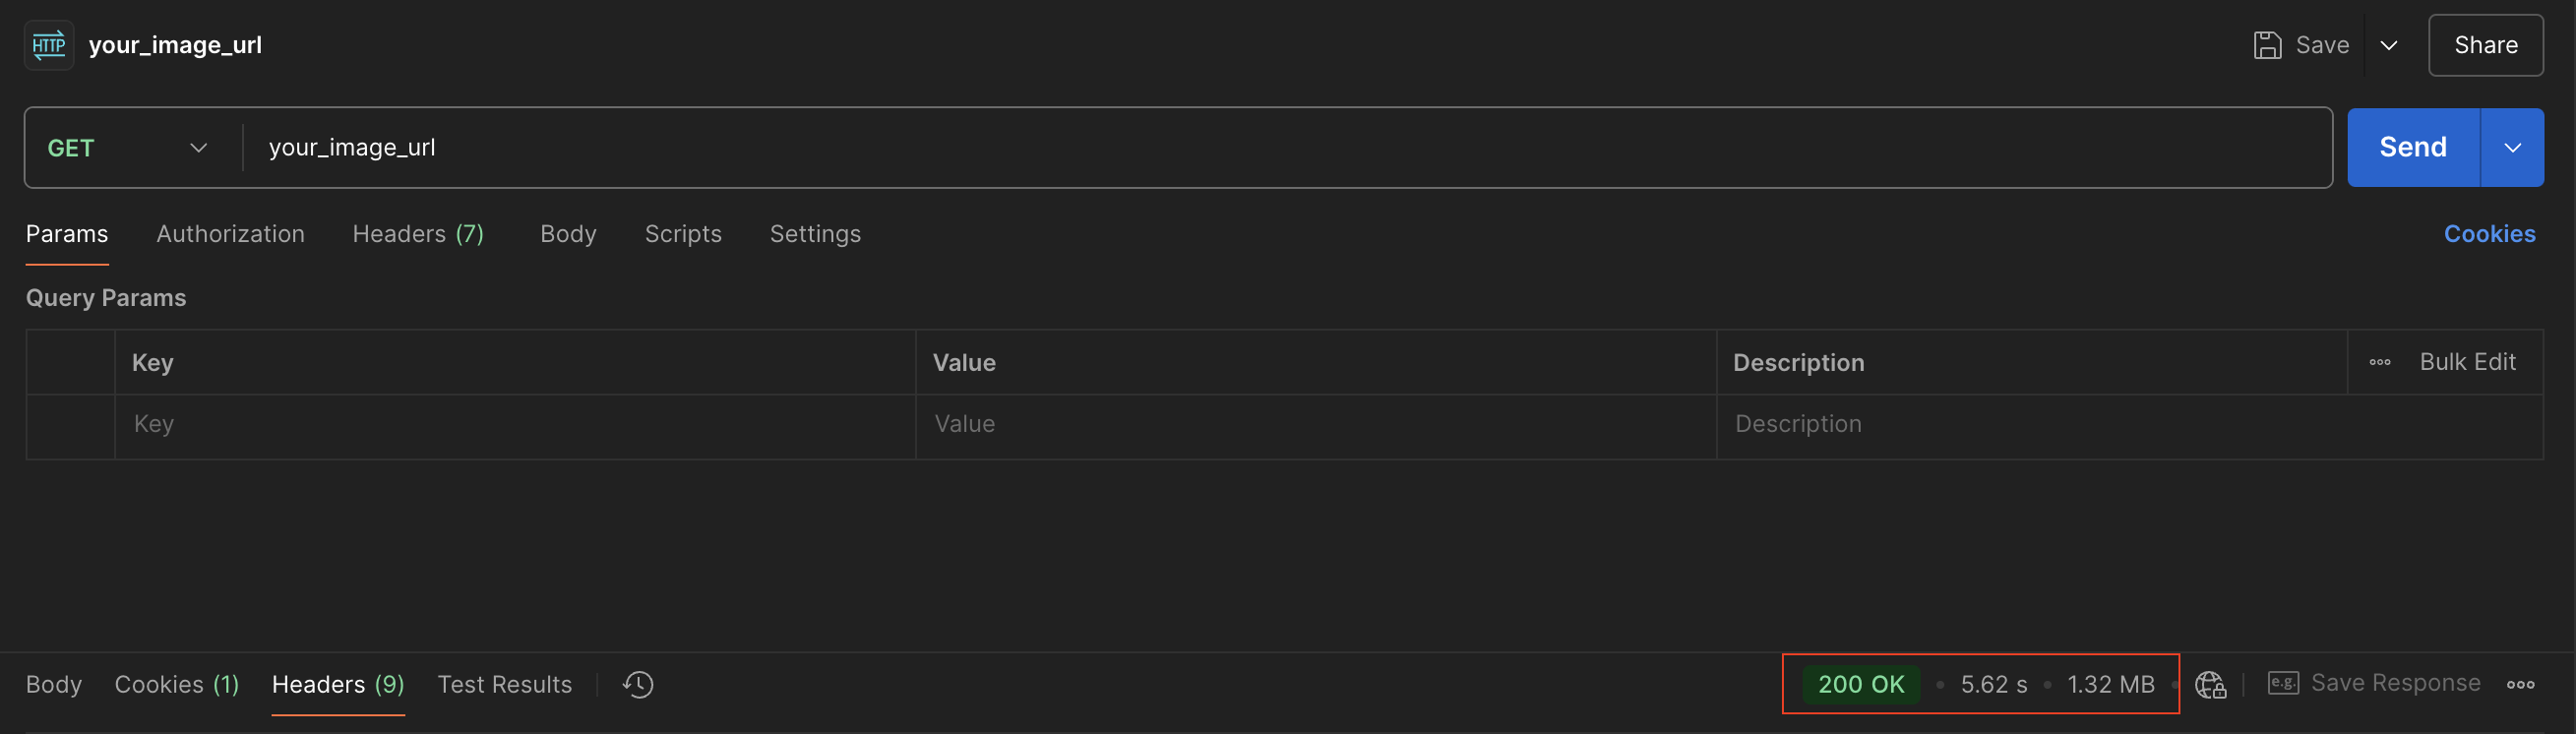 It took 5.62 seconds to fetch the image which should be optimized further.